Expandable modularization with Tuist Part 2 - Modularization basics

Why should I use Tuist? (Is there any other alternative?)
Modularization with SPM
This approach modularizes the app by creating each module directly as a Swift Package.
Pros
Official dependency management tool from Apple.
Each package is a module, so it can be built and tested independently.
Cons
When changing dependencies (package/target), Resolve may need to be performed again.
- As the number of modules increases, indexing takes a significant amount of time when building the actual project.
The process of creating and linking modules is done manually.
Modularization with XcodeGen
With XcodeGen, project configuration is defined in a YAML file.
From this file, .xcodeproj is generated by analyzing targets, source files, resources, and dependencies.
Pros
Mature and widely used in iOS projects.
Prevents project file (.xcodeproj) conflicts during collaboration.
It is easy to separate the target.
It is easy to use external tools for dependency management.
Cons
Not many iOS developers are familiar with
.ymlfiles.- As a result, the learning curve is high and debugging takes a lot of time.
Because configuration is managed in
.yml, build settings are mostly string-based, which can be harder to validate.
Modularization with Tuist
With Tuist, project configuration is defined using Swift DSL.
Pros
Configure manifests in
.swiftfiles, which is easier for iOS developers to maintain.Manifest editing works in Xcode, so you get IDE support.
Prevents project file (.xcodeproj) conflicts during collaboration.
Includes tooling for performance optimization and CI, such as caching, parallel builds, and cloud features.
Cons
CocoaPods/Carthage integration is more limited than SPM. (Still possible, but less straightforward.)
(As of early 2024) During the transition to v4, teams may encounter frequent changes and occasional integration issues.
Why I decided to use Tuist
The InnoSquad iOS team chose Tuist after an elimination process.
First, with XcodeGen, we felt .yml-based maintenance would slow us down in a fast release environment.
Second, we tried modularizing with first-party SPM. We ran into these issues:
As mentioned above, in our project configuration at the time, there was a constant problem of having to re-run Resolve frequently after changing files/targets.
When creating a file, templates supported by Xcode (author information at the top, etc.) were not automatically added.
As modularization expanded, manually creating modules became increasingly expensive.
After adopting Tuist, we resolved these pain points.
All issues mentioned above have been resolved.
Adding or deleting files is reflected immediately, and module scaffolding is automated with Stencil.
Development productivity also improved because one app can be built with separated targets.
Modularizing with Tuist (Basics)
Now let’s briefly walk through the baseline modularization setup with Tuist.
The structure of the module basically follows the same structure as organized in the previous post.
Please refer to the full sample code at this repository.
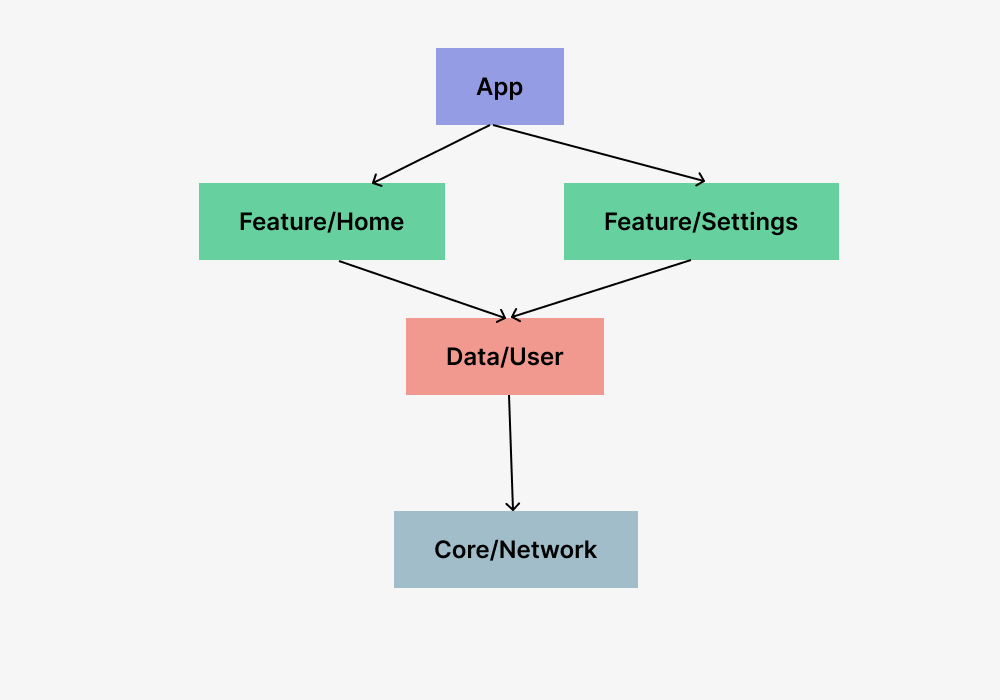
This is a simplified module structure.
At a high level, there is one App module, two Feature modules, shared Data modules, and Core modules.
Let’s proceed as if we’re starting from an empty project.
Start the tuist init command from an empty folder.
This creates the folder structure below. (The first project name follows the folder name.)
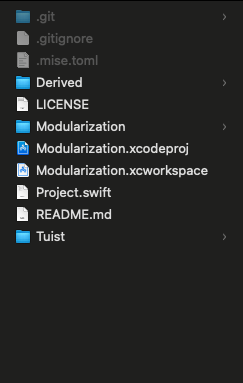
Once created, run tuist edit to open the manifest project.
The initial structure looks like this:
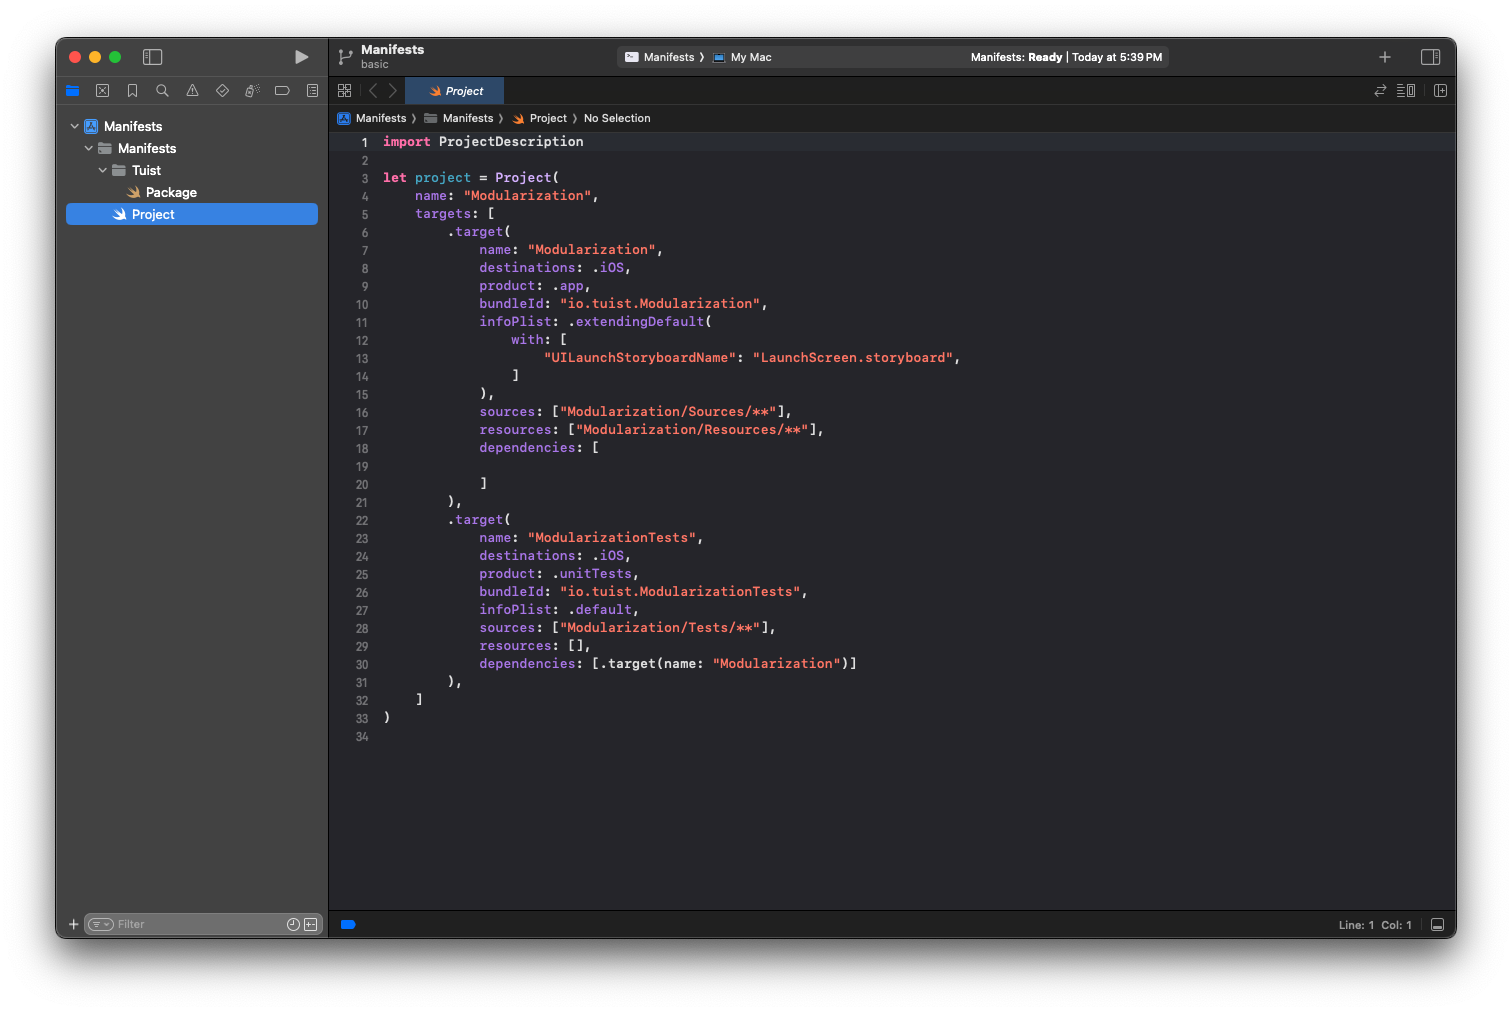
Now we need to create various modules here.
After creating it manually at first, we will learn how to use the stencil through the next blog.
Then create folders based on the target module structure.
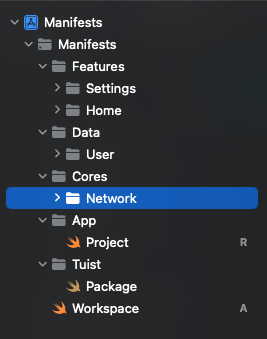
Why Workspace Was Created
A configuration for organizing and running multiple projects as one.
- A workspace is an Xcode document that allows you to group projects and other documents to work together.
- You can include any number of Xcode projects and other files in your workspace.
- In addition to organizing the files for each Xcode project, workspaces provide implicit and explicit relationships between contained projects and targets.
- Workspace.swift
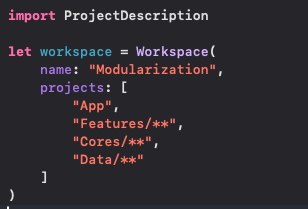
Define the workspace name and the paths that contain
Project.swiftfiles.App Folder
Contains the App’s
Project.swift.Main app settings are defined here.
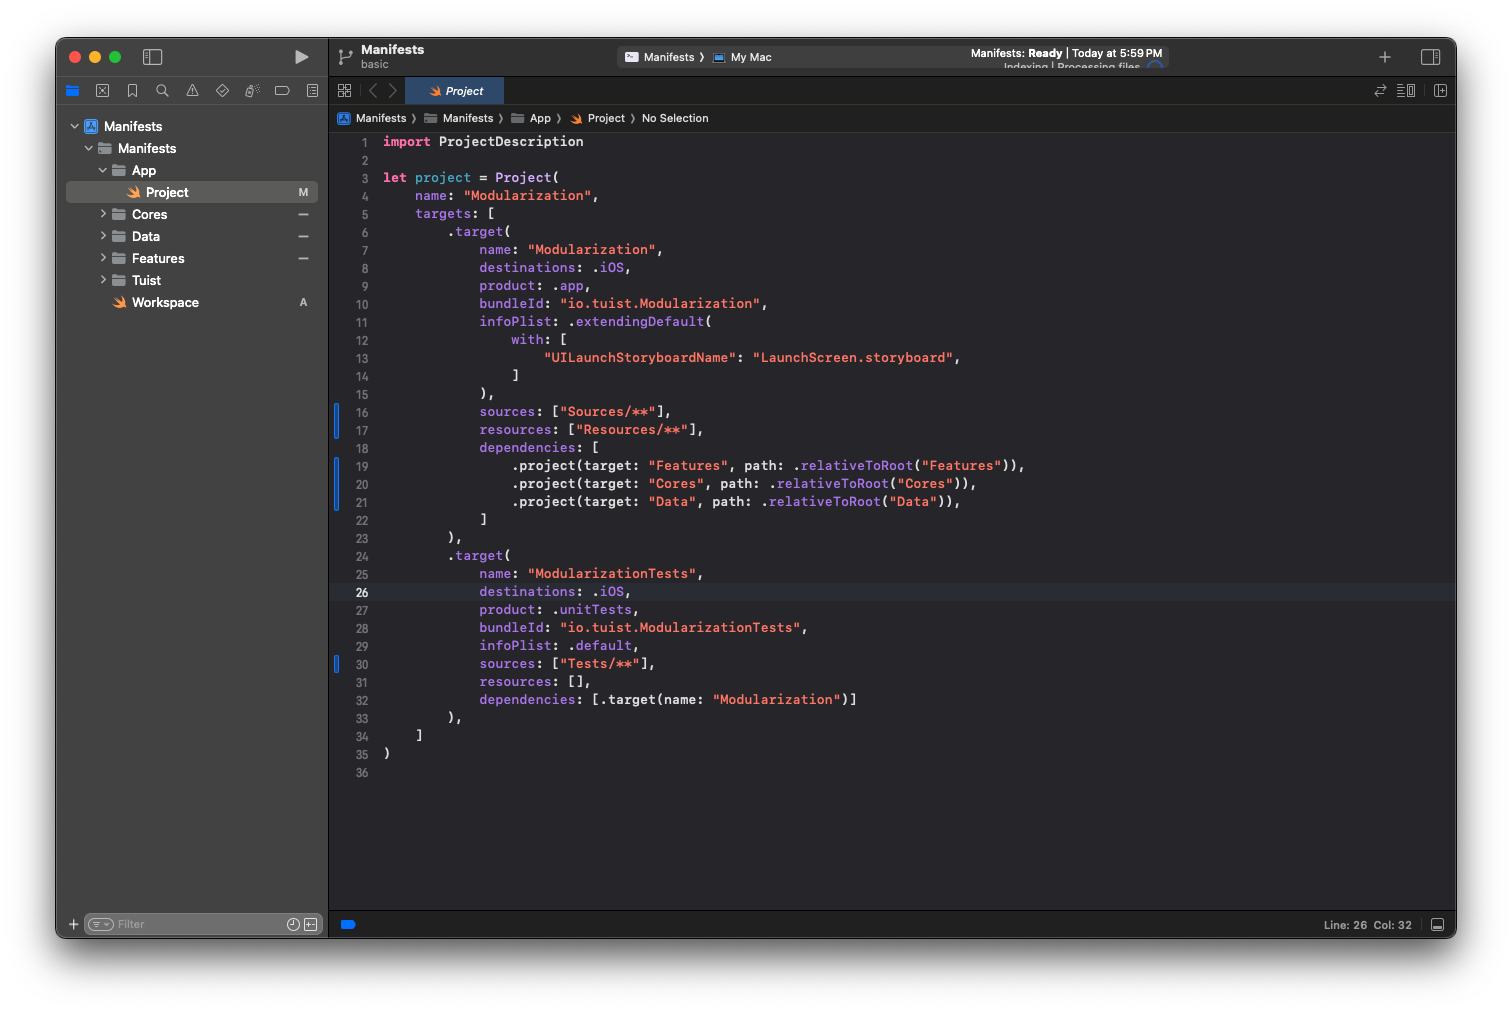
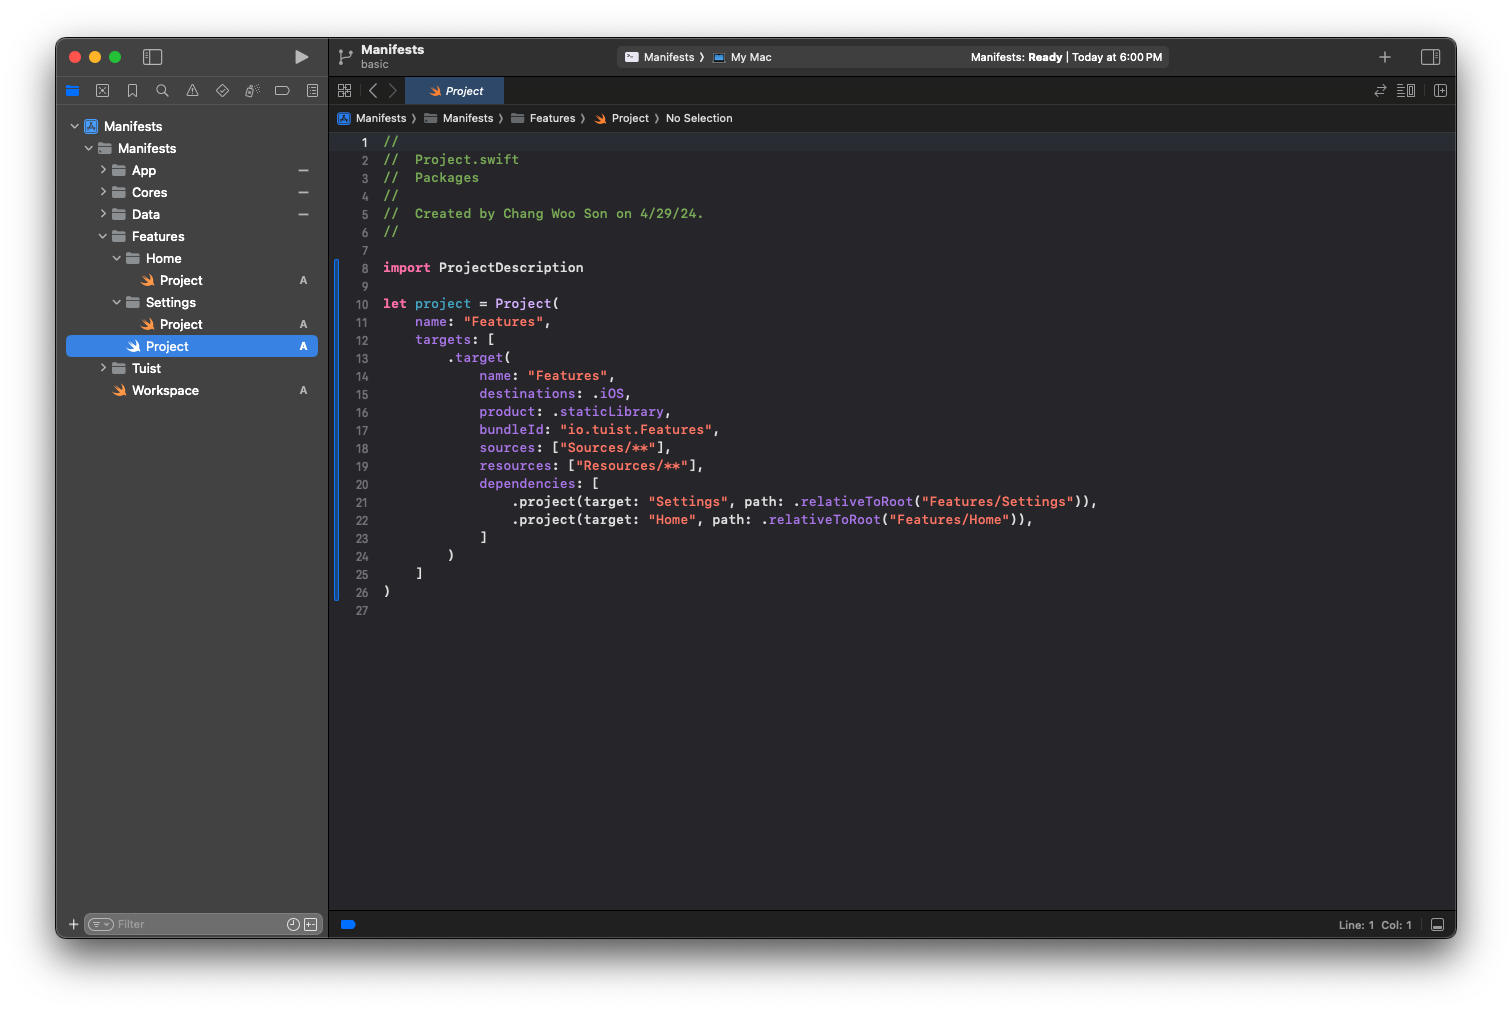
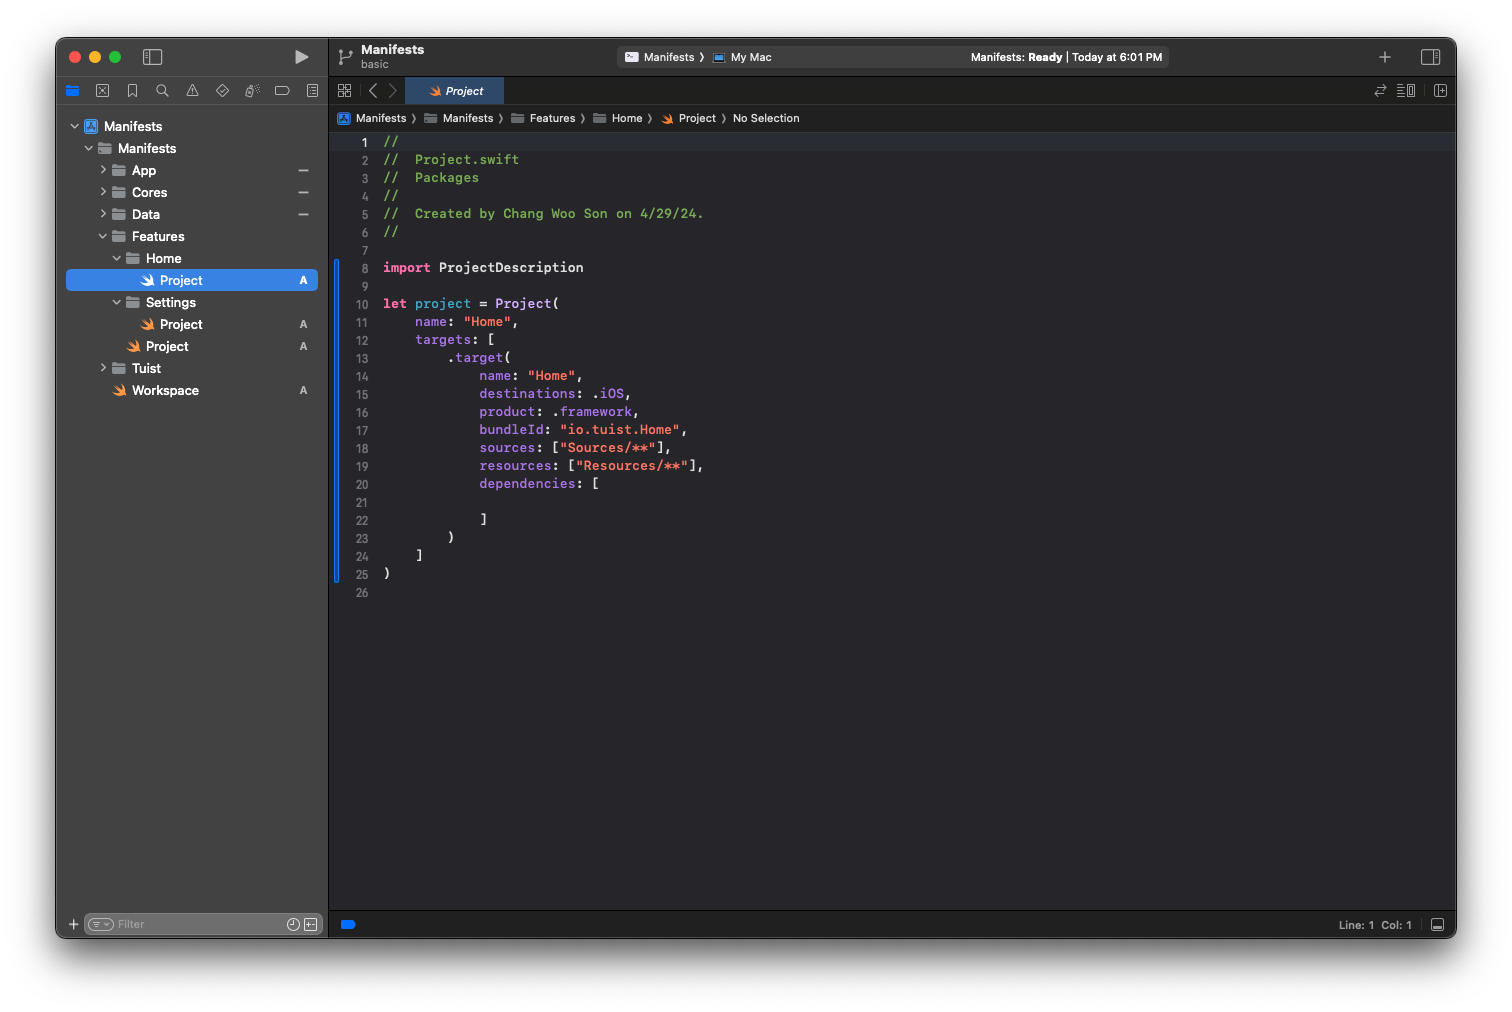
Features folder
Organizes individual features so they can be registered together.
Project.swiftinFeaturesdepends on each feature module.Each feature’s
Project.swiftdefines dependencies and project settings for that feature.
Data folder
- It has the same structure as Features.
Core
- It has the same structure as Features.
At this point, the baseline project structure is complete.
Next, verify that the project is generated and builds correctly.
Close the manifest project opened by tuist edit, run tuist generate, then build in Xcode (or run tuist build).
(tuist install is used when adding external dependencies.)
You will get a workspace with the structure above.

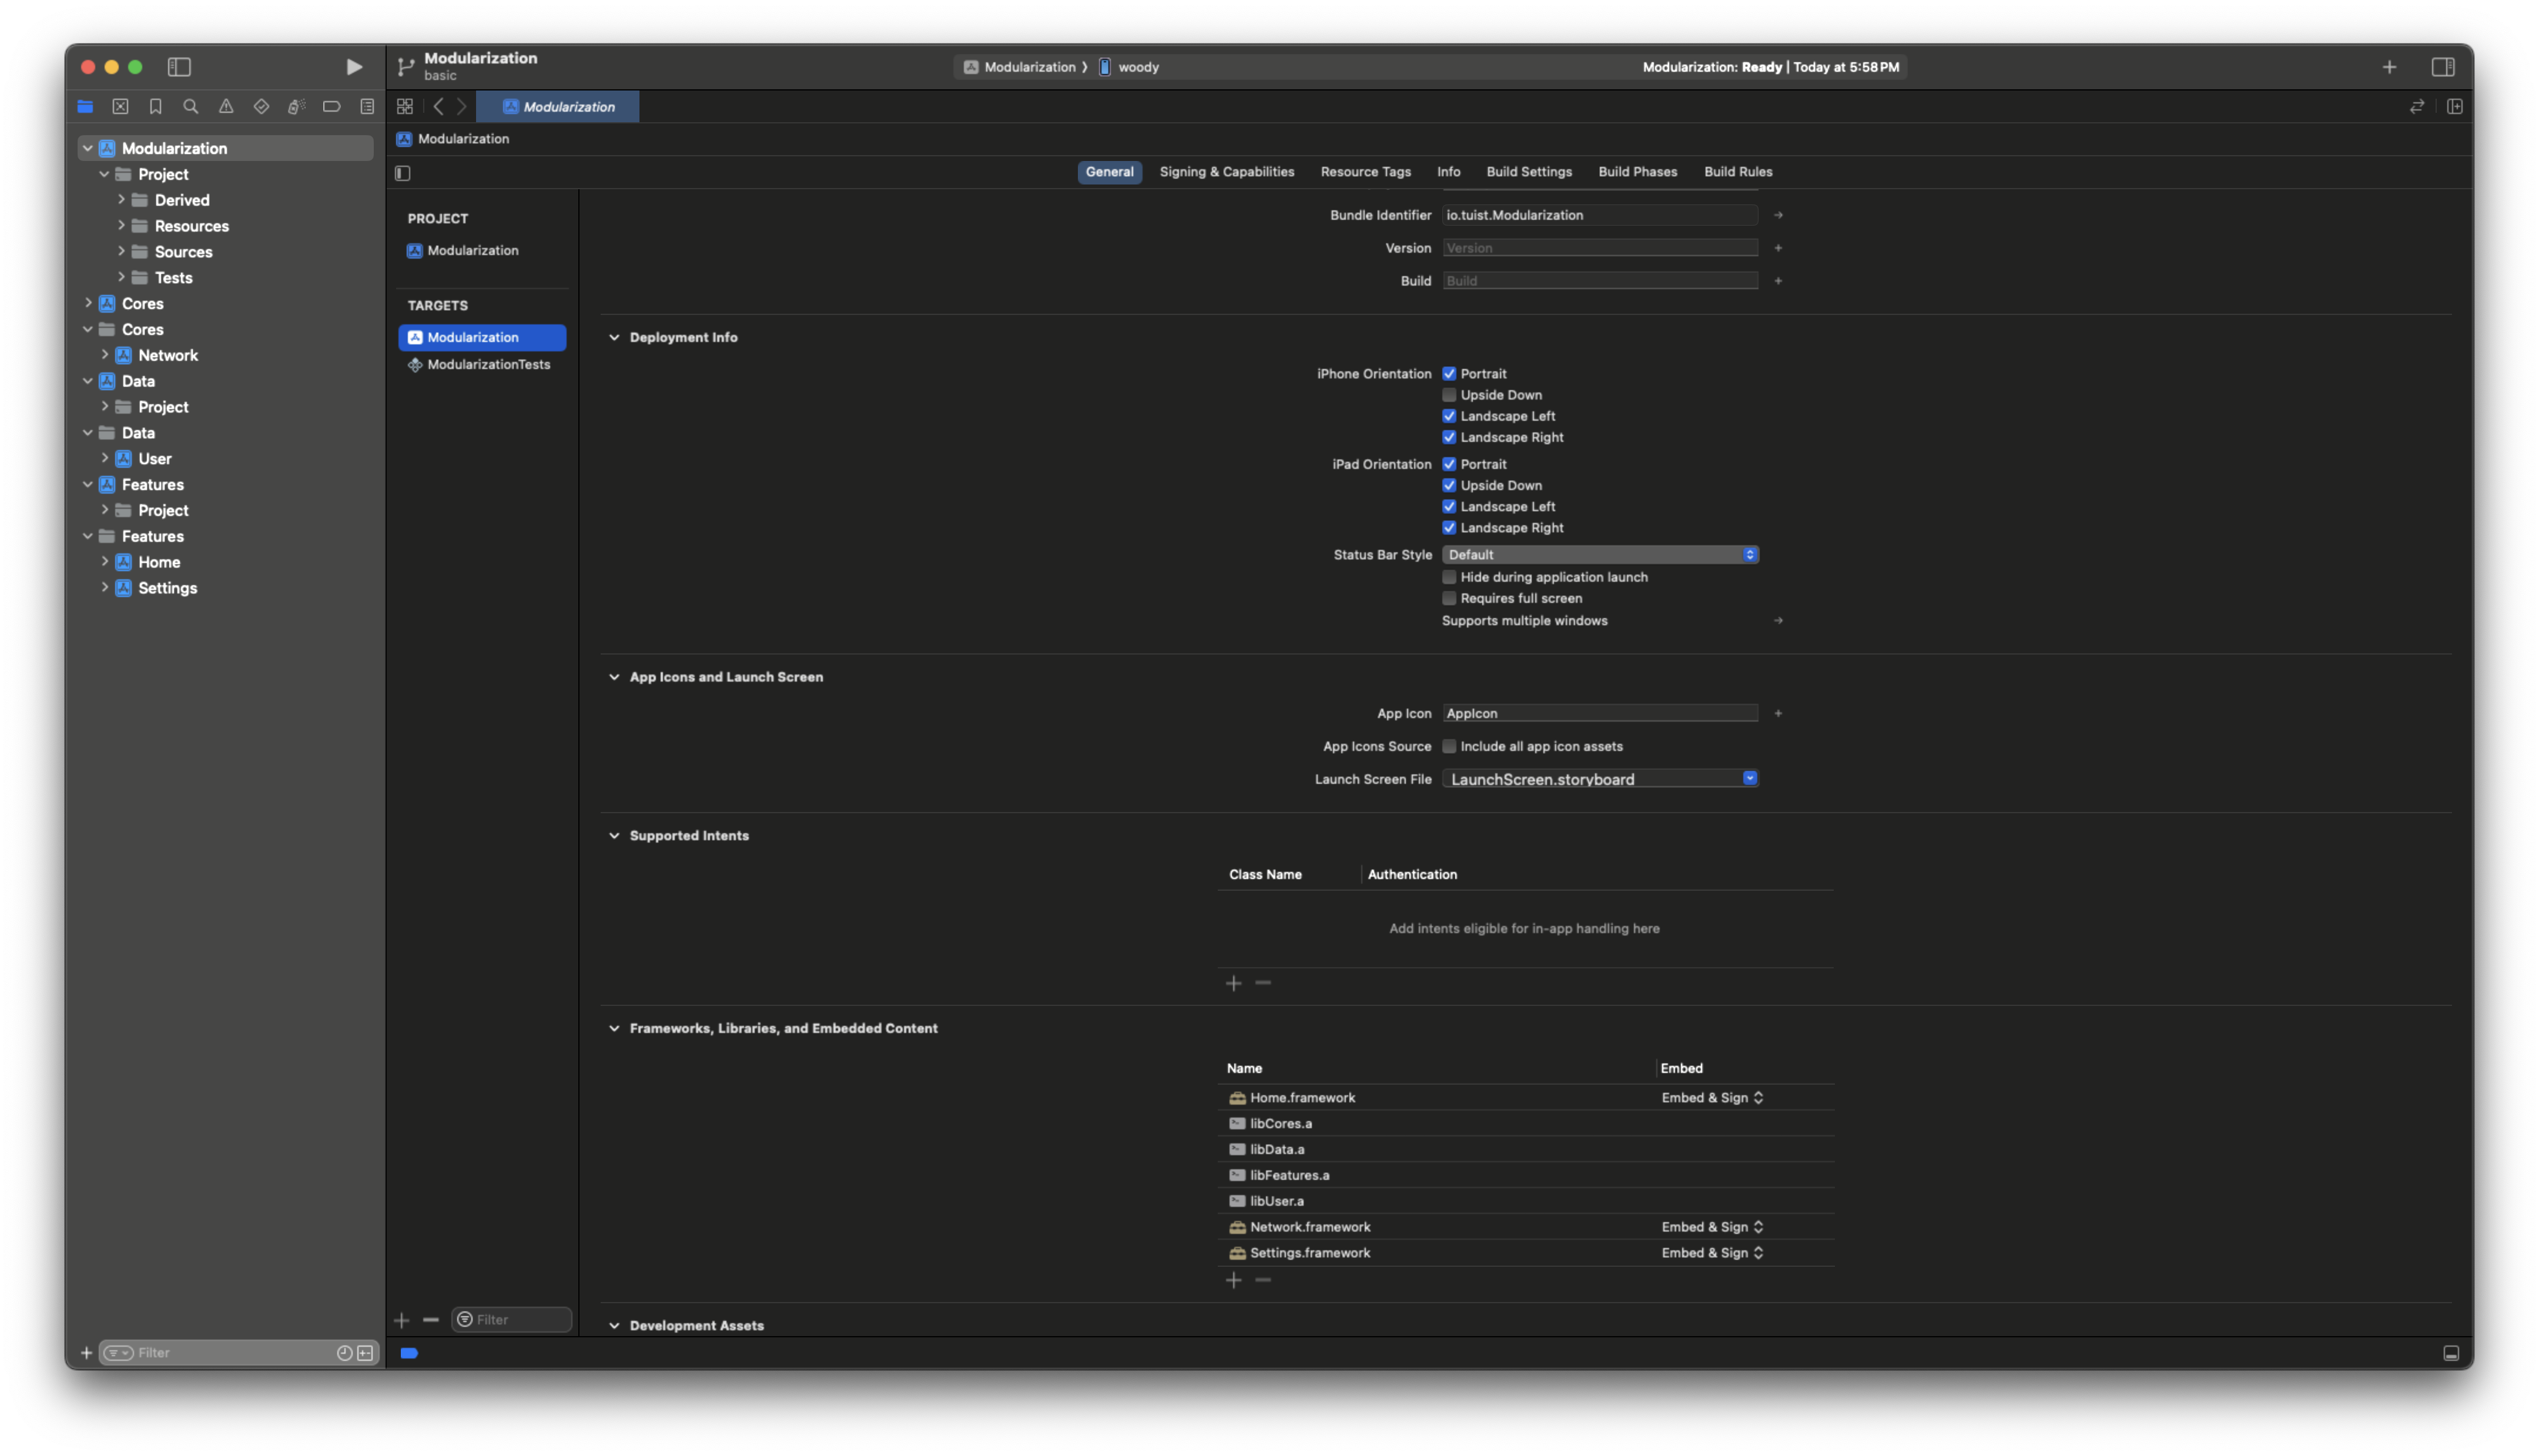
In Xcode’s right panel, you can confirm each module is correctly linked to the main app target.
We’ll cover more details in the next post.
Conclusion
The initial setup is more approachable than it may seem.
Tuist is a solid starting point for modularization, especially for iOS teams already comfortable with Swift.
There is still plenty to optimize later (for example, dynamic frameworks vs static libraries).
In the next post, we’ll go deeper into Clean Architecture to modularize with clearer boundaries.