Expandable modularization with Tuist Part 4 - Modularization in practice

Introduction
In this final part, we’ll build a project structure that is practical for real production work.
We’ll assume multiple developers are working in parallel and that the app has at least two feature modules.
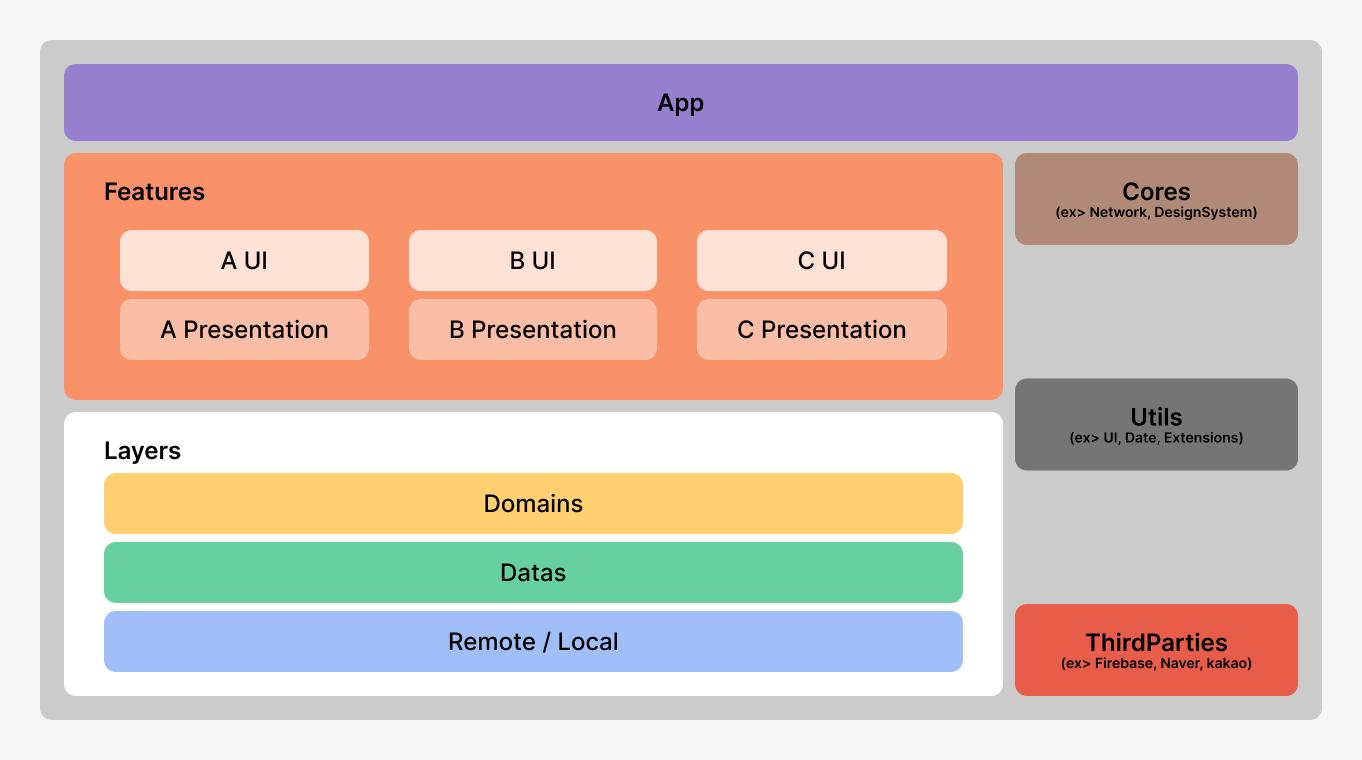
As covered in the previous post, this guide builds a Tuist project using the structure below.
Before creating the project, let’s review principles for adding modules, the internal structure of feature modules, and common pitfalls.
Design Principles for Adding Modules
Choose the appropriate tier for each module (Feature, Core, Layer, and so on).
Decide whether to split interface and implementation.
Choose framework/library type based on usage (
dynamicvsstatic).
Notes
Design patterns such as MVVM and MVP are related to Features.
Remember that modularization operates at a larger scale than presentation-layer patterns.
Feature module
Feature modules are typically split into a UI-rendering area and a data-handling area.
To prevent circular dependencies and support sample apps and tests, the resulting structure is slightly more complex.
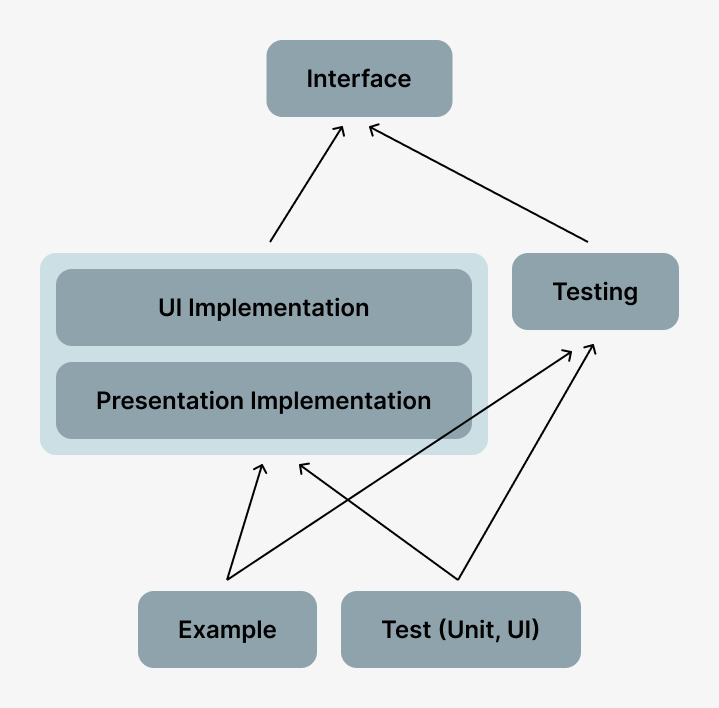
Interface
- Provides externally accessible interfaces and models for the feature’s UI entry points.
UI
- Holds the UI portion of the feature. (Goal: keep UI as dumb as possible.)
Presentation
- Handles UI actions and connects to the domain layer. (In MVVM, this is where
ModelandViewModellive.)
Testing
Provides mock data.
Provides code for use in the Example app.
Tests
- Contains unit tests and UI tests.
Example
- A lightweight app used to quickly validate feature behavior.
Cautions
Circular references between modules
For example, assume there is navigation from Settings to Profile, and also from Profile back to Settings.
If implemented directly, the Settings module depends on Profile while Profile also depends on Settings.
This is an inter-module circular dependency.
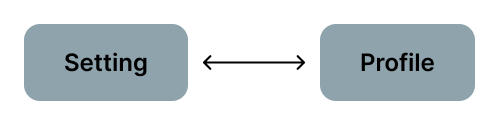
When circular references occur, clear boundaries between components disappear and chain changes may occur.
Uncle Bob emphasizes that dependencies between components should be acyclic (ADP: Acyclic Dependencies Principle). We continuously check our dependency graph for loops and break them when they appear.
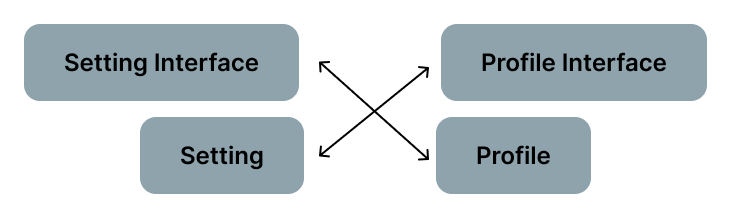
Solution for circular references between modules
Case 1) Resolve by creating a route module
- Problem → Every feature module must depend on the route module, which can make that module too central and heavy.
Case 2) Break dependencies through interfaces (DIP: Dependency Inversion Principle)
Separate modules into interface modules and implementation modules.
Each implementation module resolves circular references by referring to the interface module.
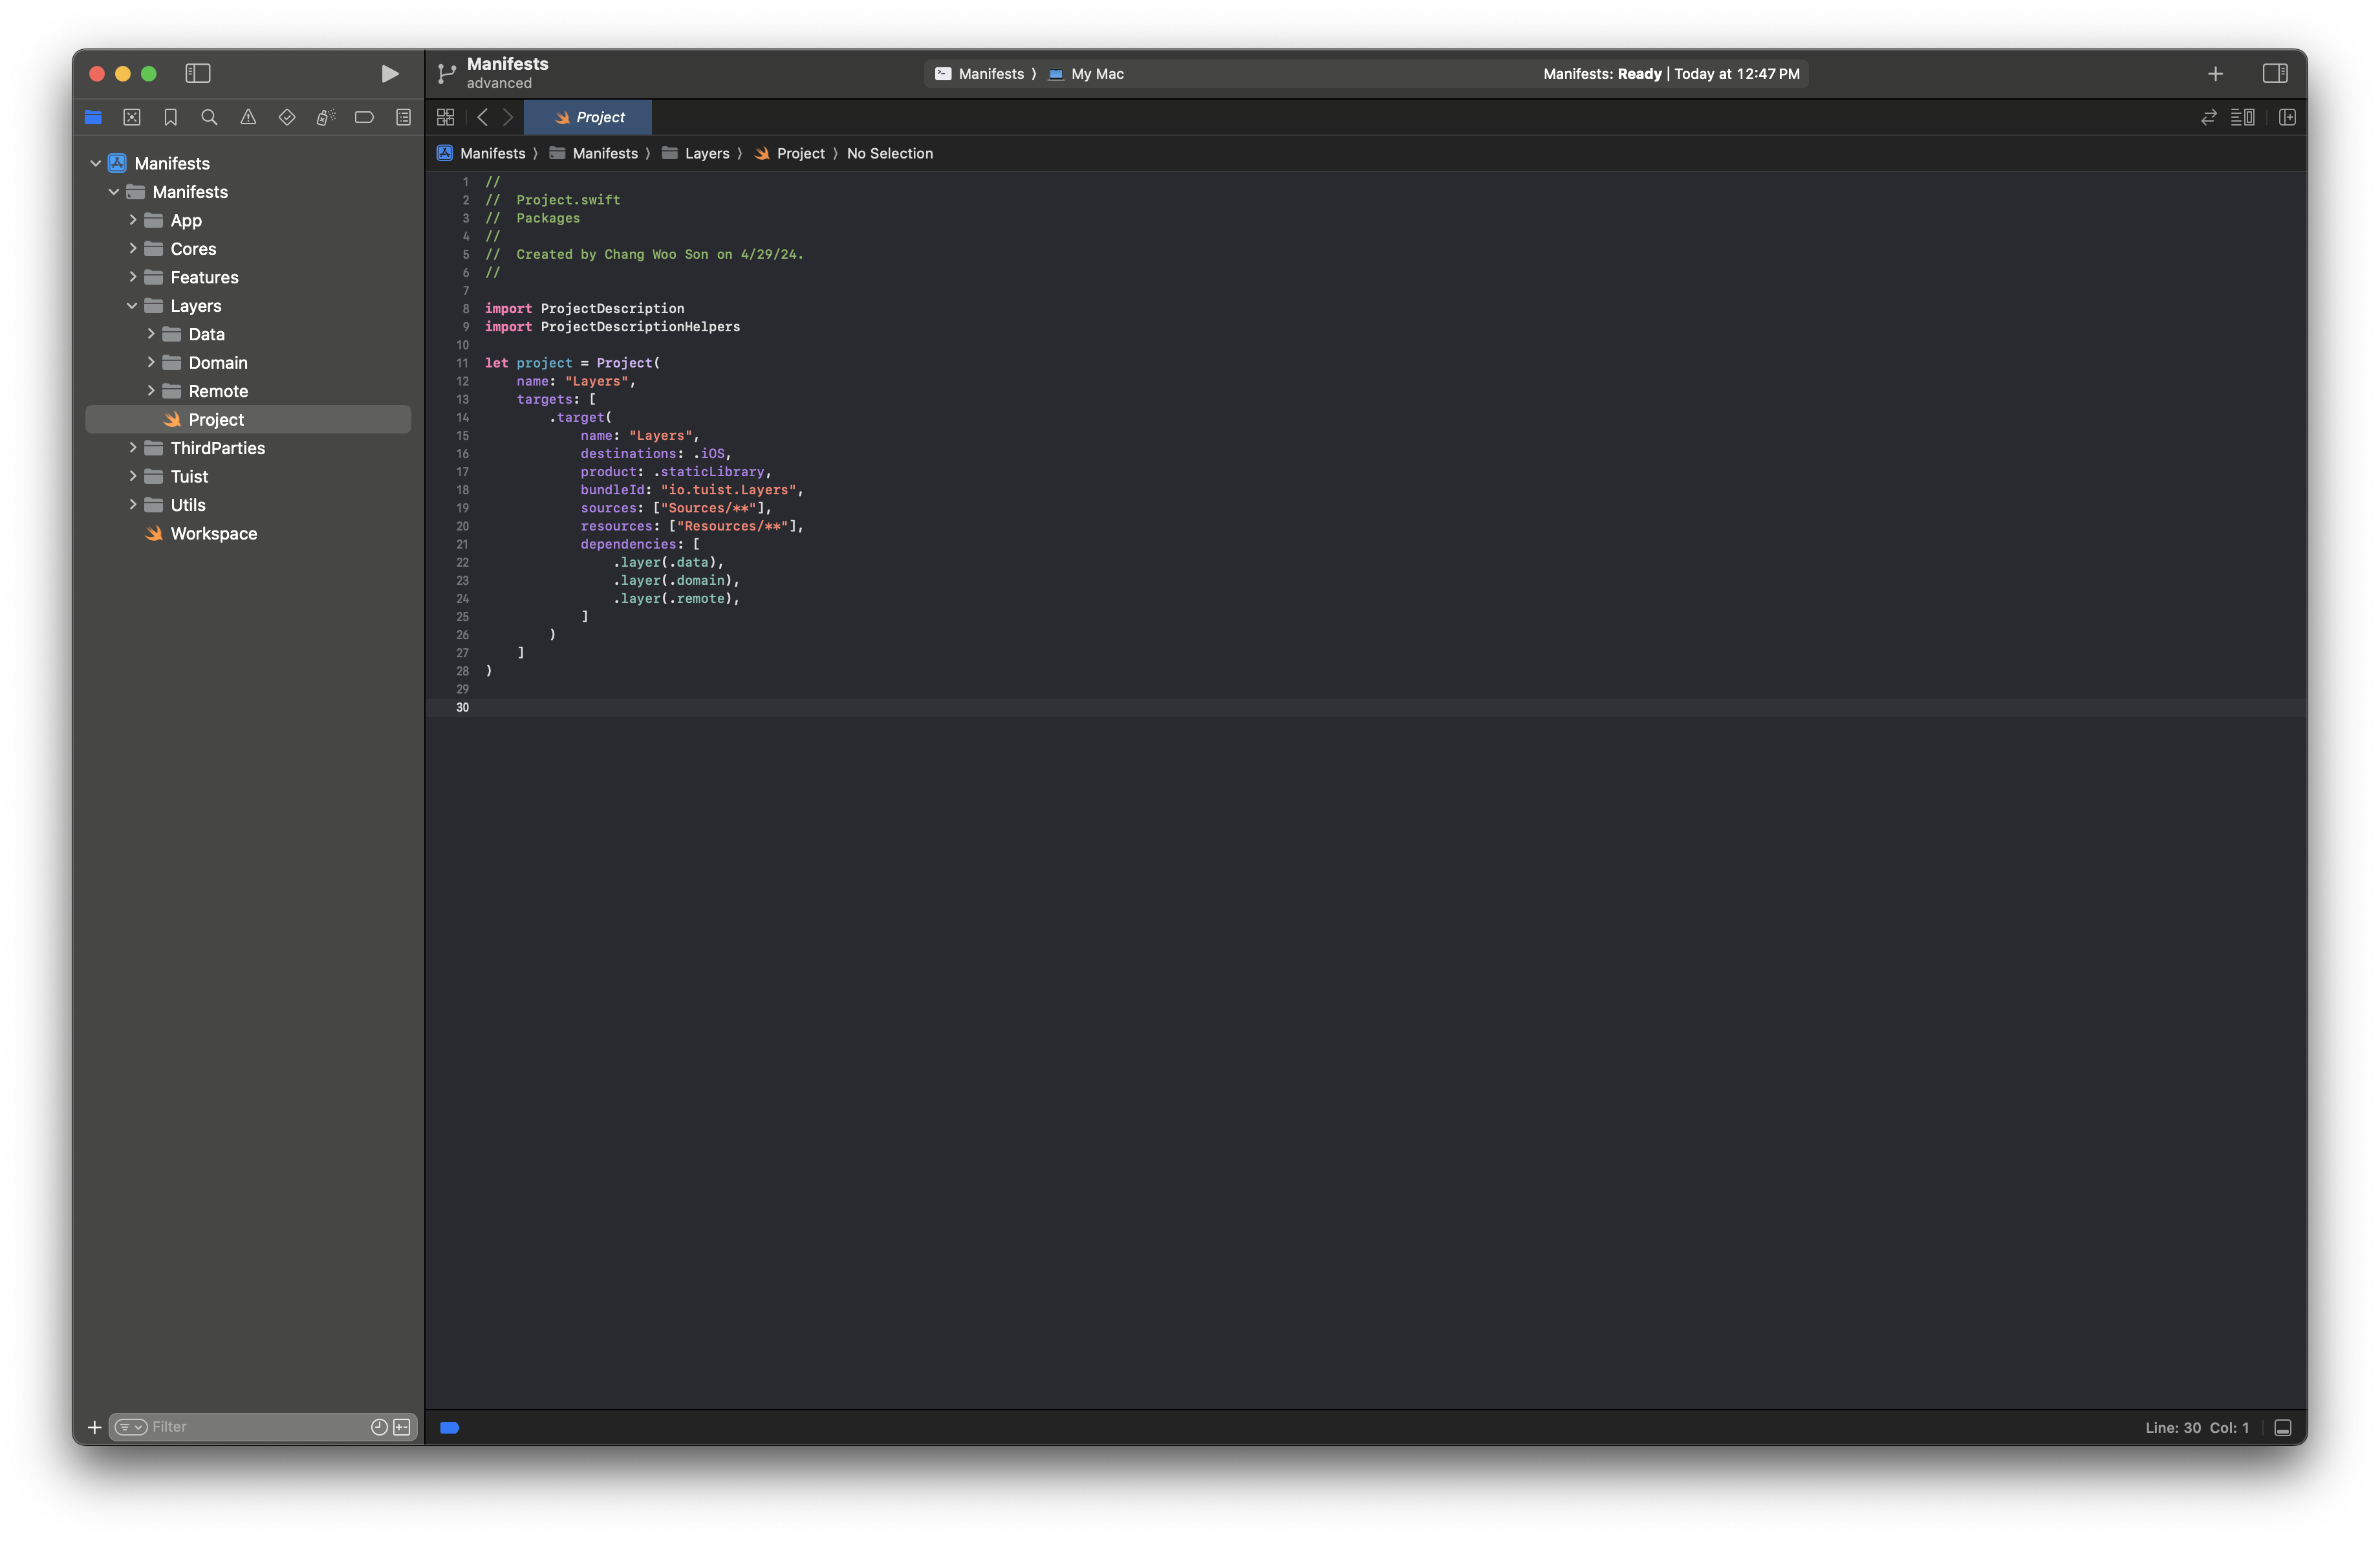
Create a Real Tuist Project
Now that we’ve covered the caveats, let’s move on to building an actual Tuist project.
Starting from the basic structure, which was created last time, we aim to create the advanced structure.
Workspace.swift

Create a workspace.
- Register projects grouped as App, Features, Layers, Cores, ThirdParties, and Utils. (You can think of the image above as one project map.)
App
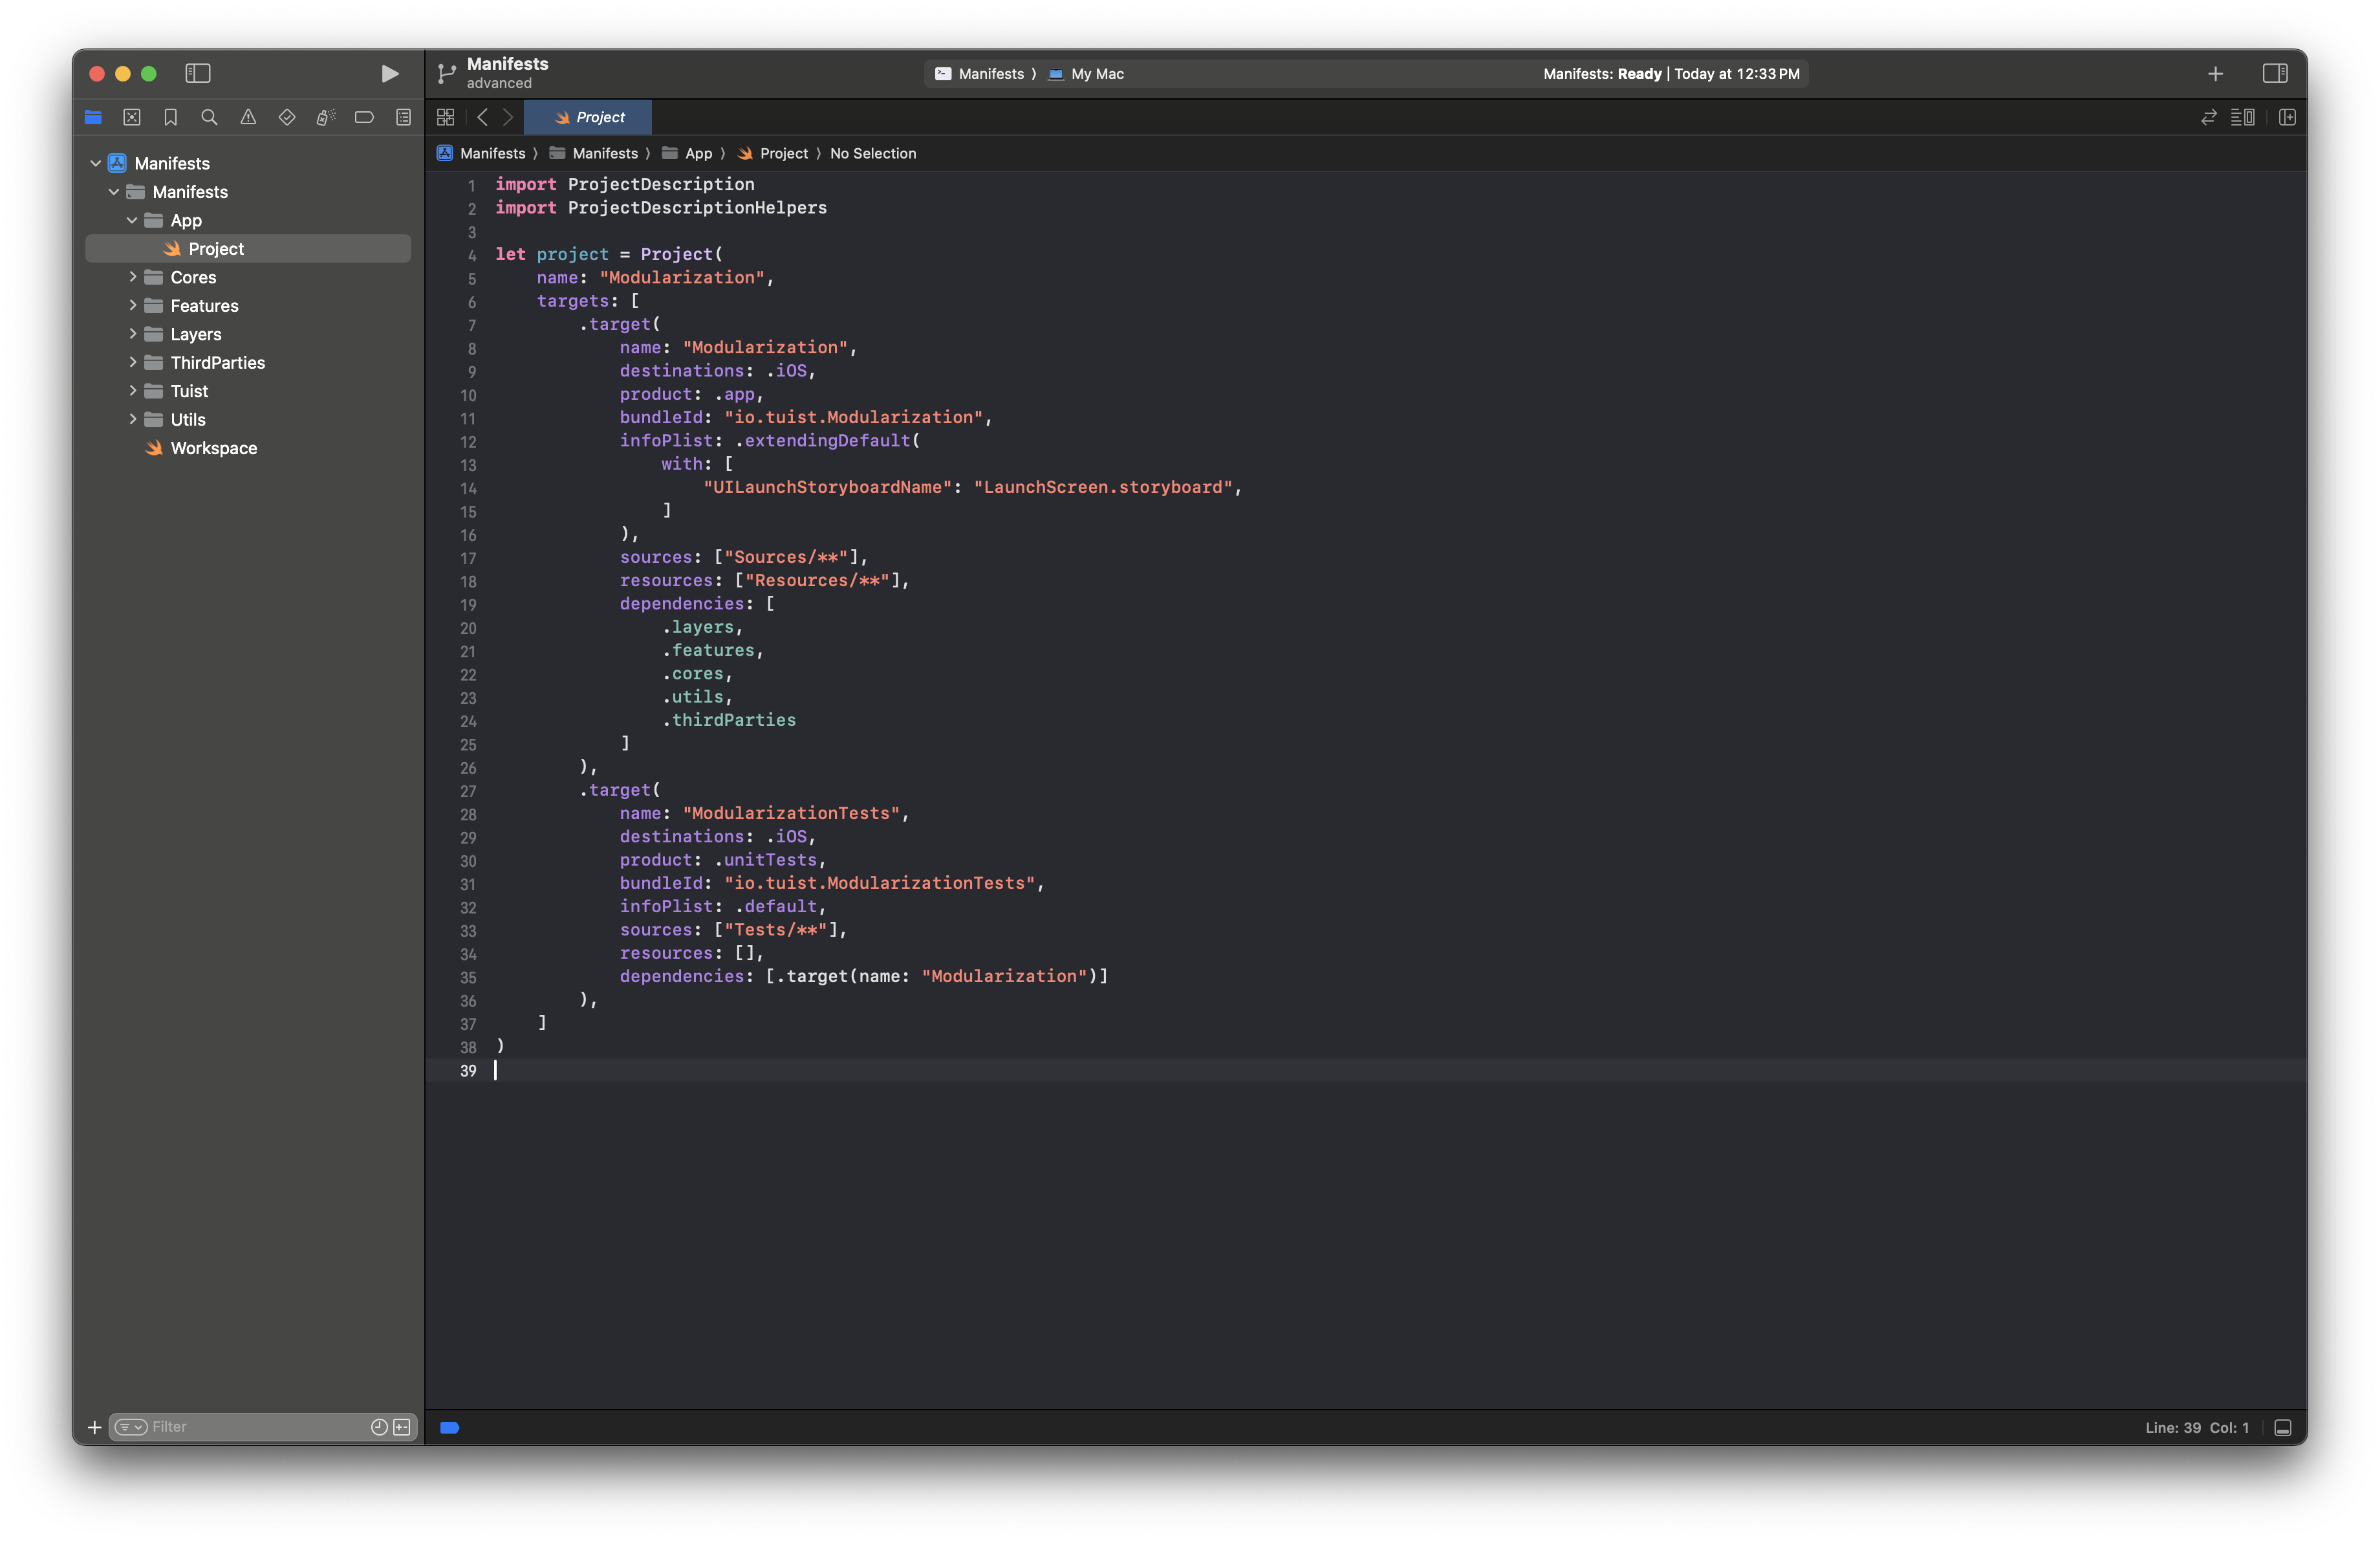
The app setup is mostly the same as in the previous post.
- It depends on the top-level project of each layer.
Features
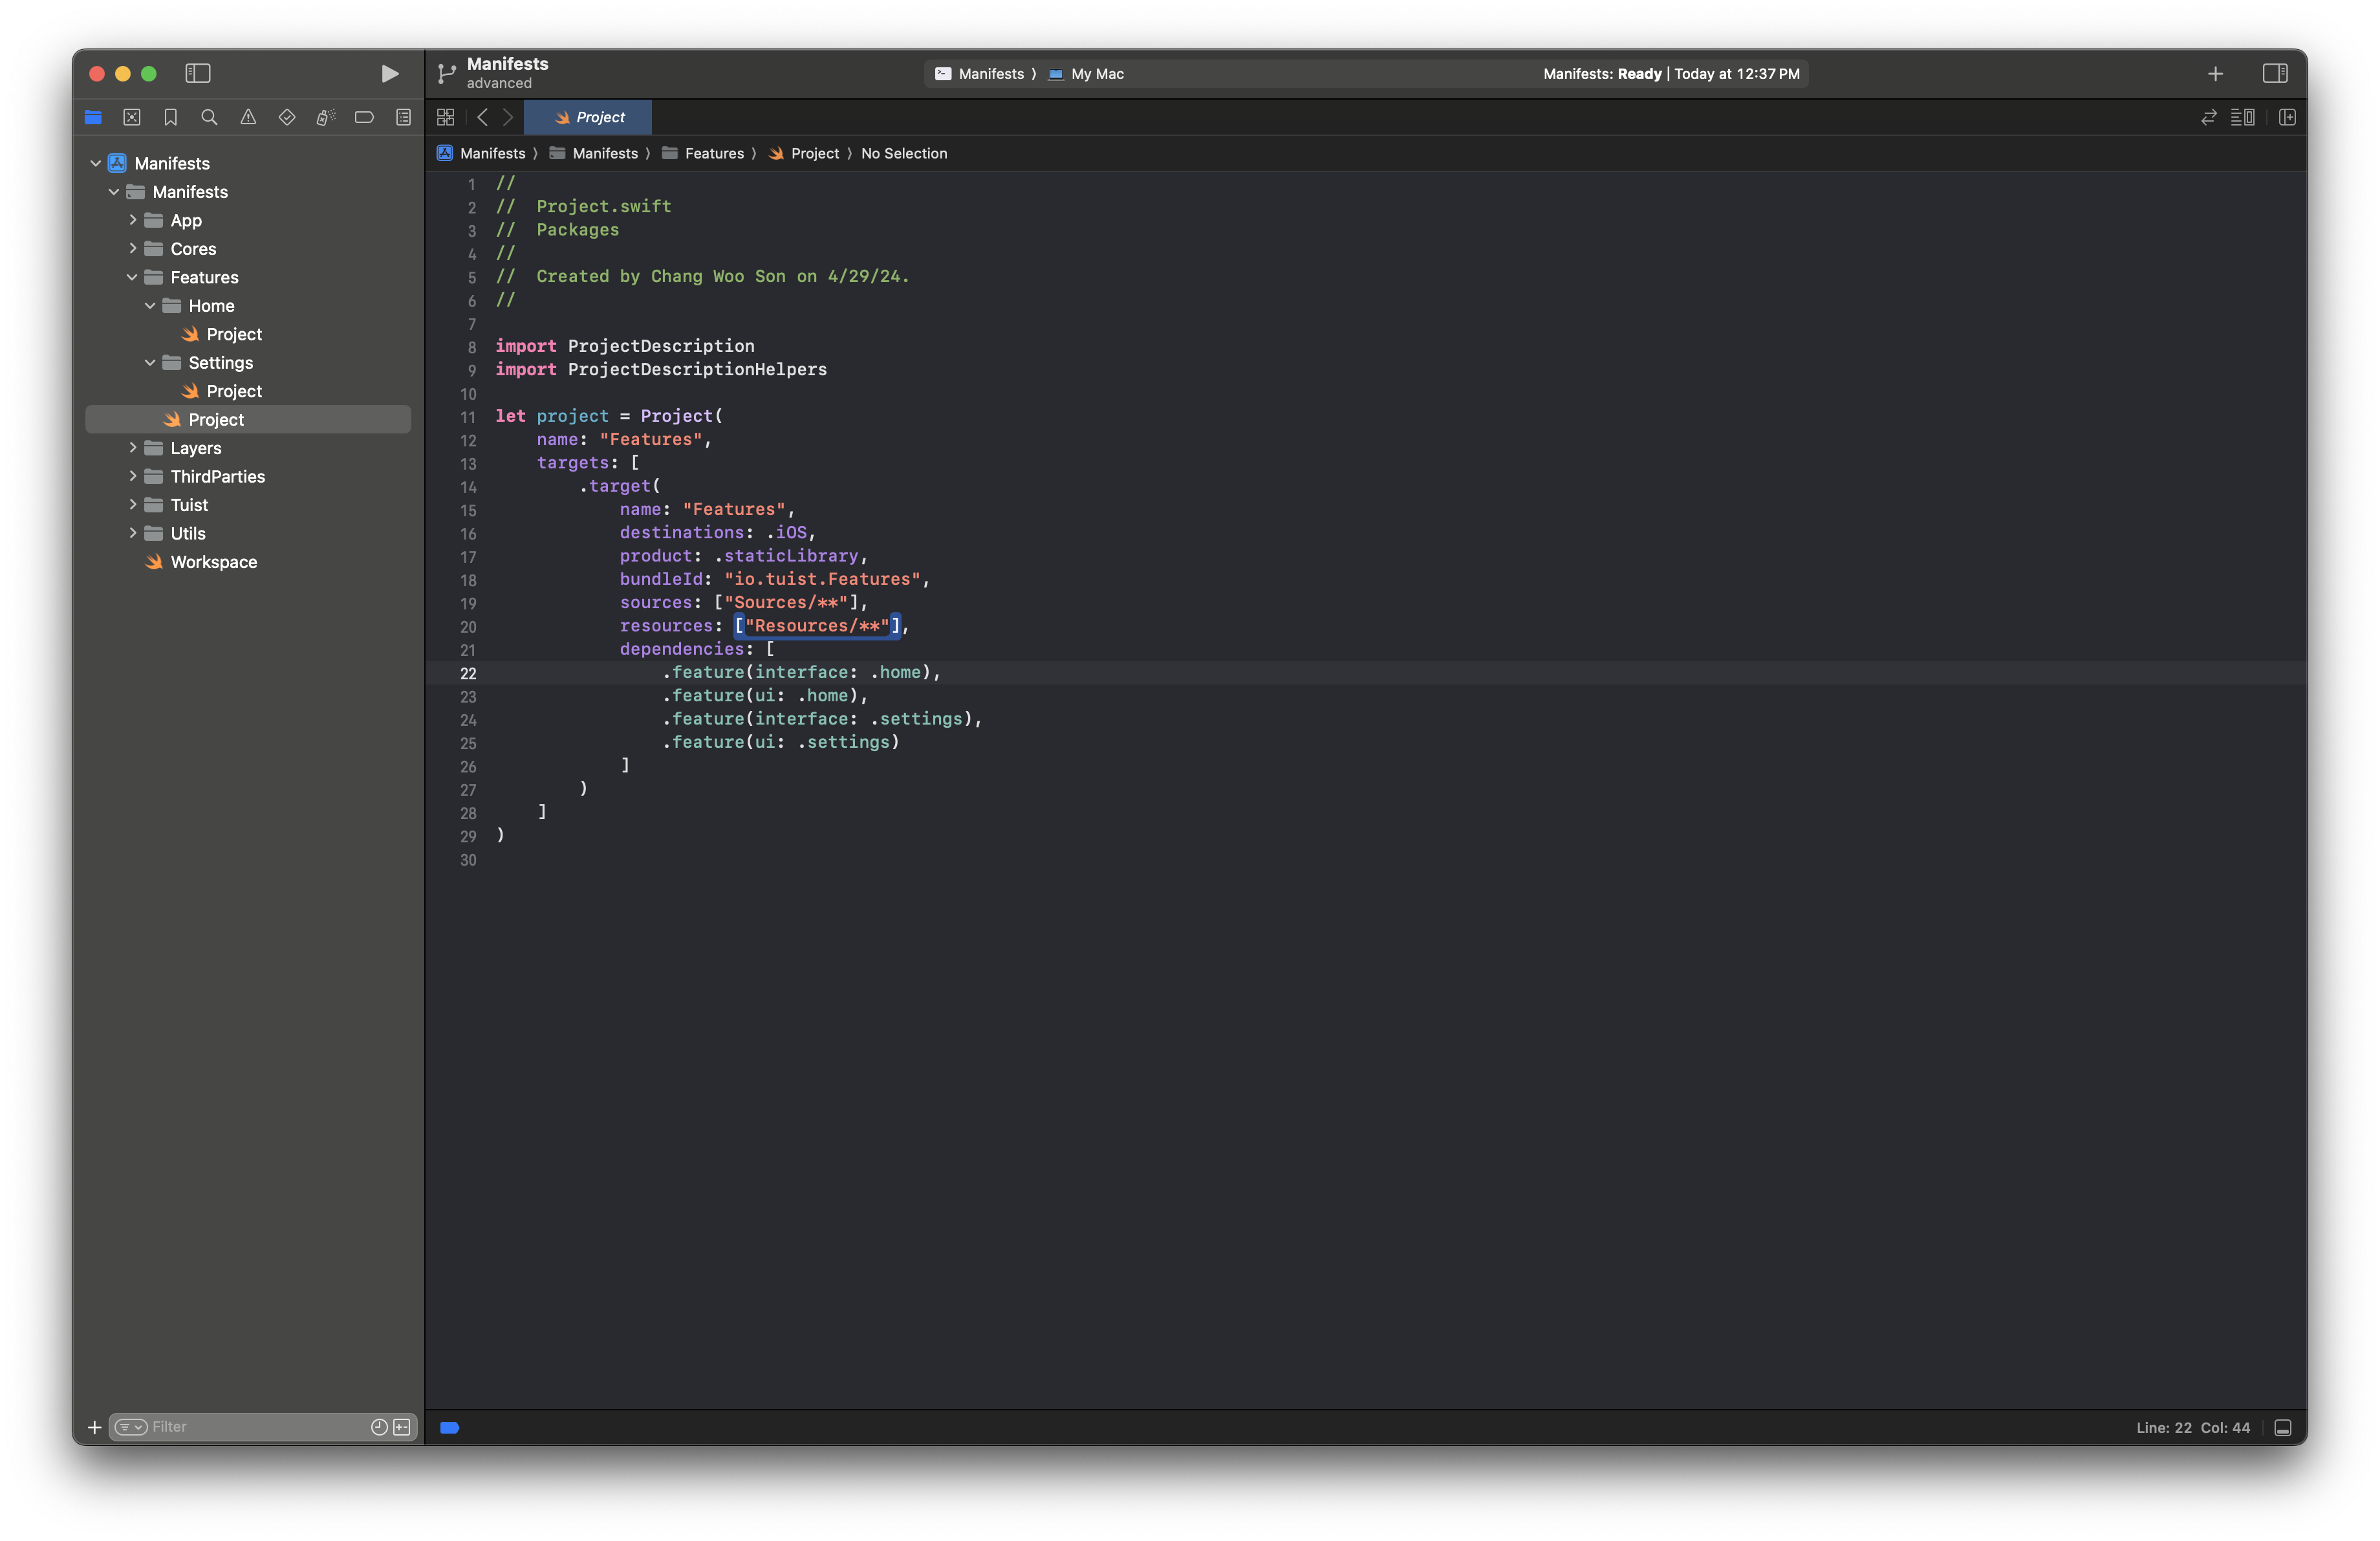
Features module
Each feature has an Interface module and UI module.
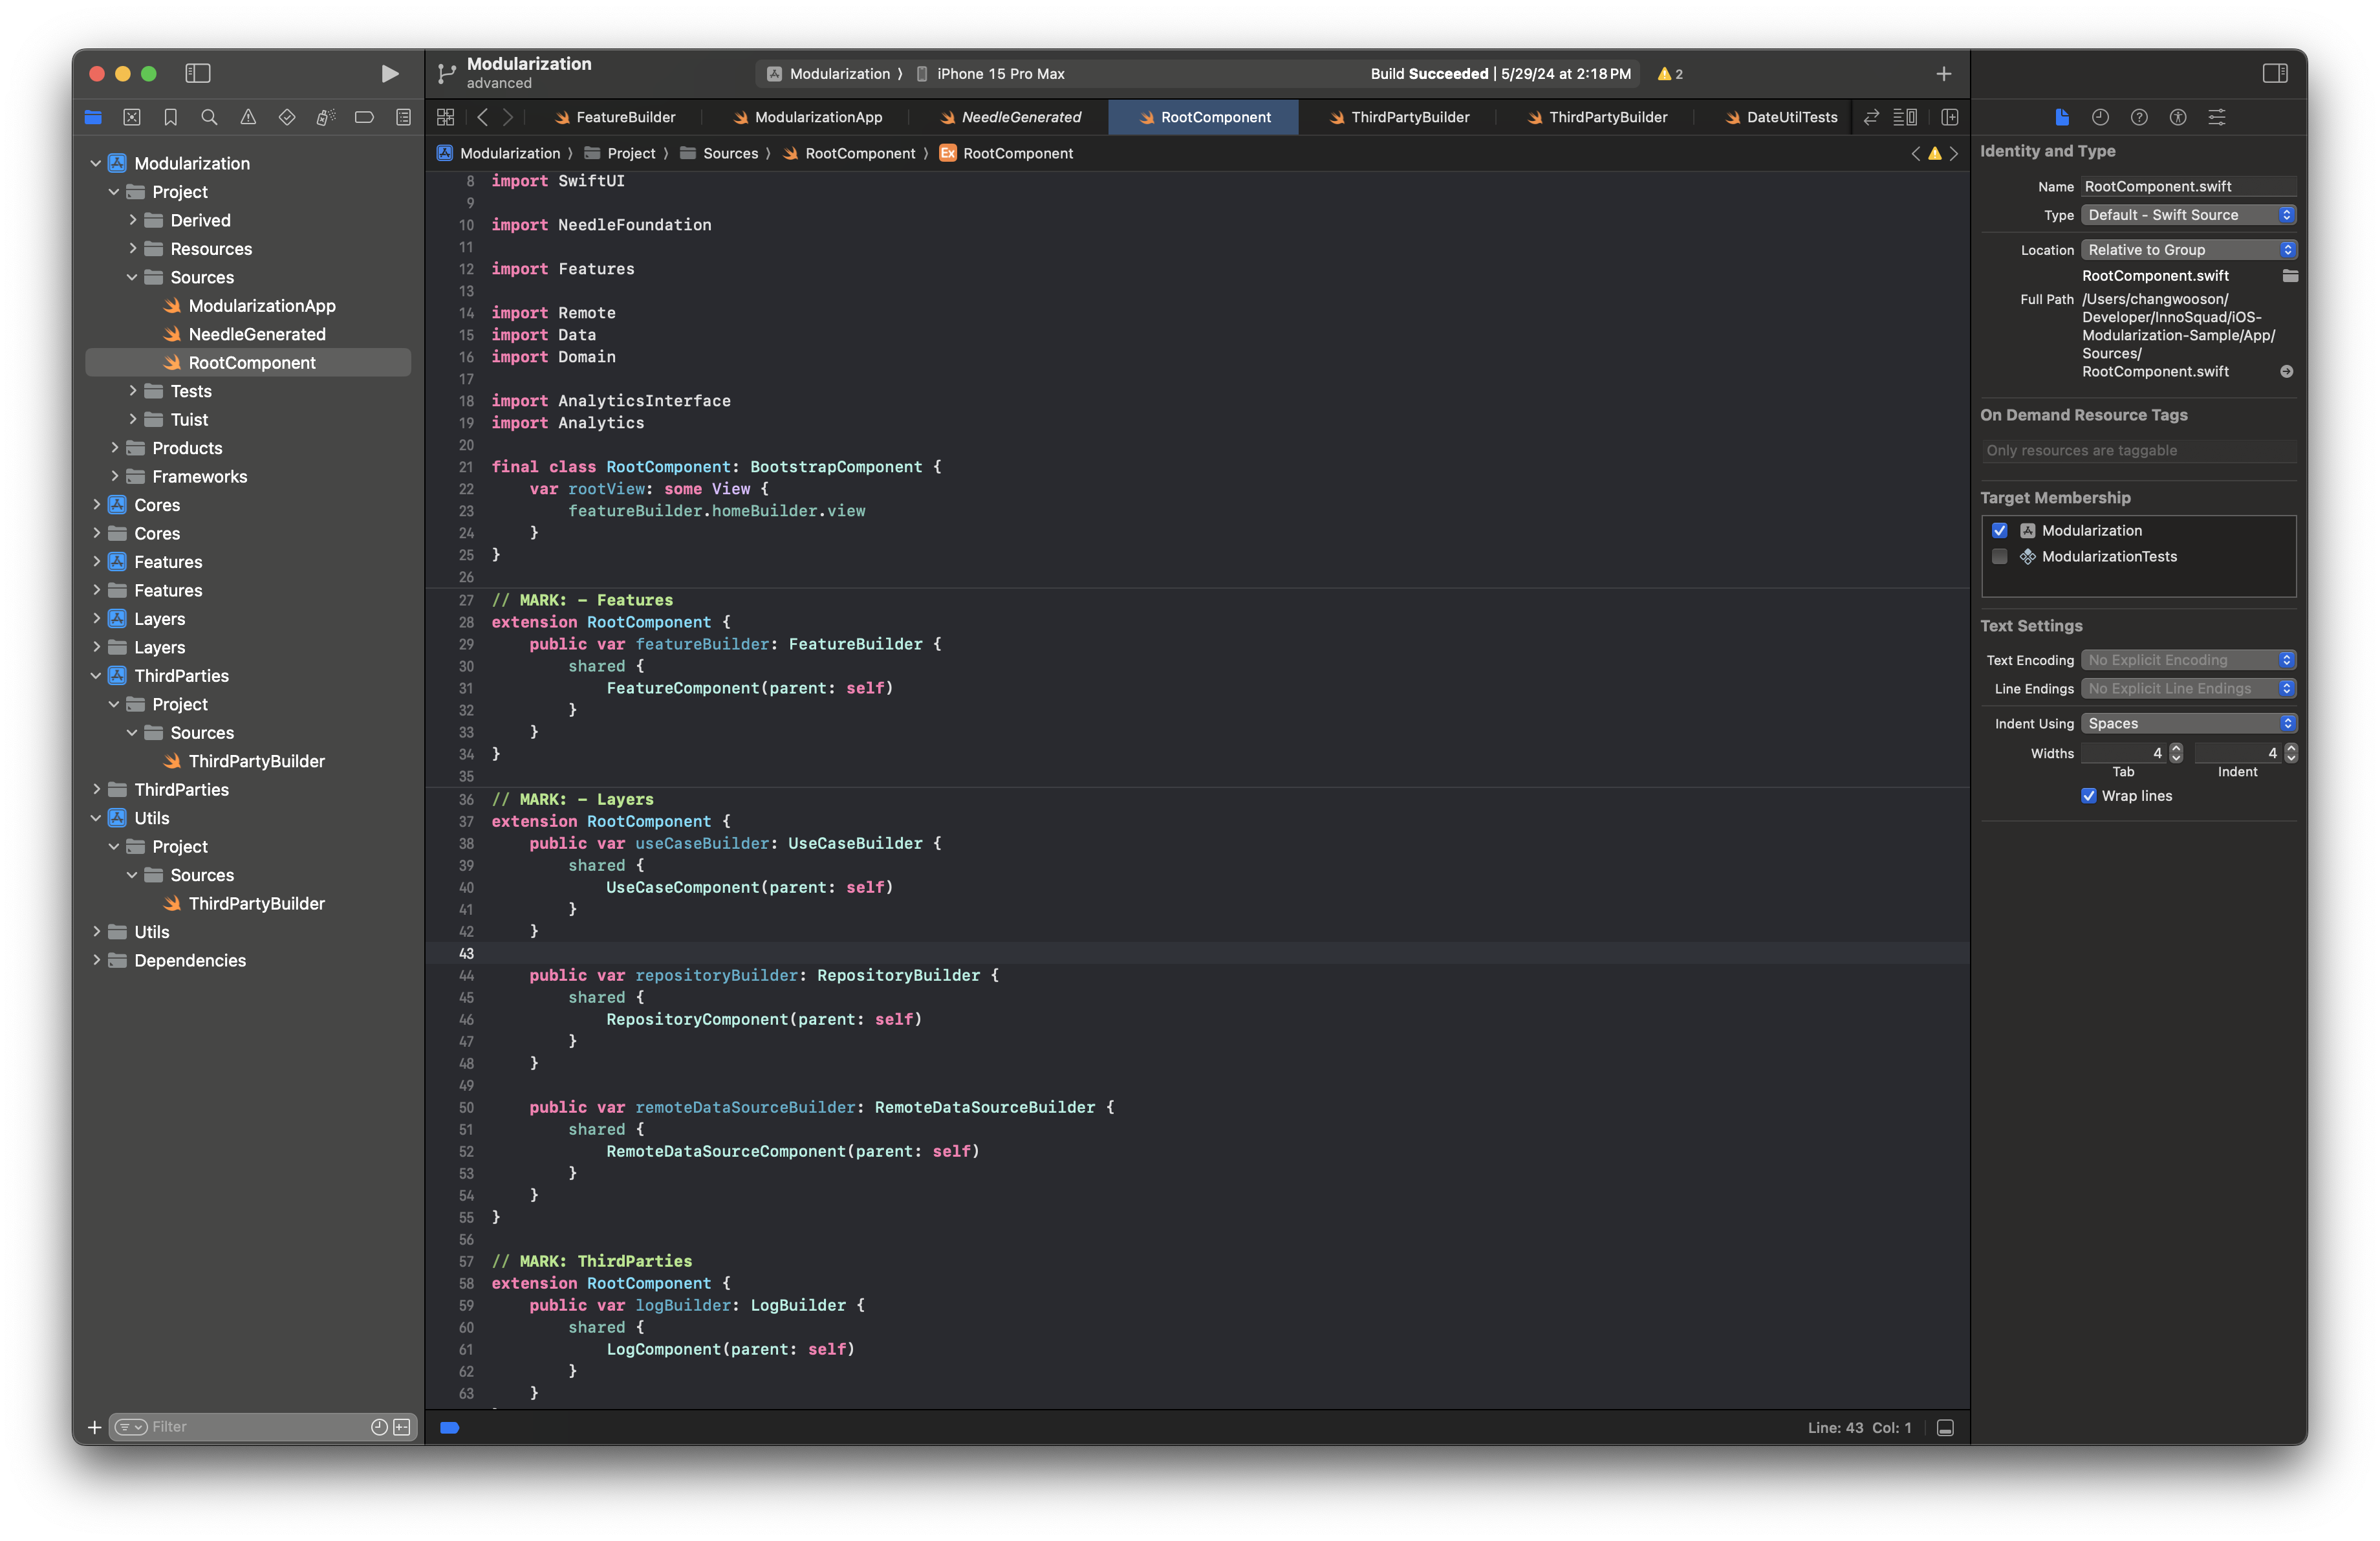
This is where we configure dependency injection.
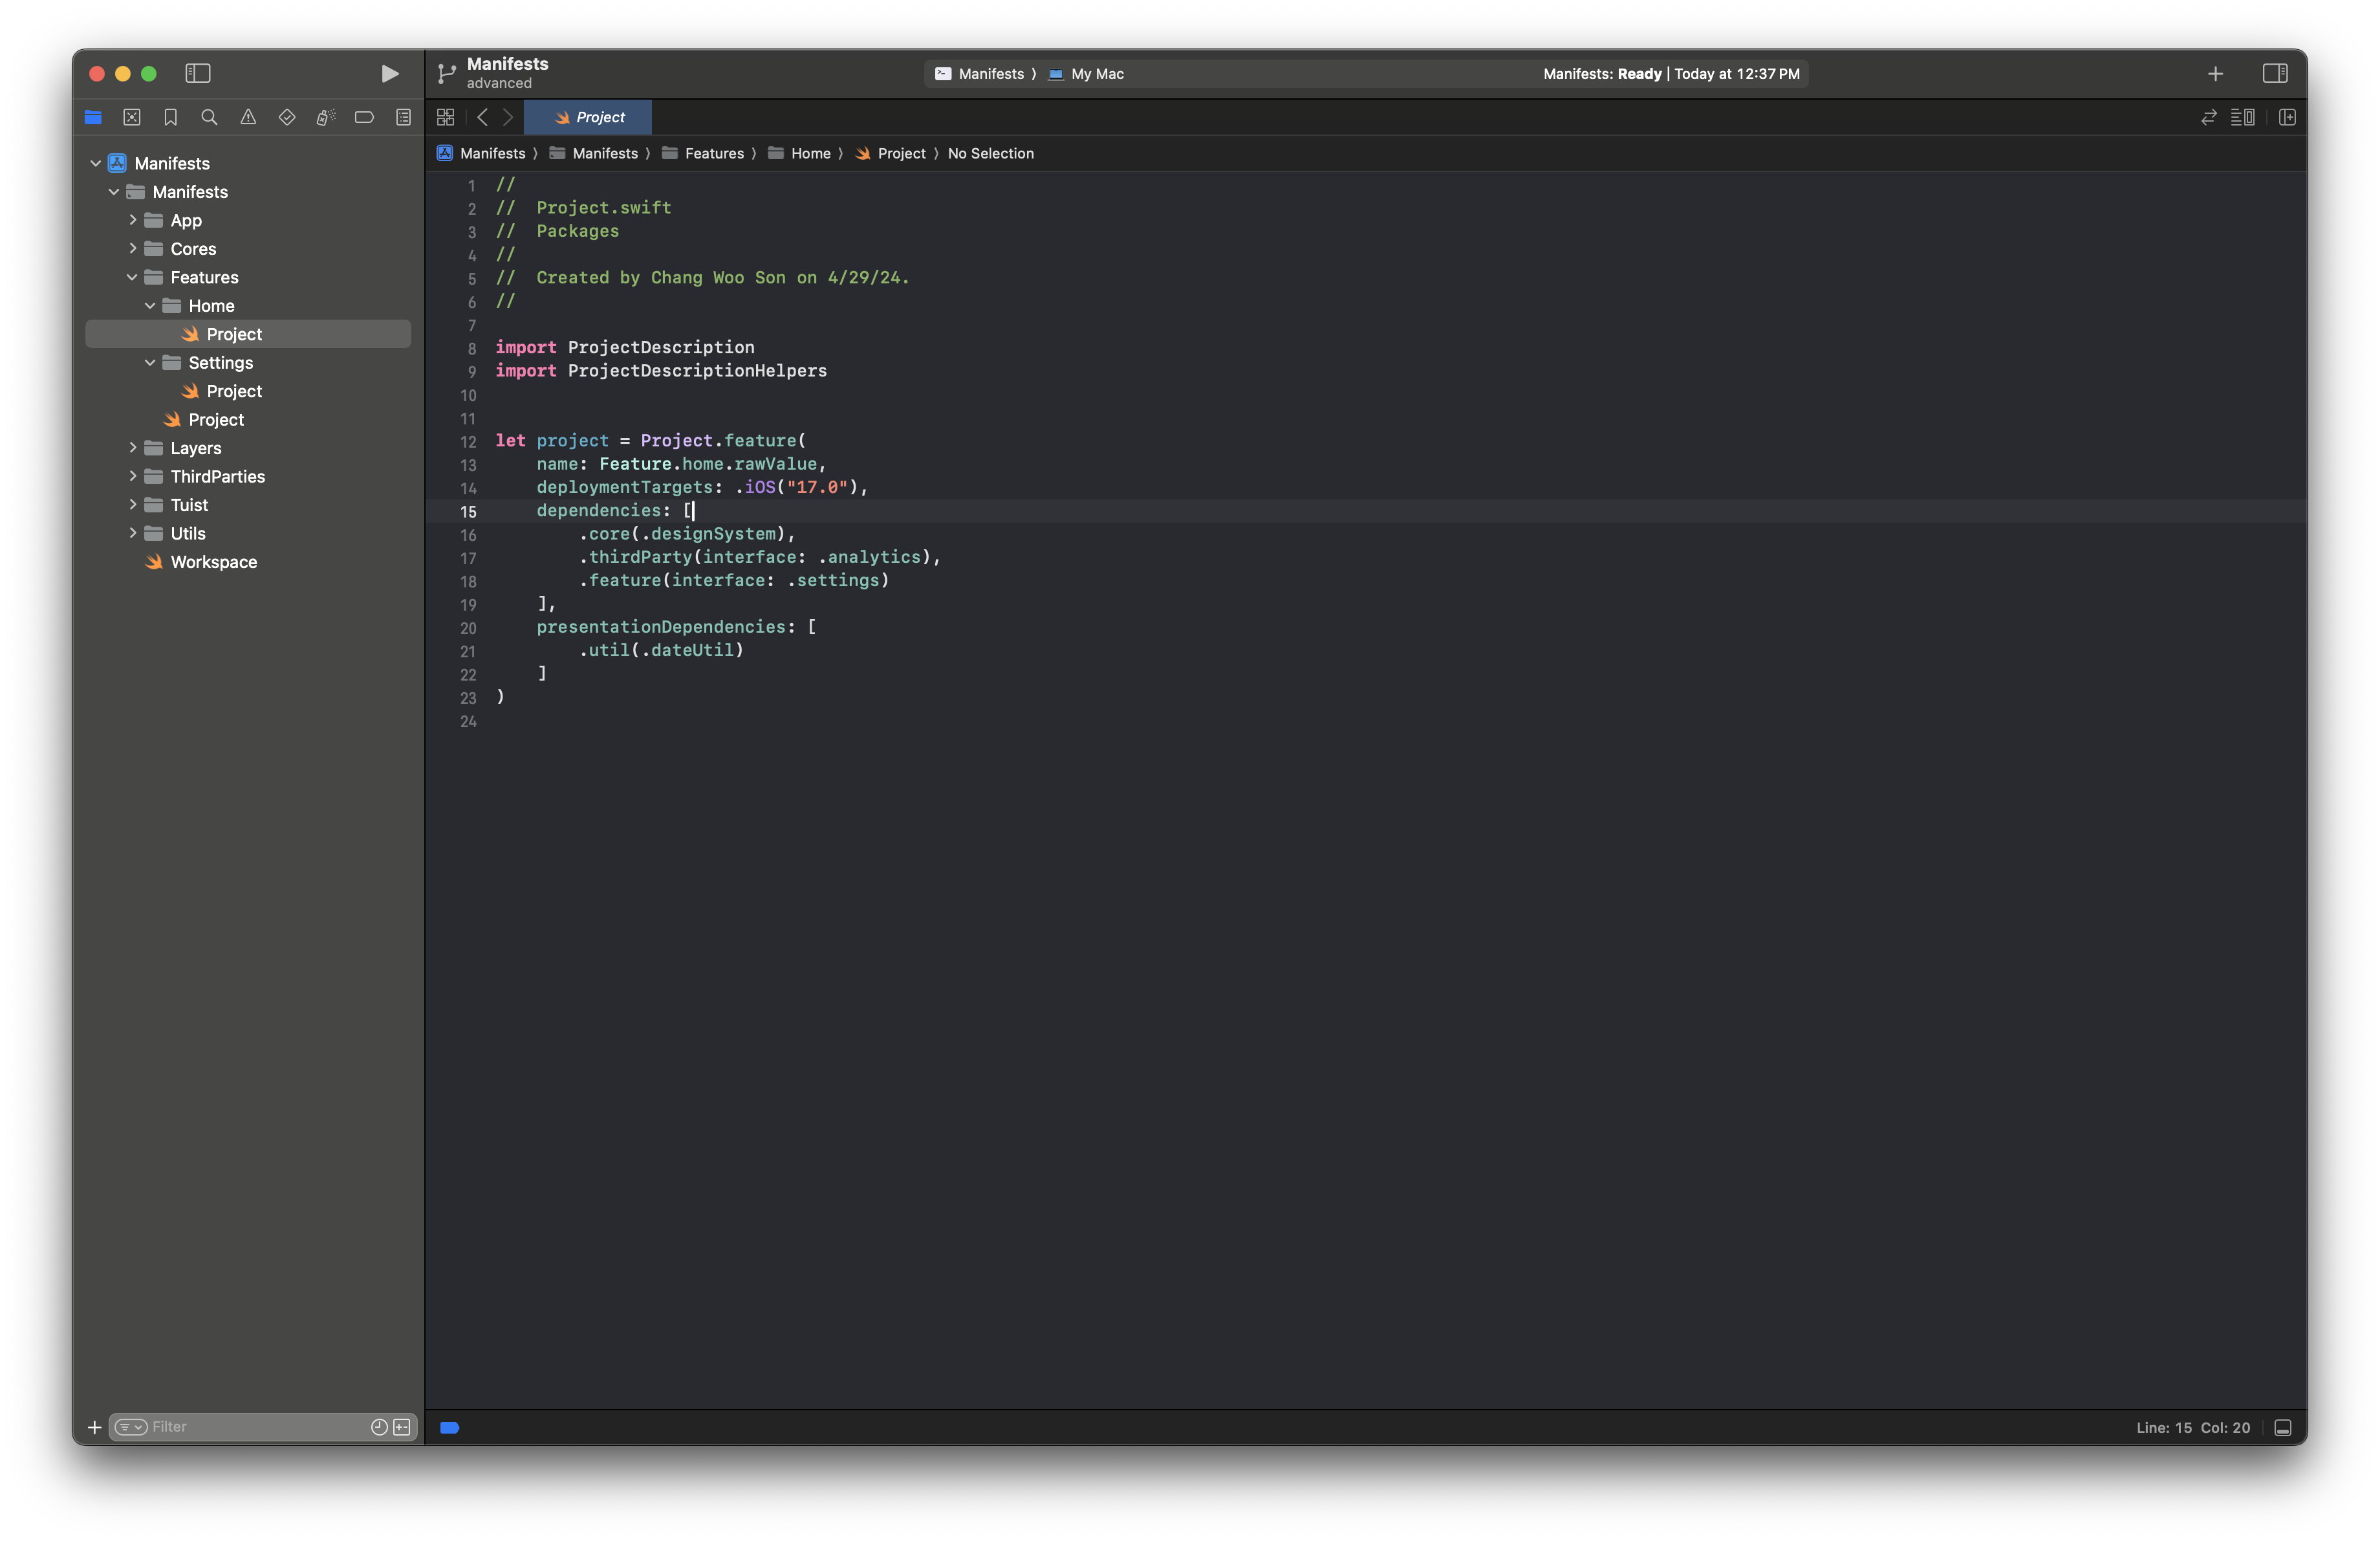
Individual Feature
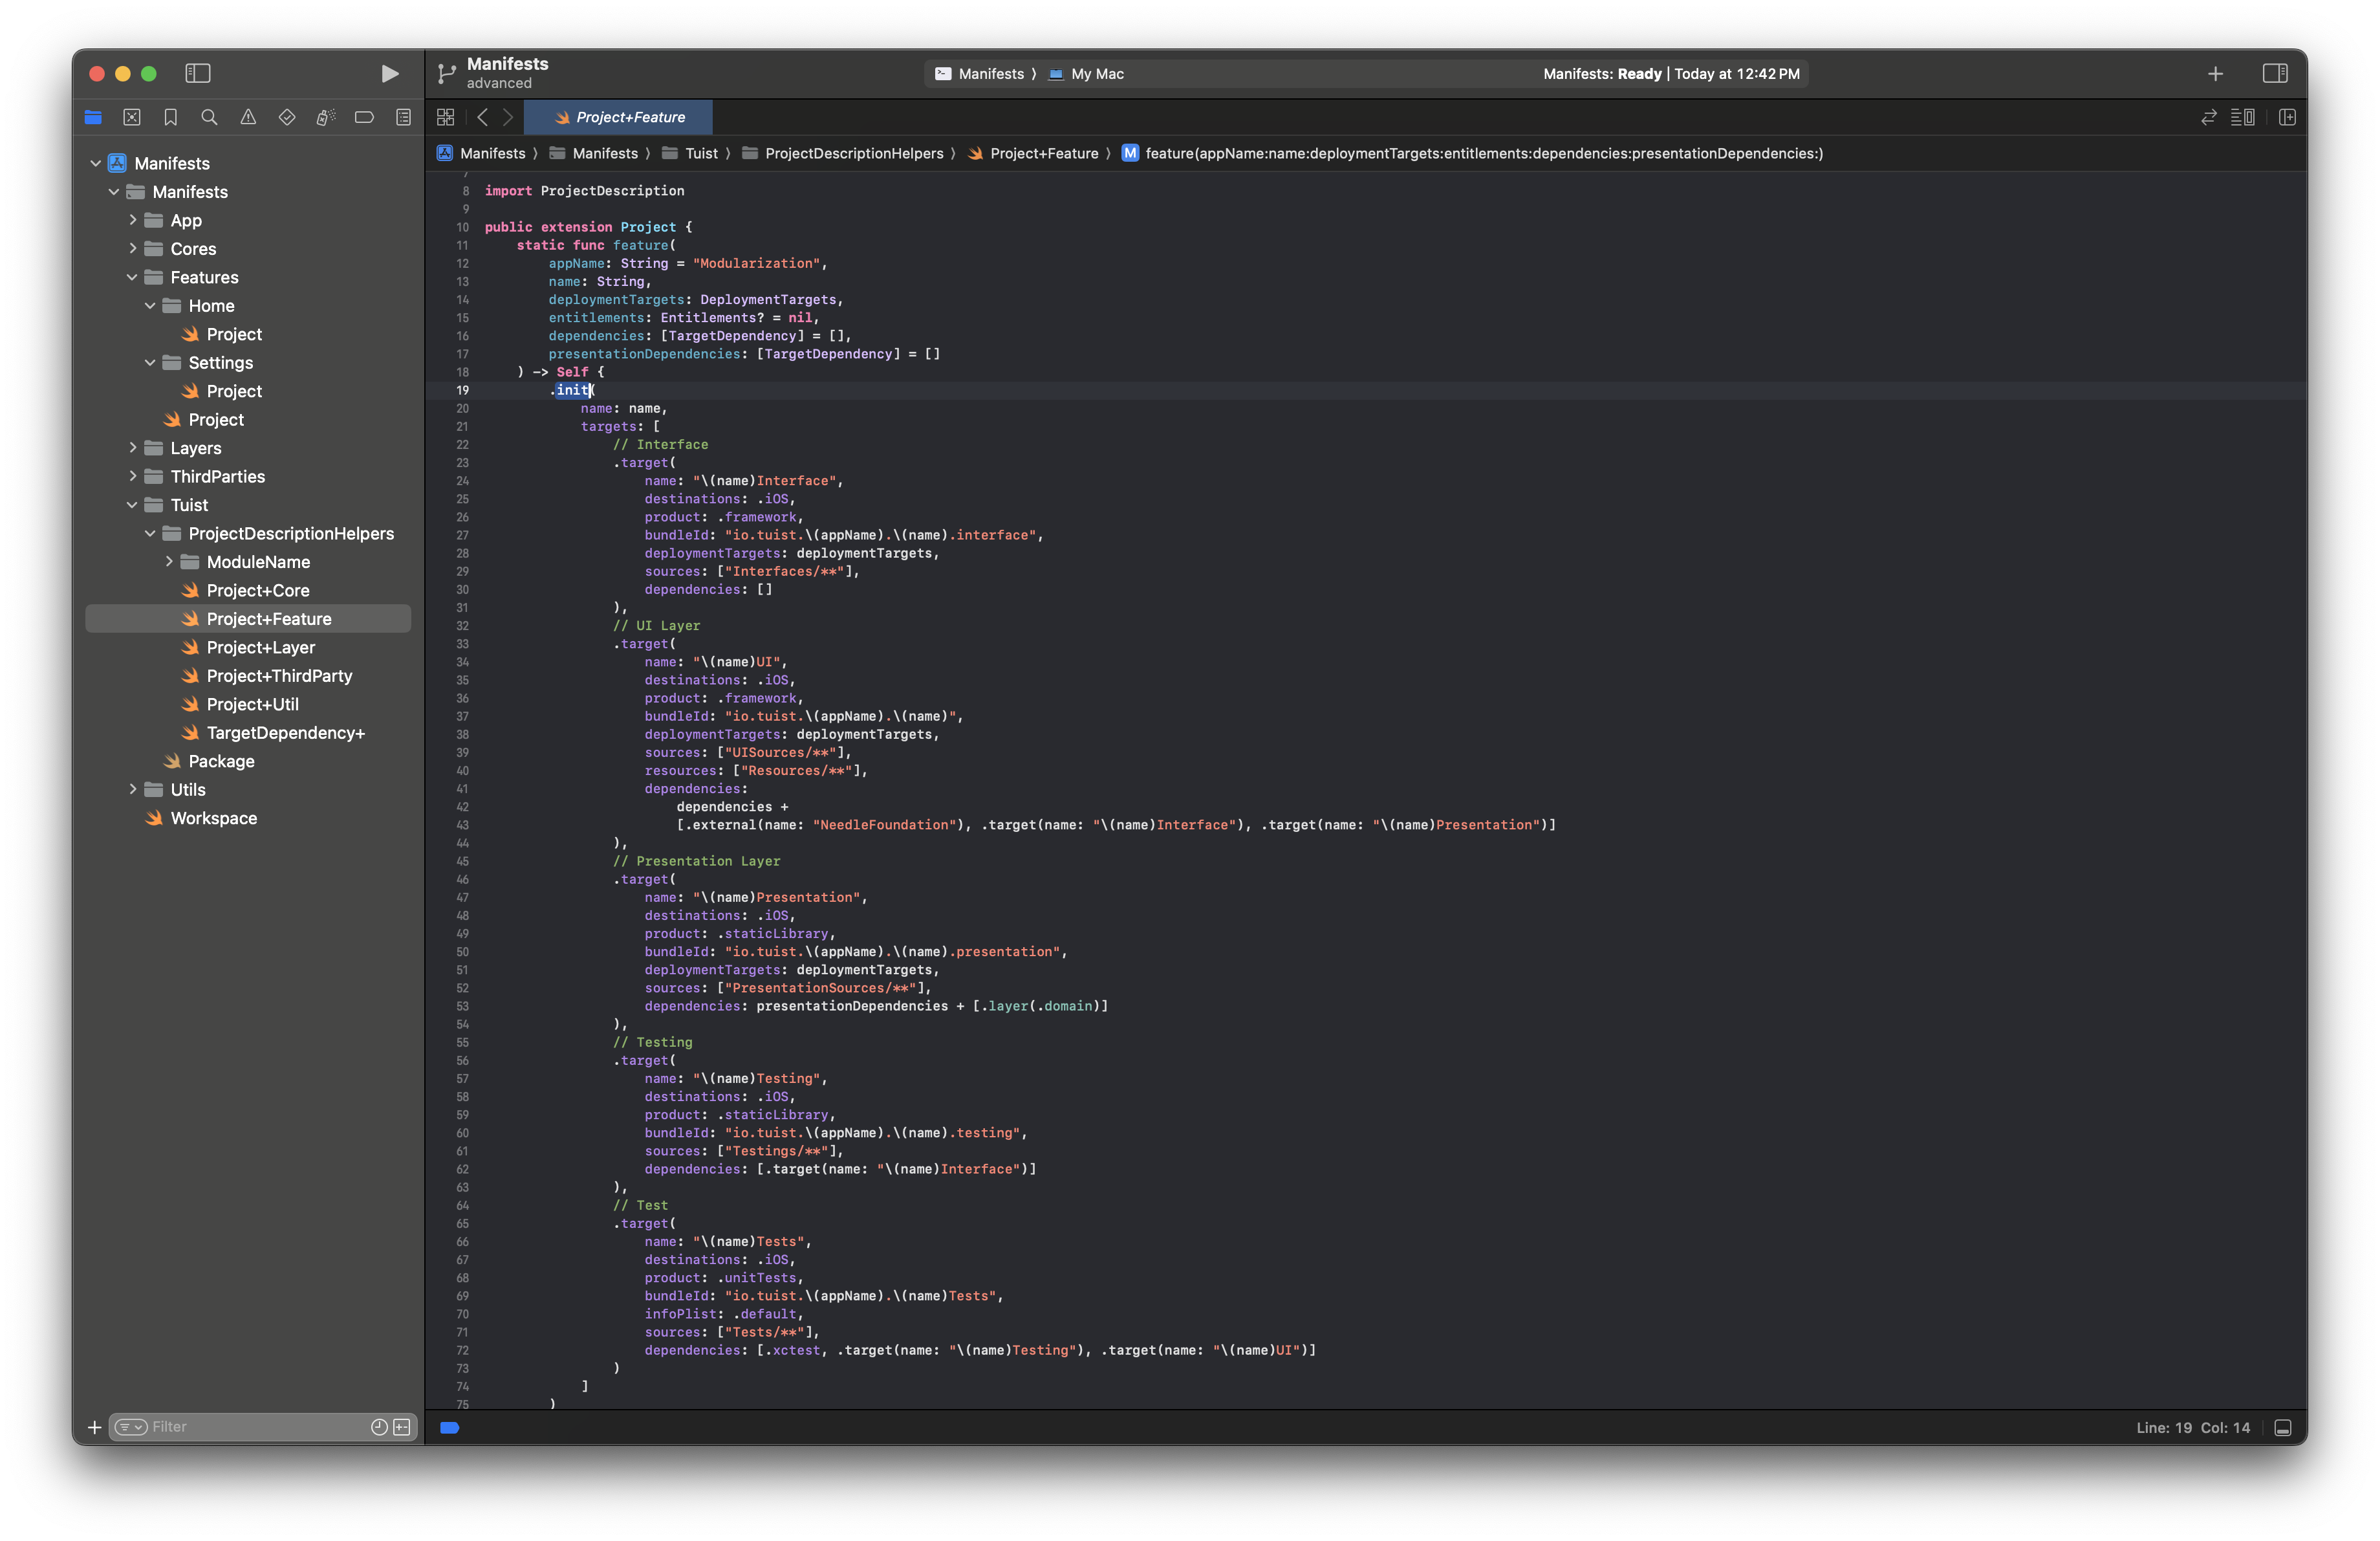
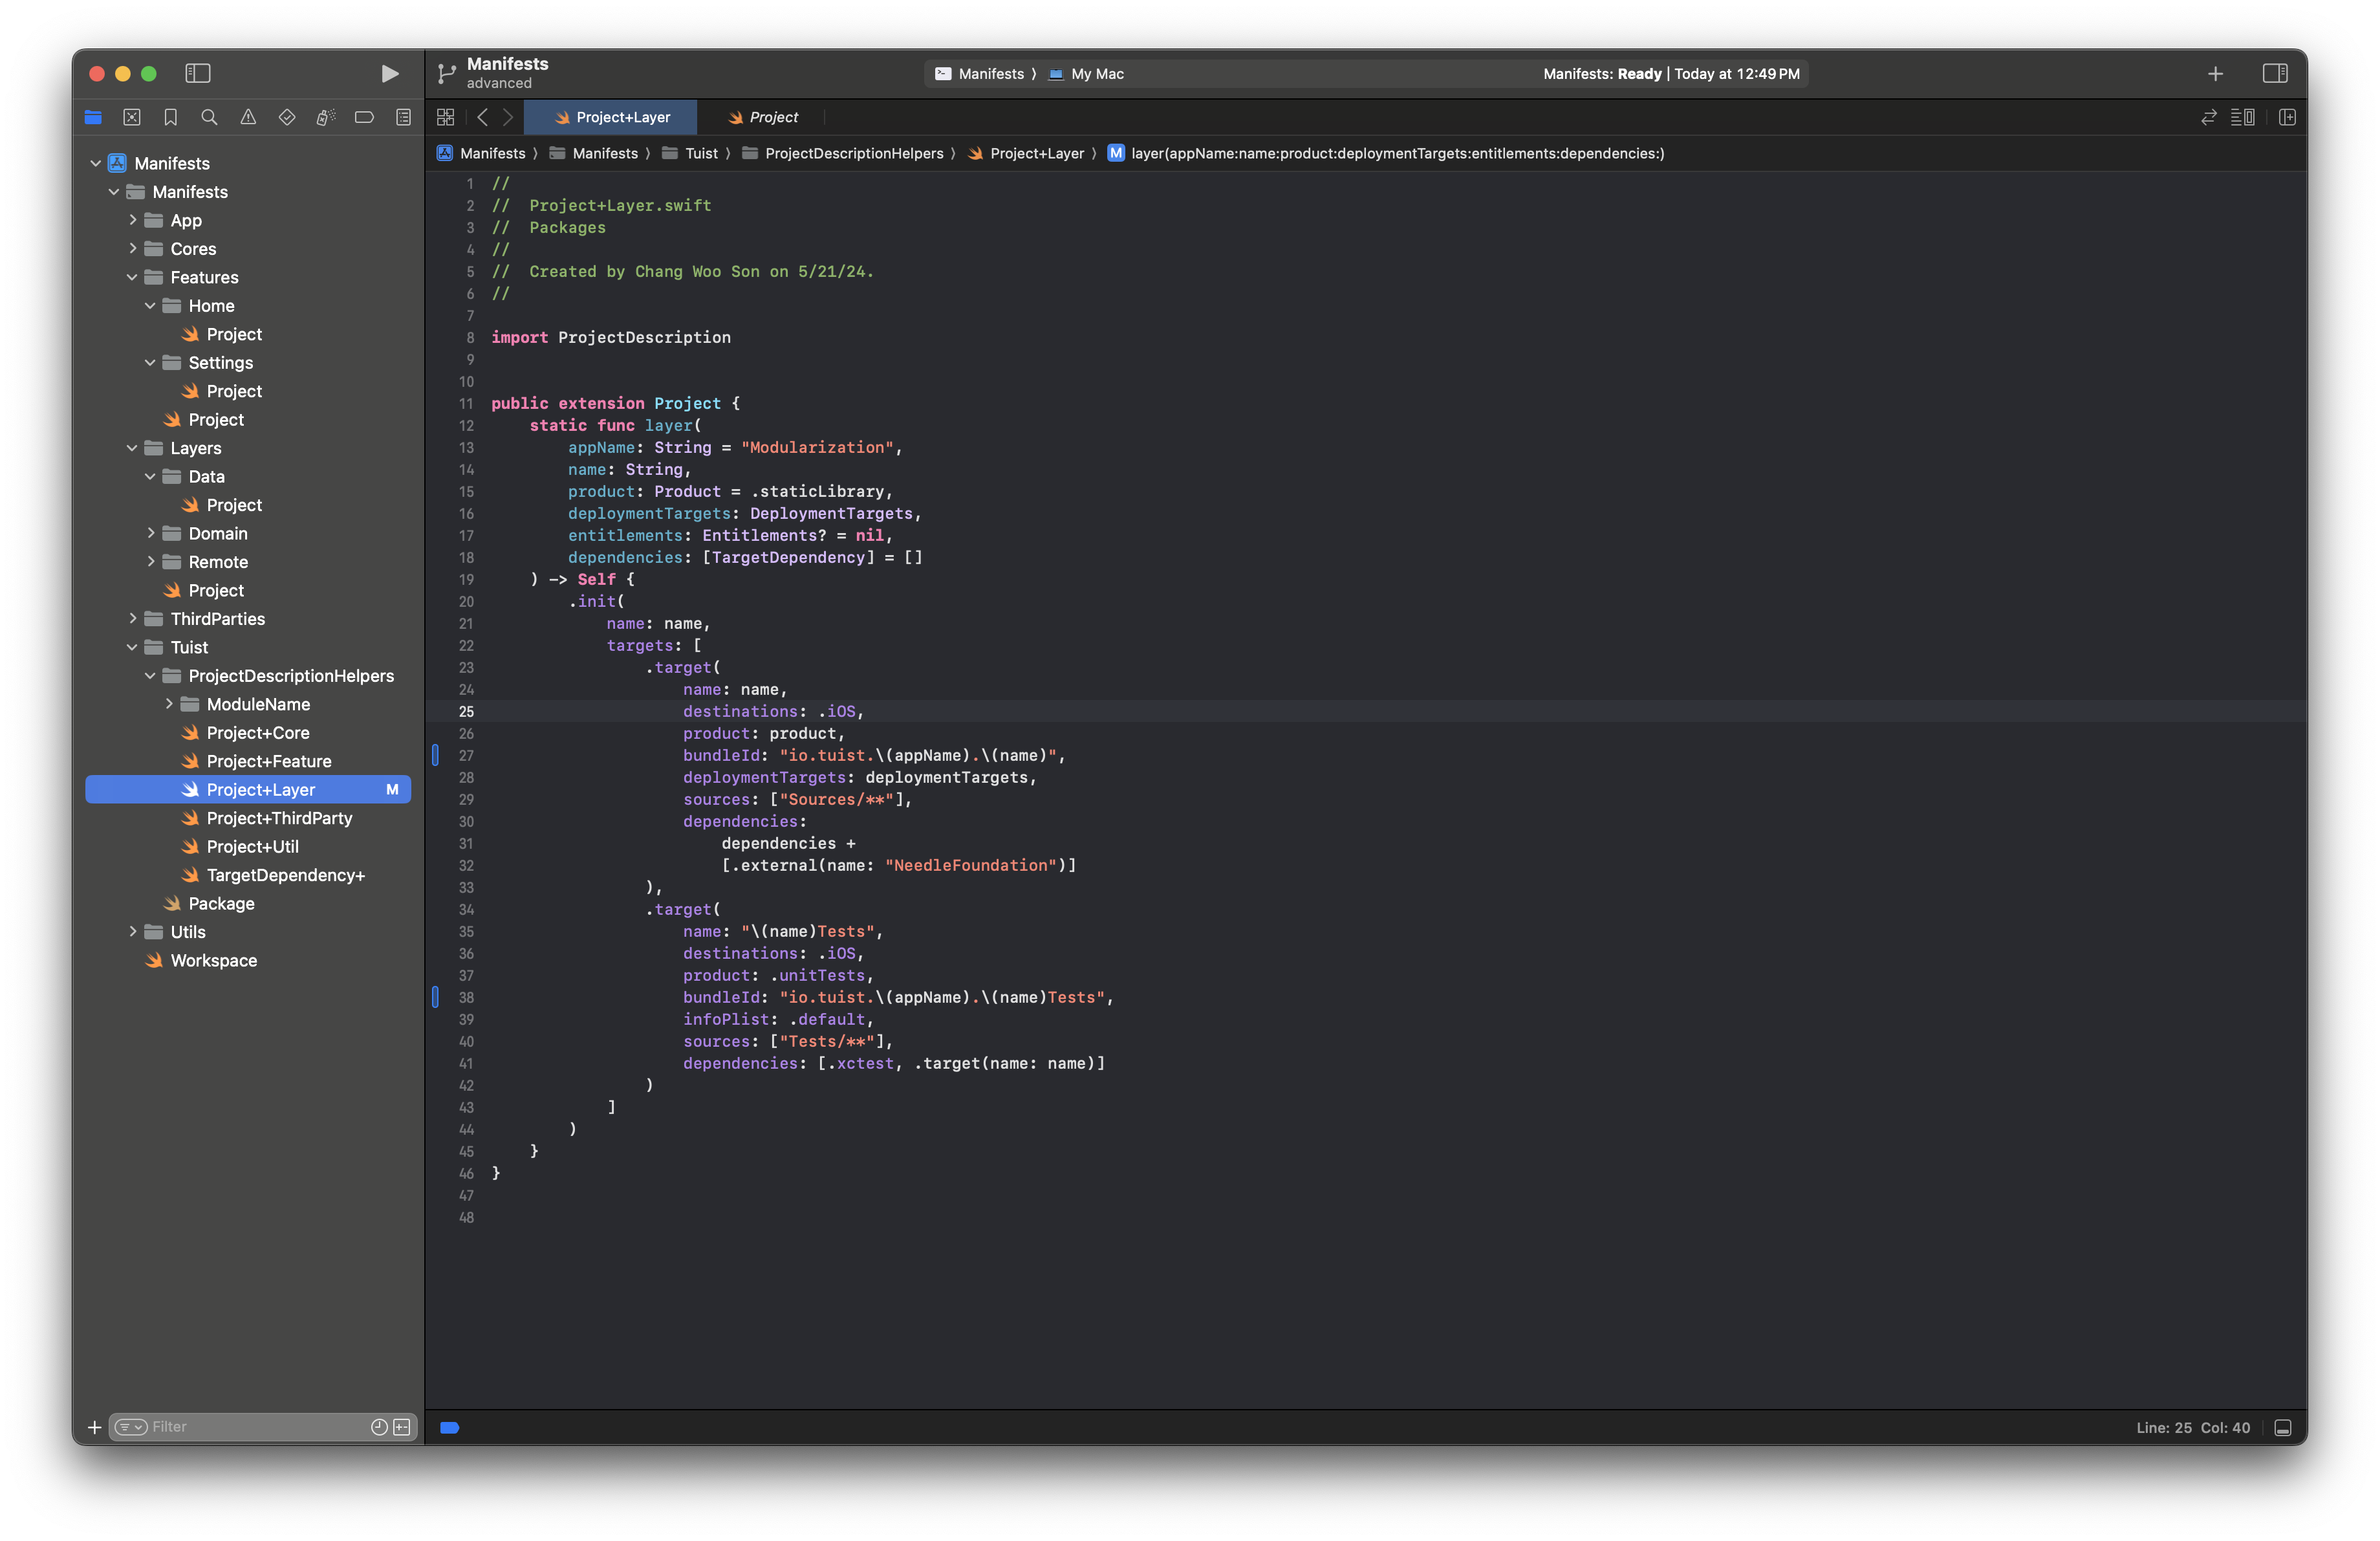
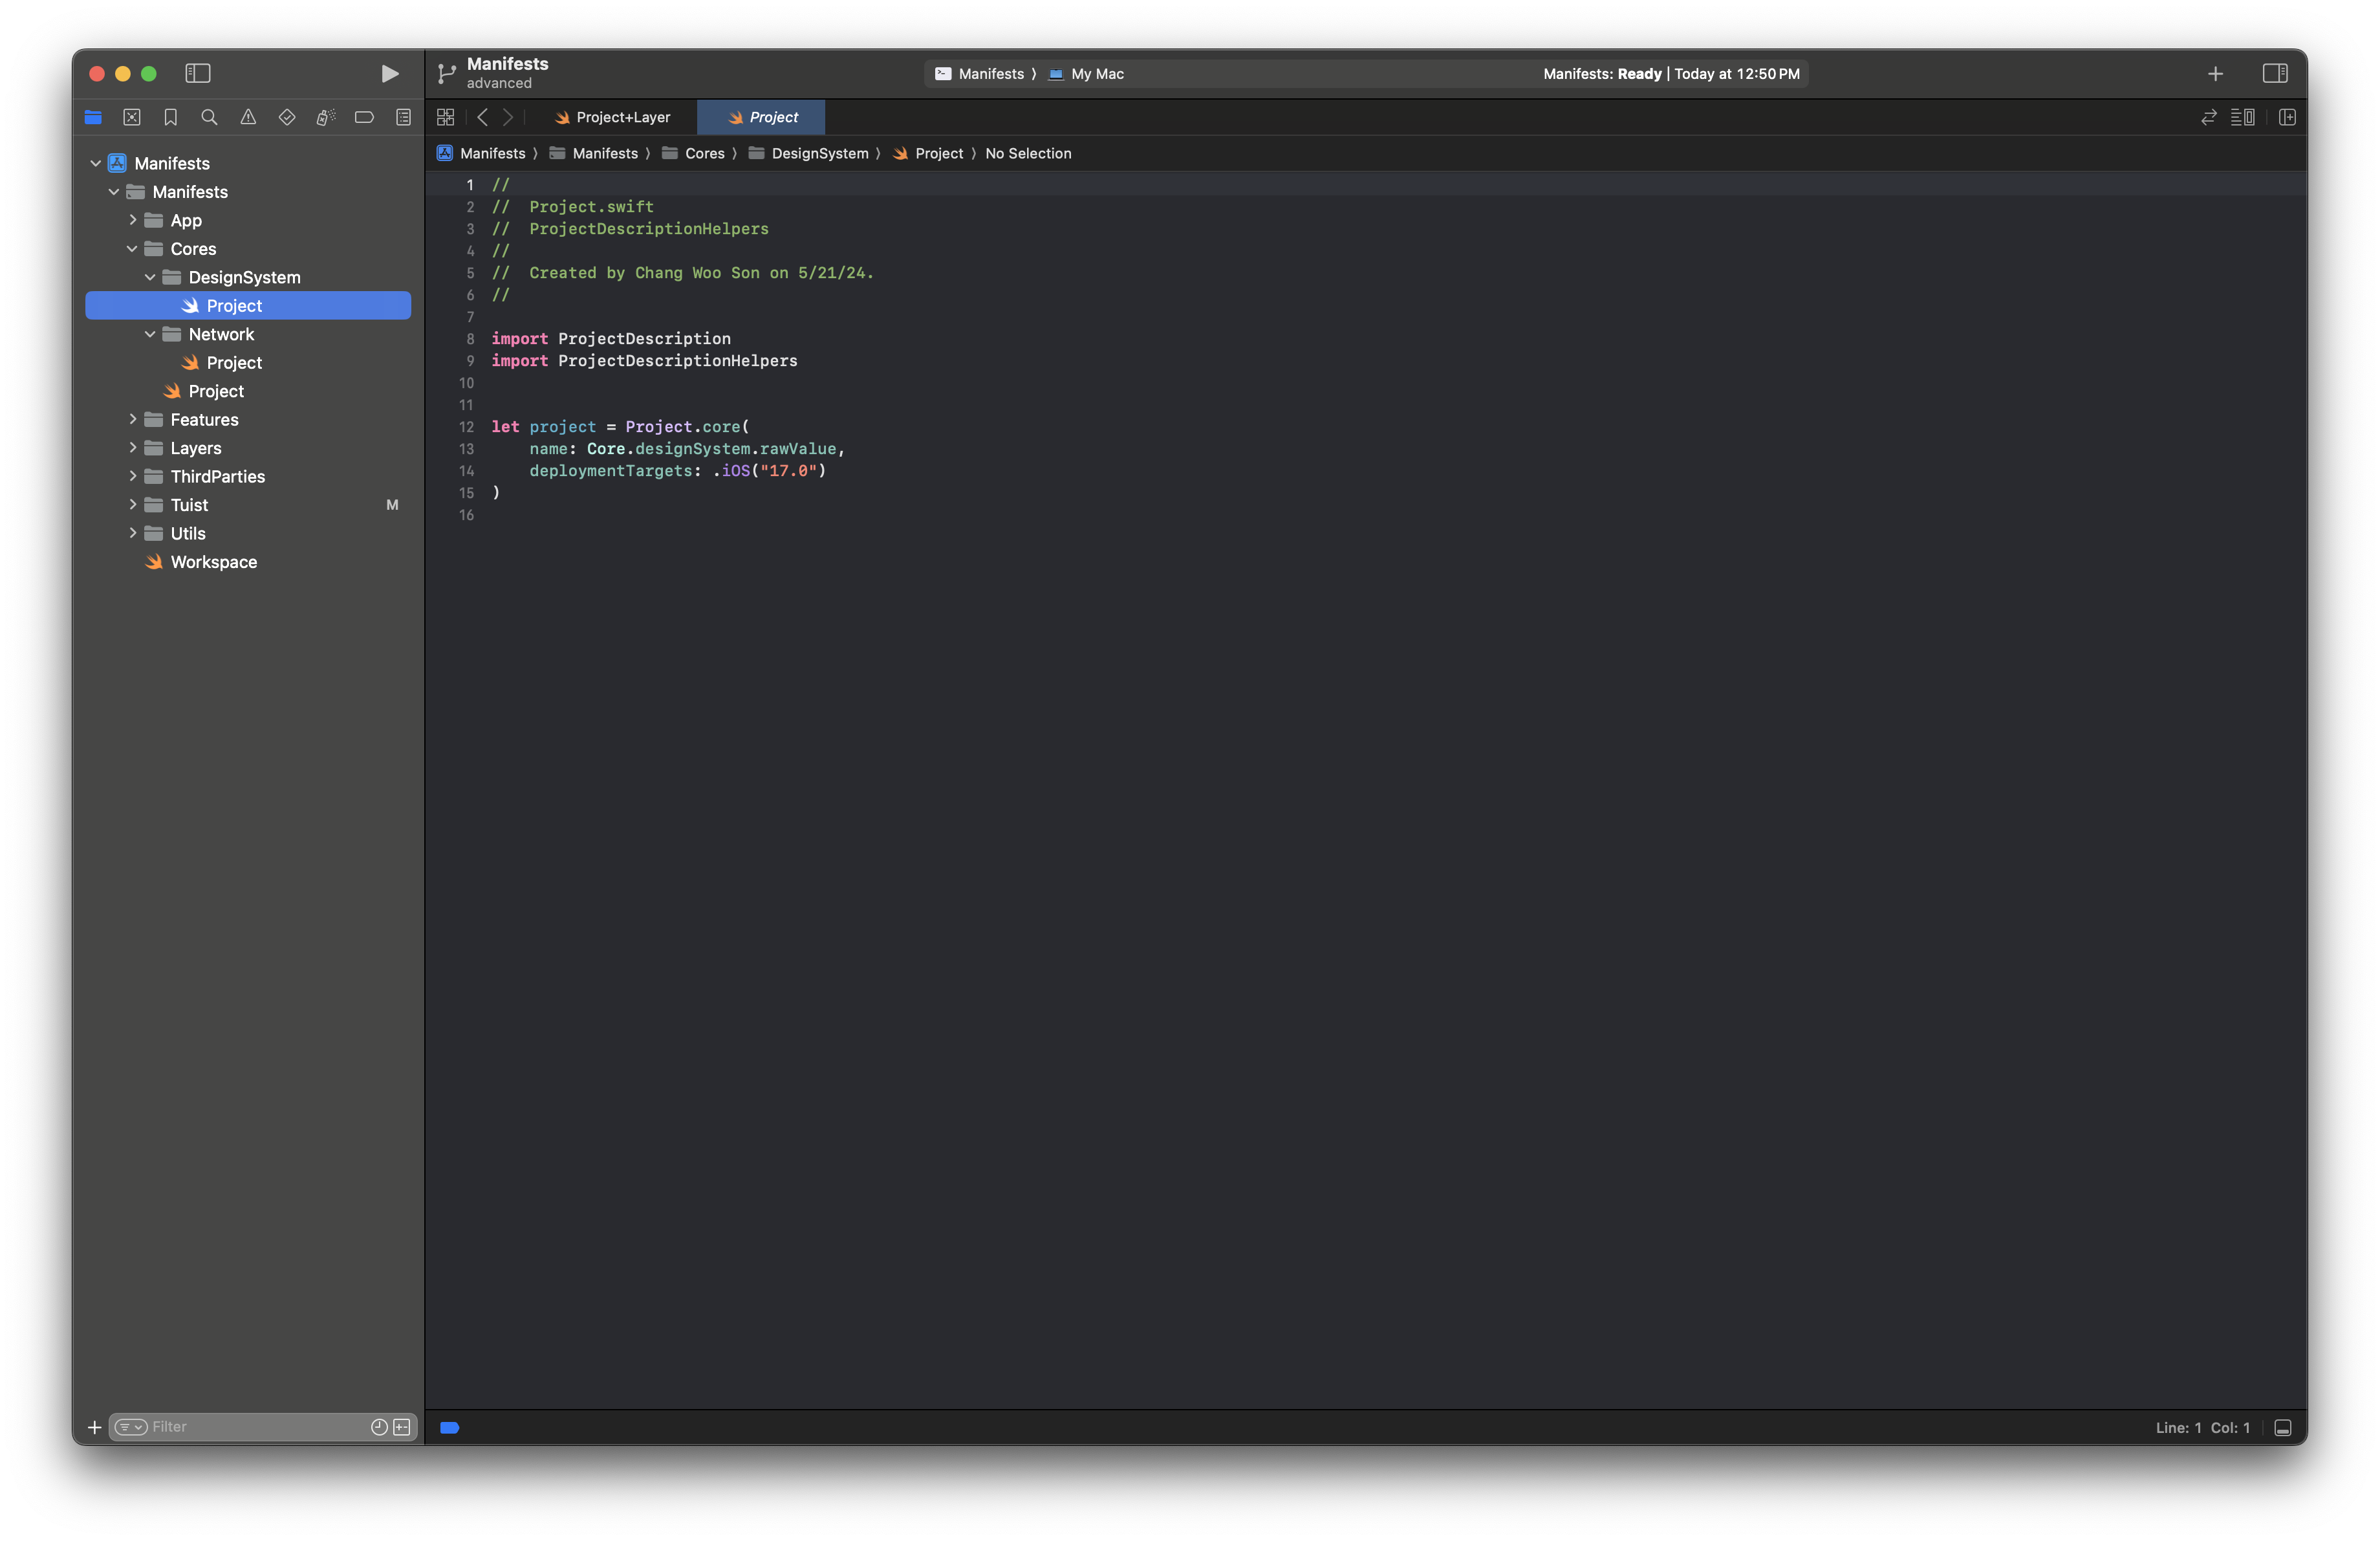
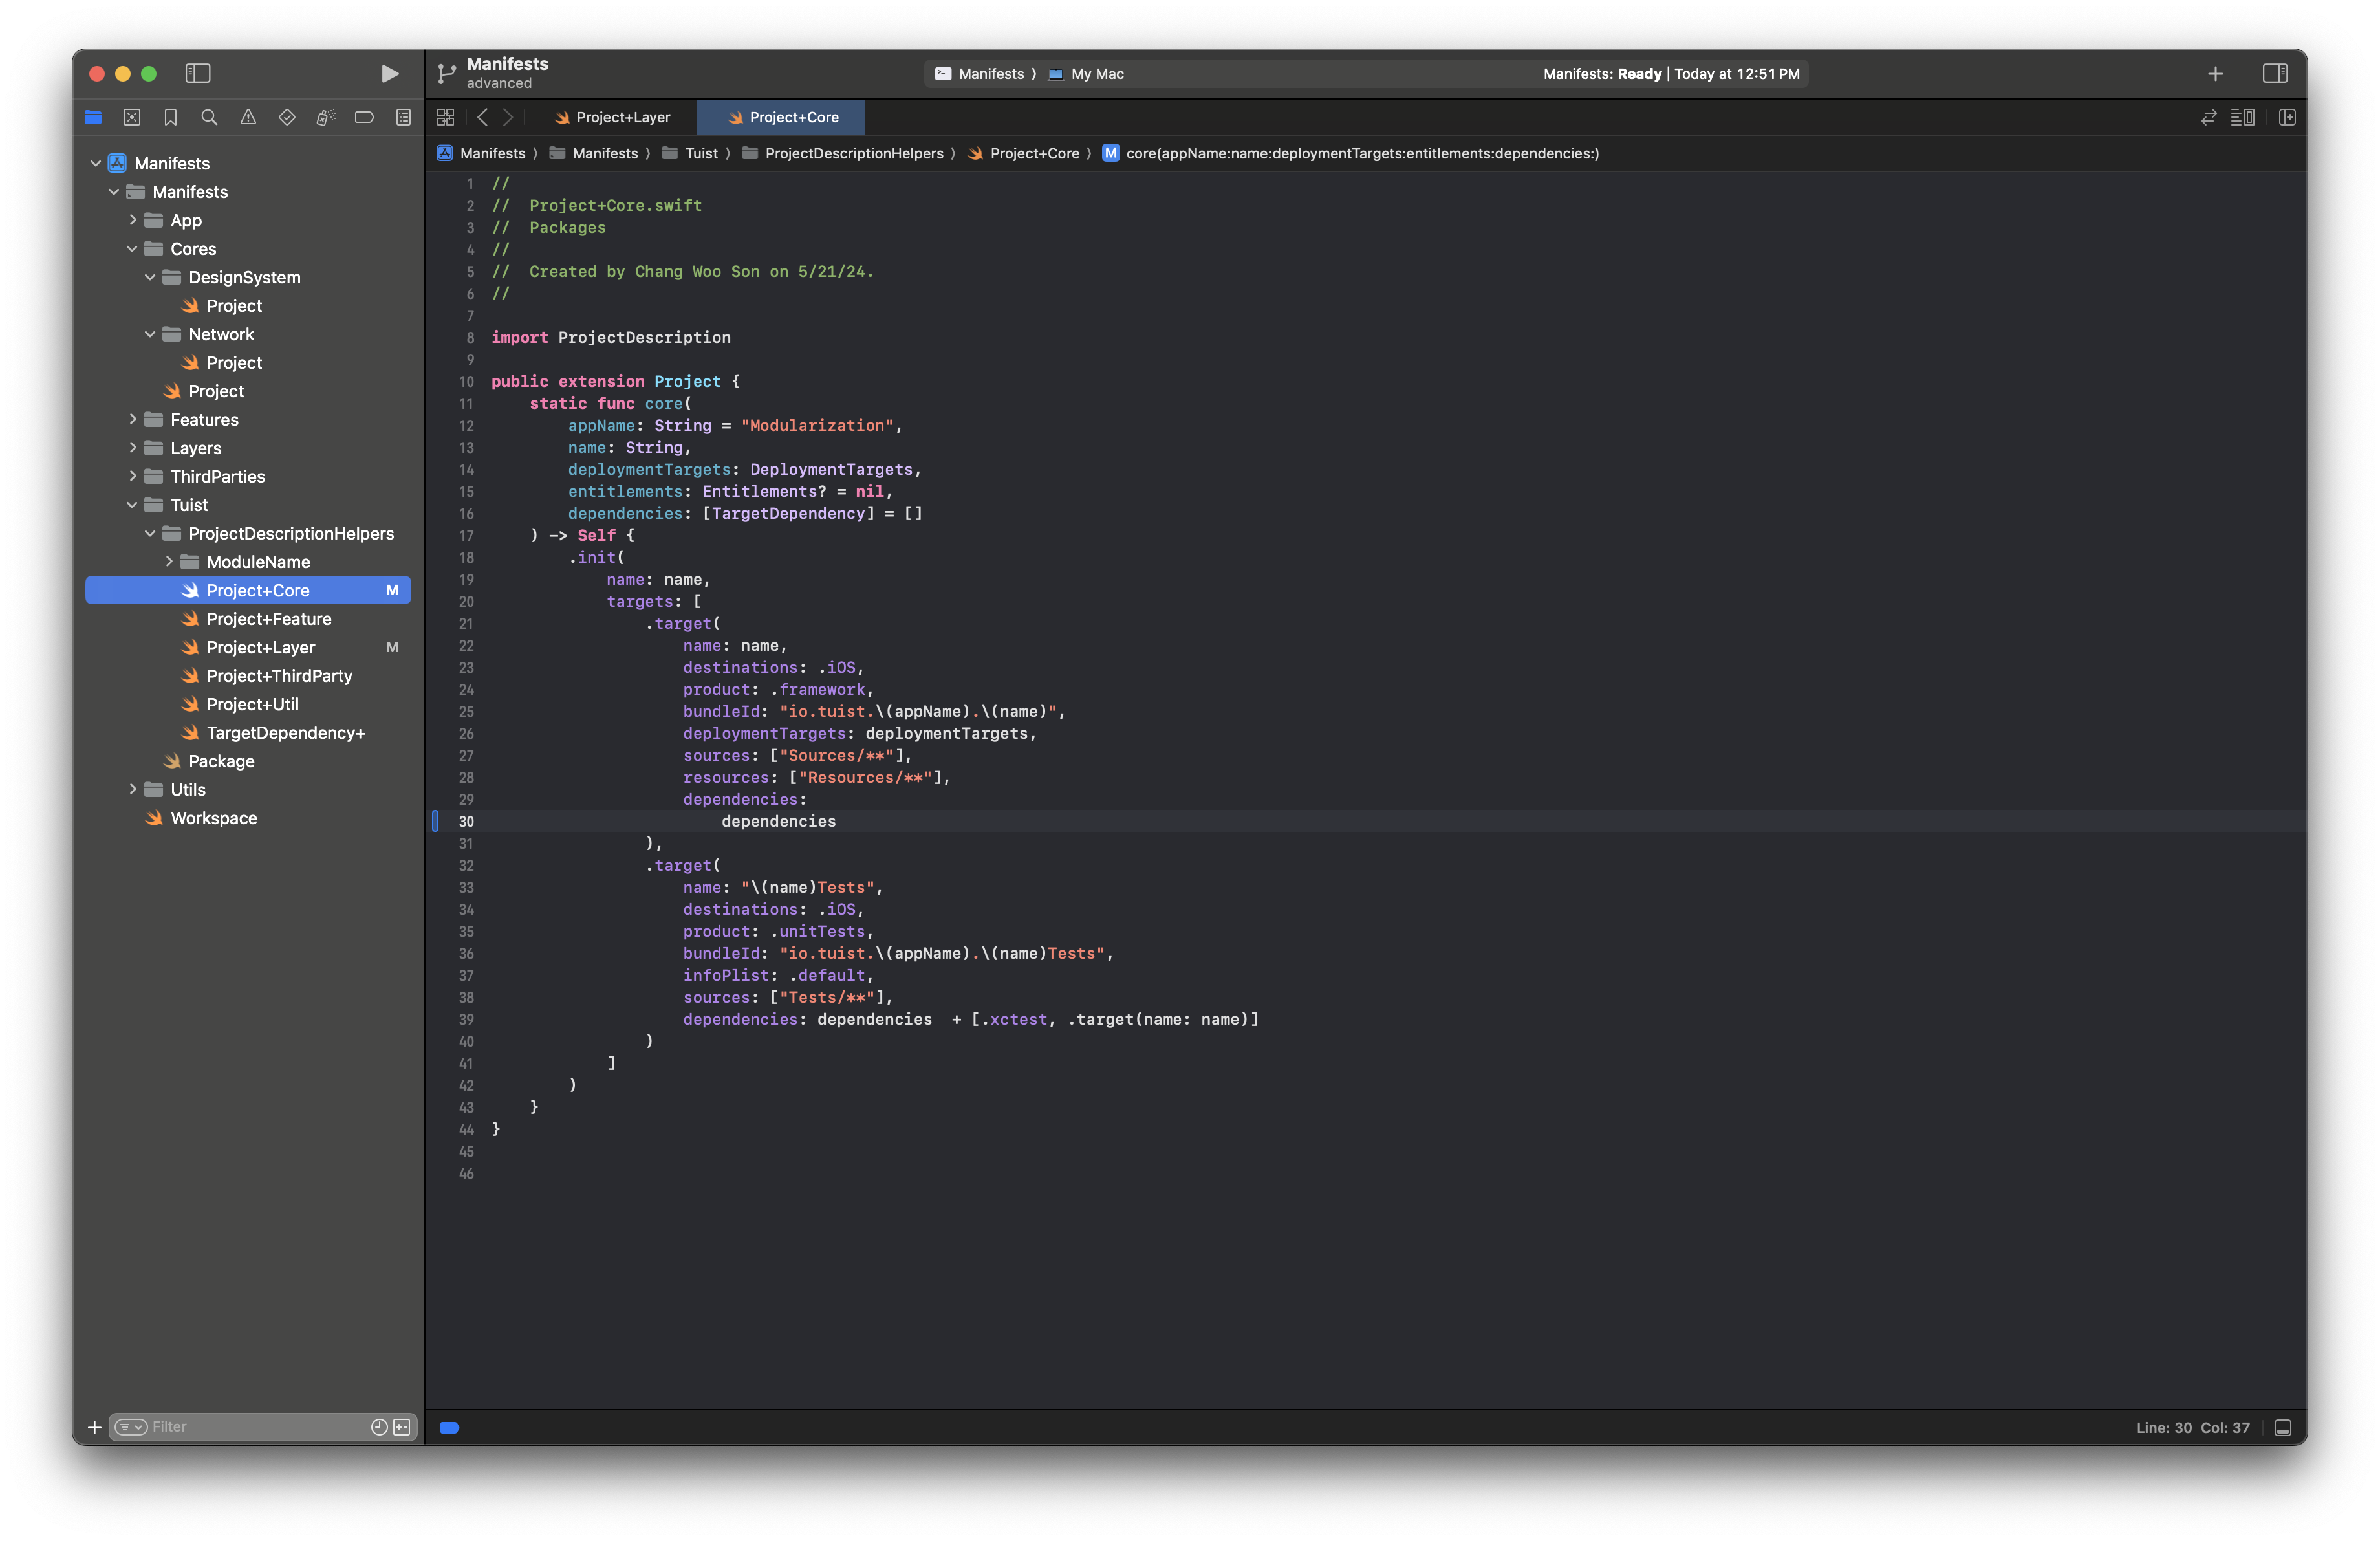
Create a project using a predefined Project extension.
Creates
Interface,UI,Presentation,Testing, andTestsmodules. (Exampleis added when needed.)Interface
- Uses a dynamic framework form without extra dependencies.
UI
- Receives required dependencies and includes
NeedleFoundation, interfaces, and presentation dependencies.
- Receives required dependencies and includes
Presentation
- Receives required dependencies, including domain modules for data retrieval.
Layers
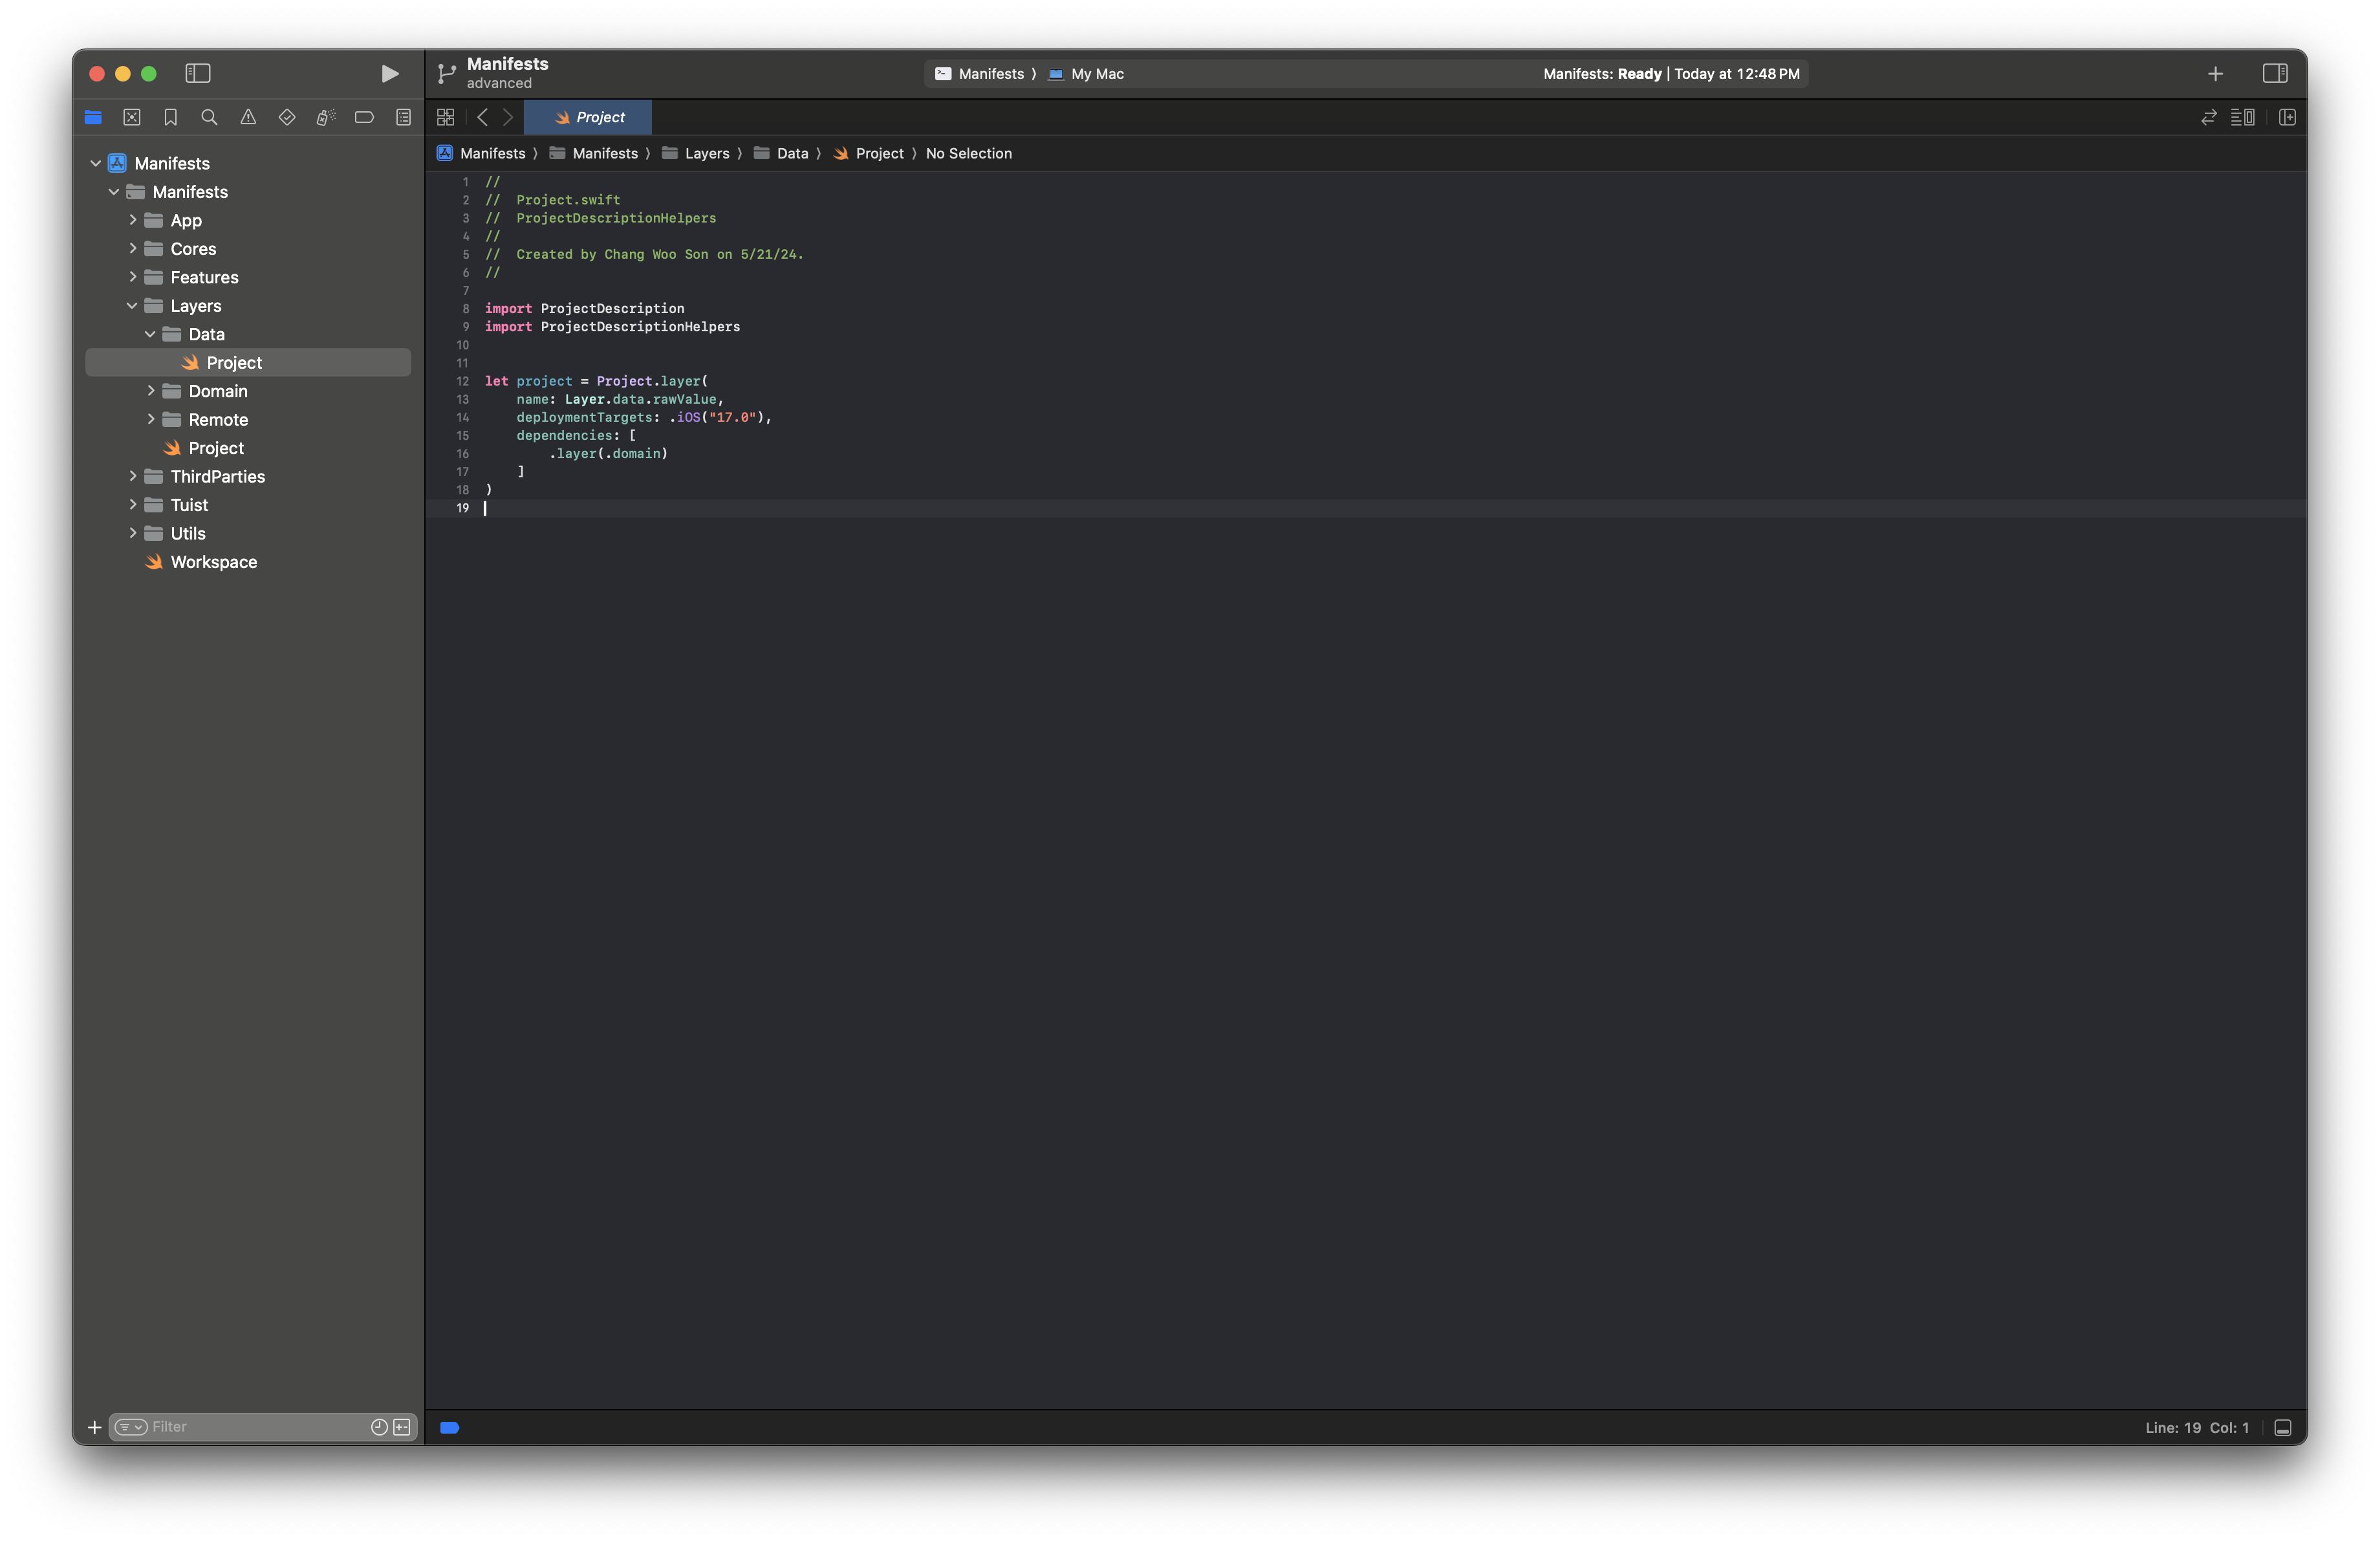
The current layer structure has Domain, Data, and Remote structures.
- Layer-level DI is configured across the entire app.
The ownership relationship is Domain ← Data ← Remote.
Domain is a dynamic framework
Data and Remote are static libraries.
Cores
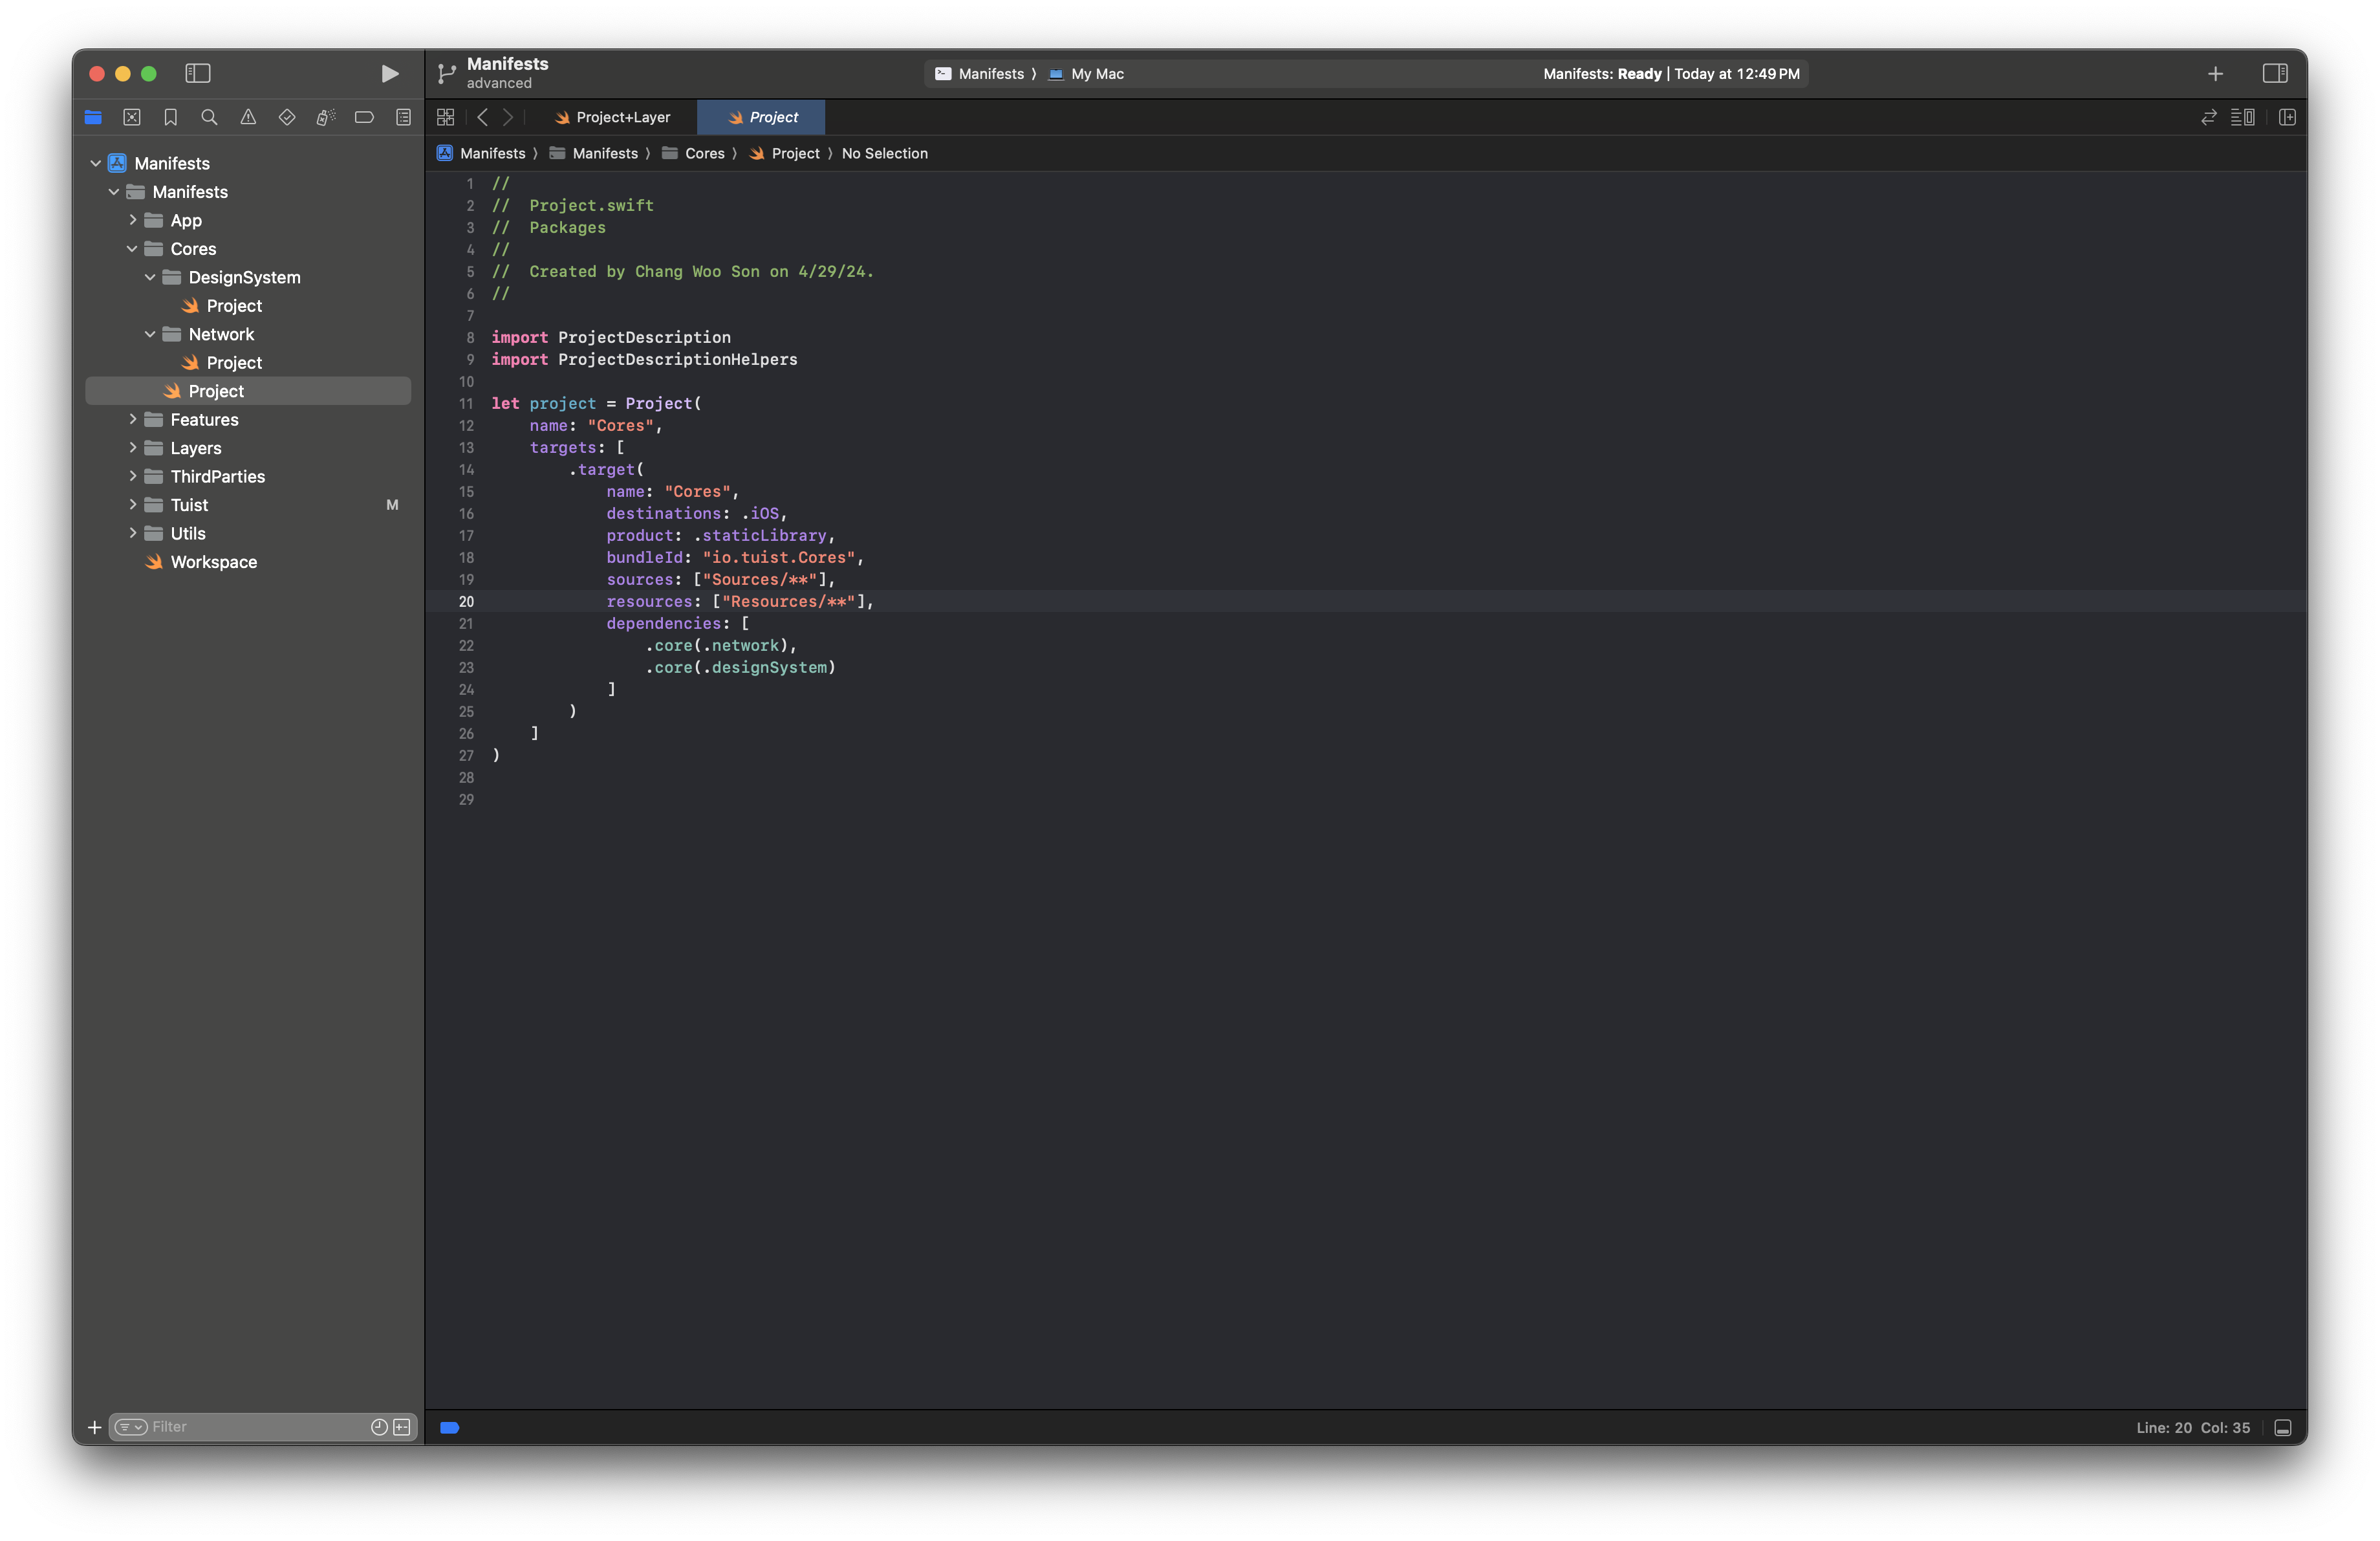
In Core, modules do not depend on each other.
Each module is consumed directly where needed.
In this structure they are dynamic frameworks, but static libraries are also valid when needed.
ThirdParties
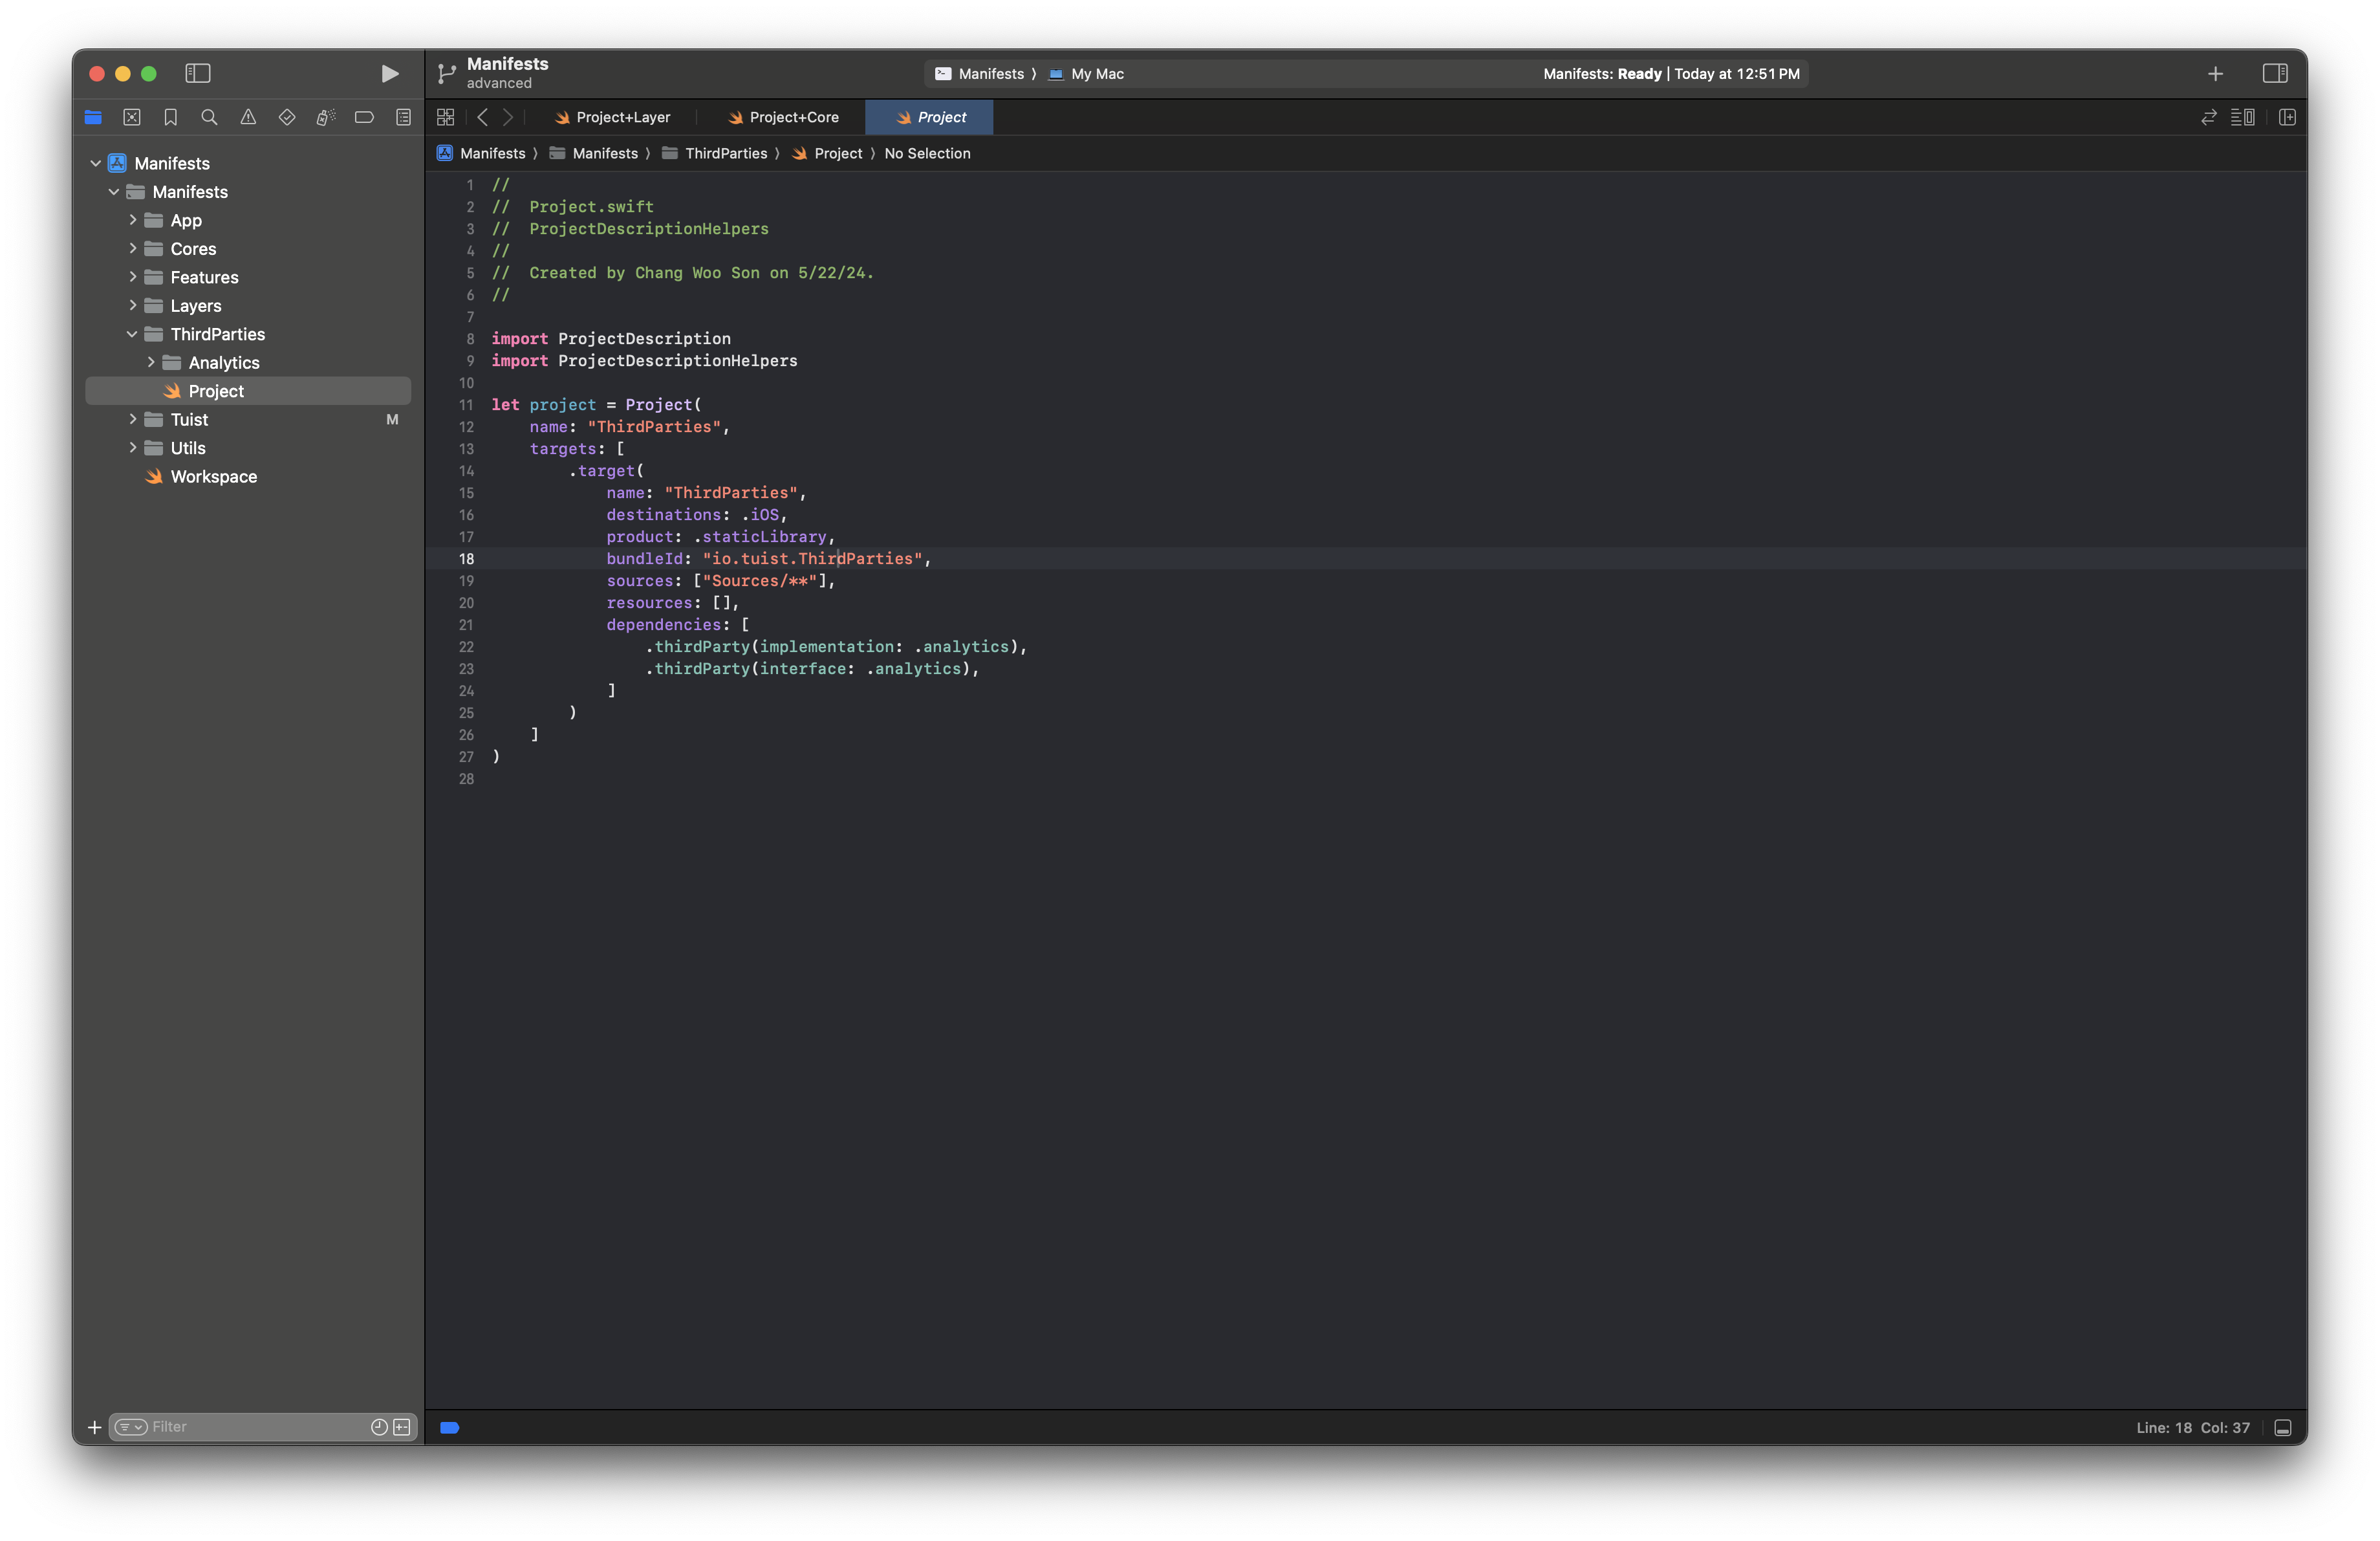

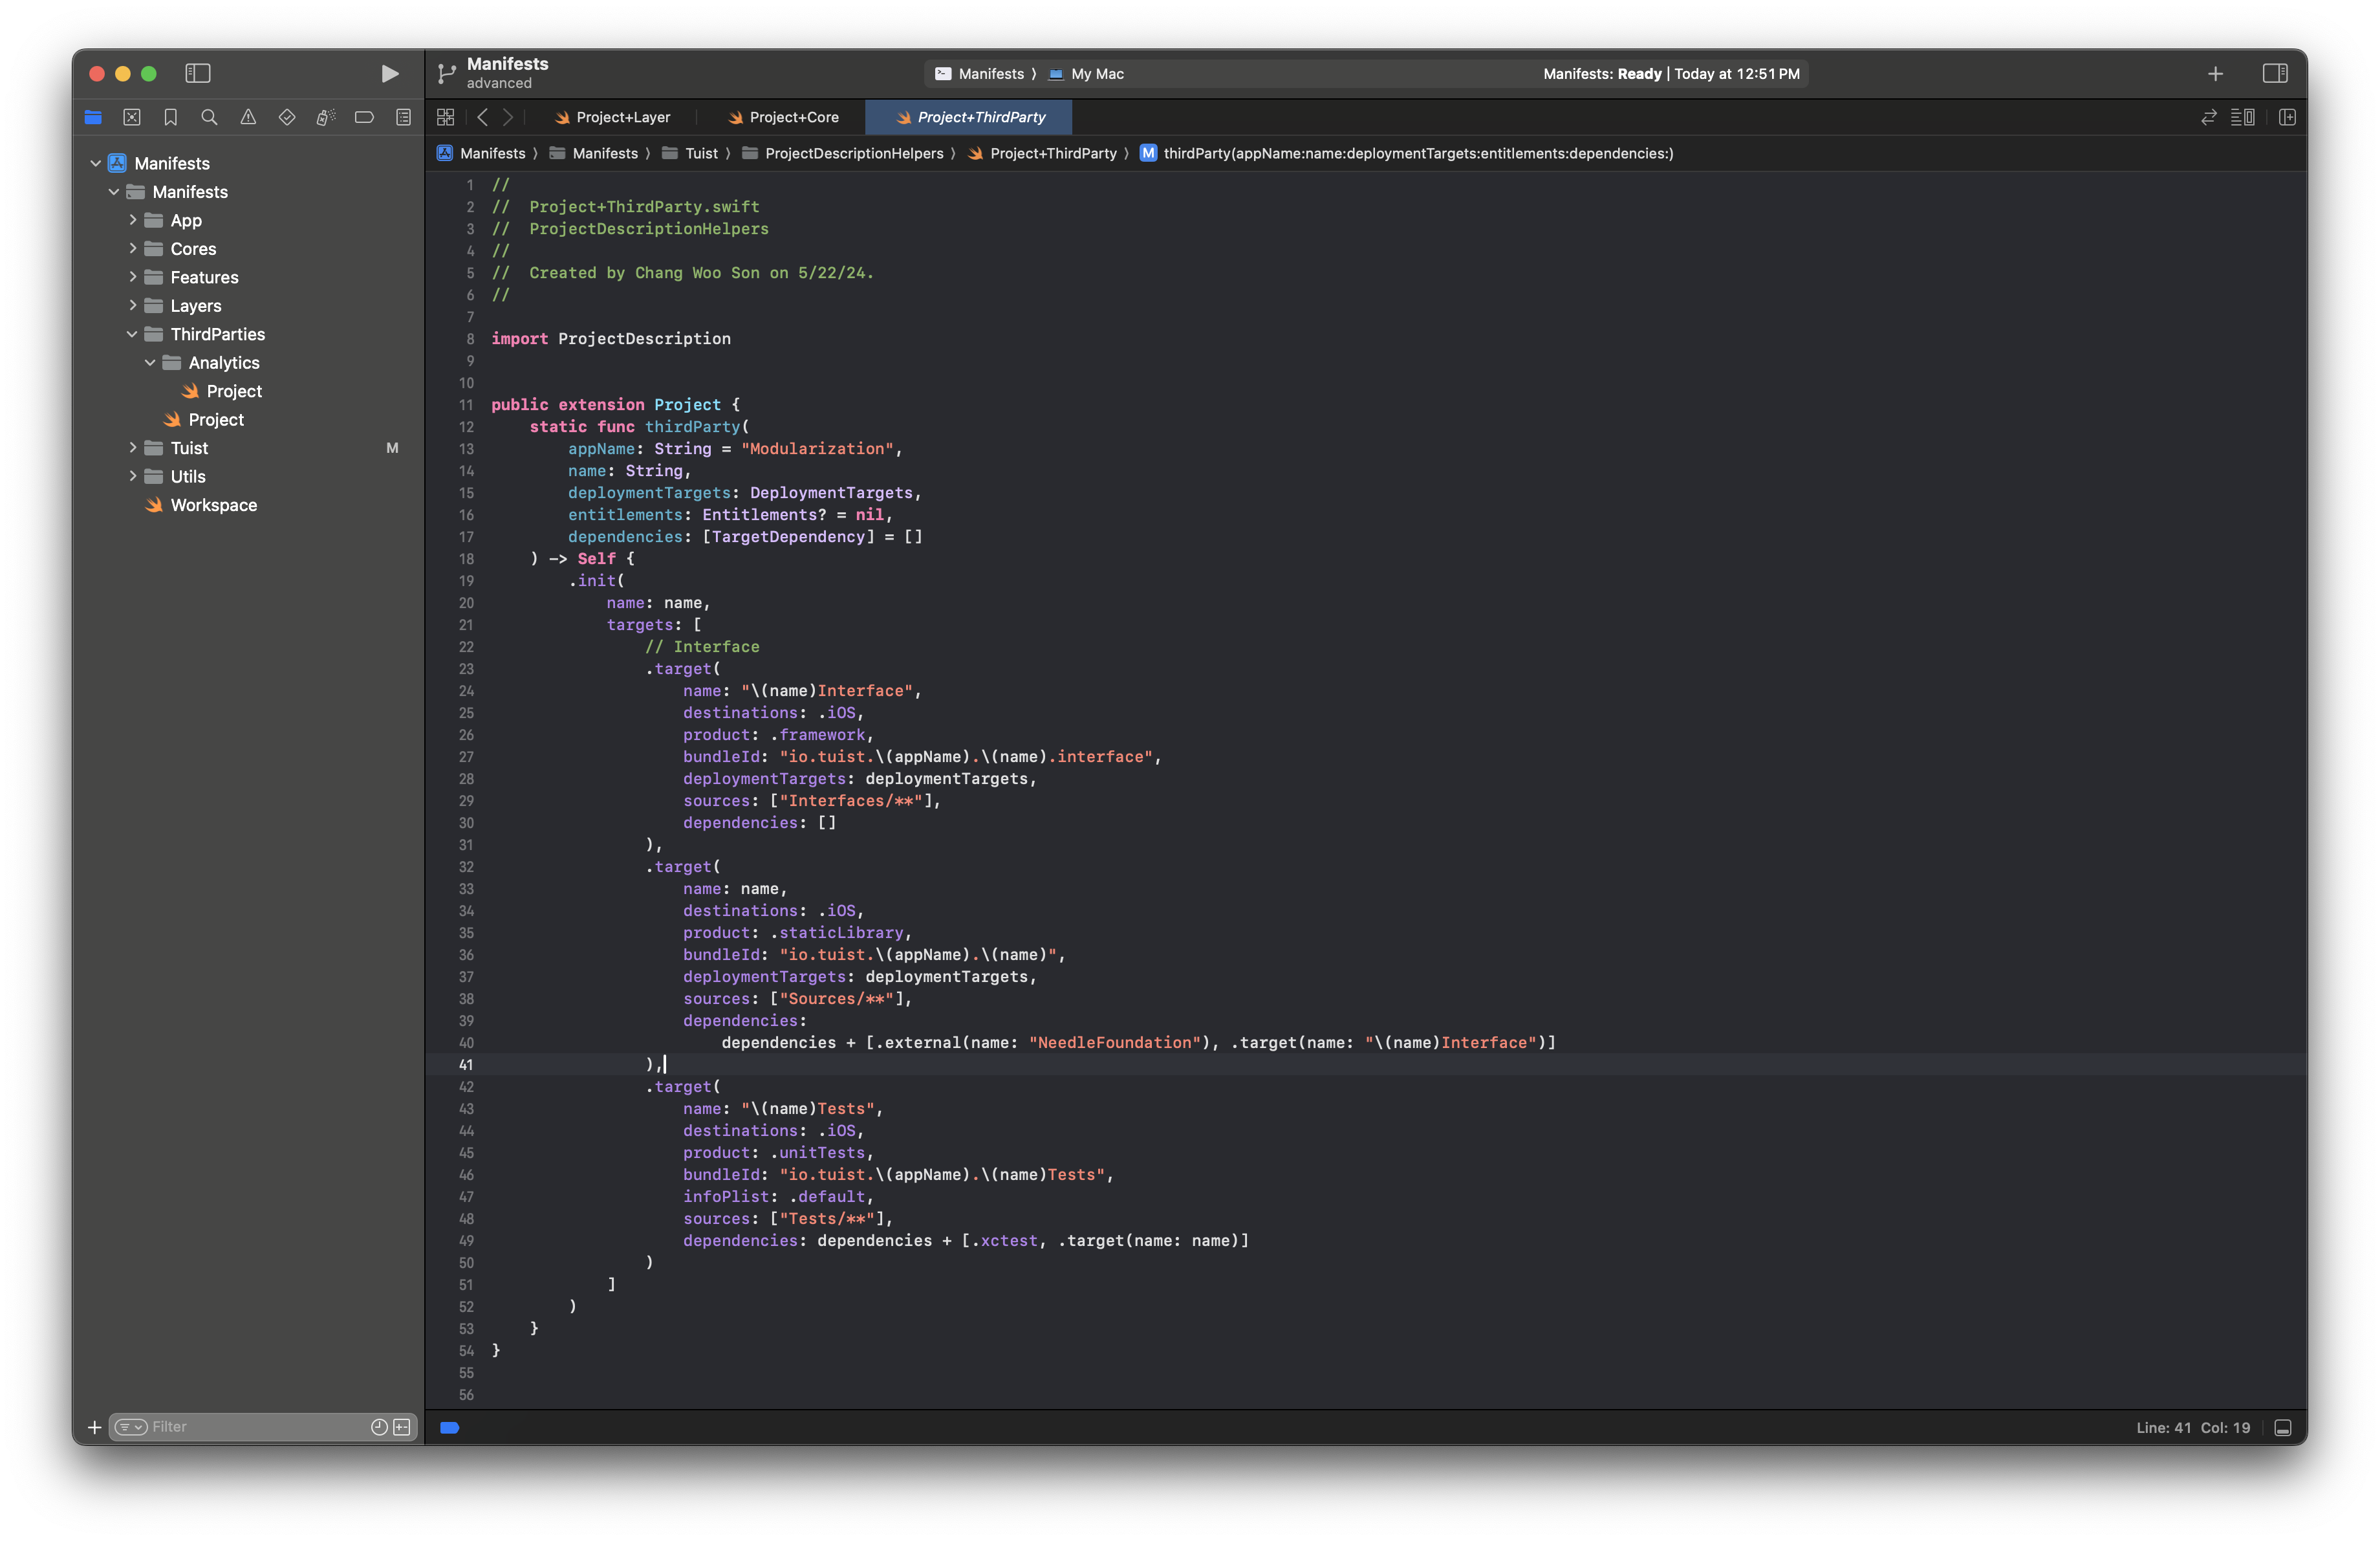
ThirdParty modules are created when interface-based wrapping is needed.
Wrapped third-party libraries are not called directly elsewhere; only internal implementation modules reference them.
Access these modules through interfaces.
Utils
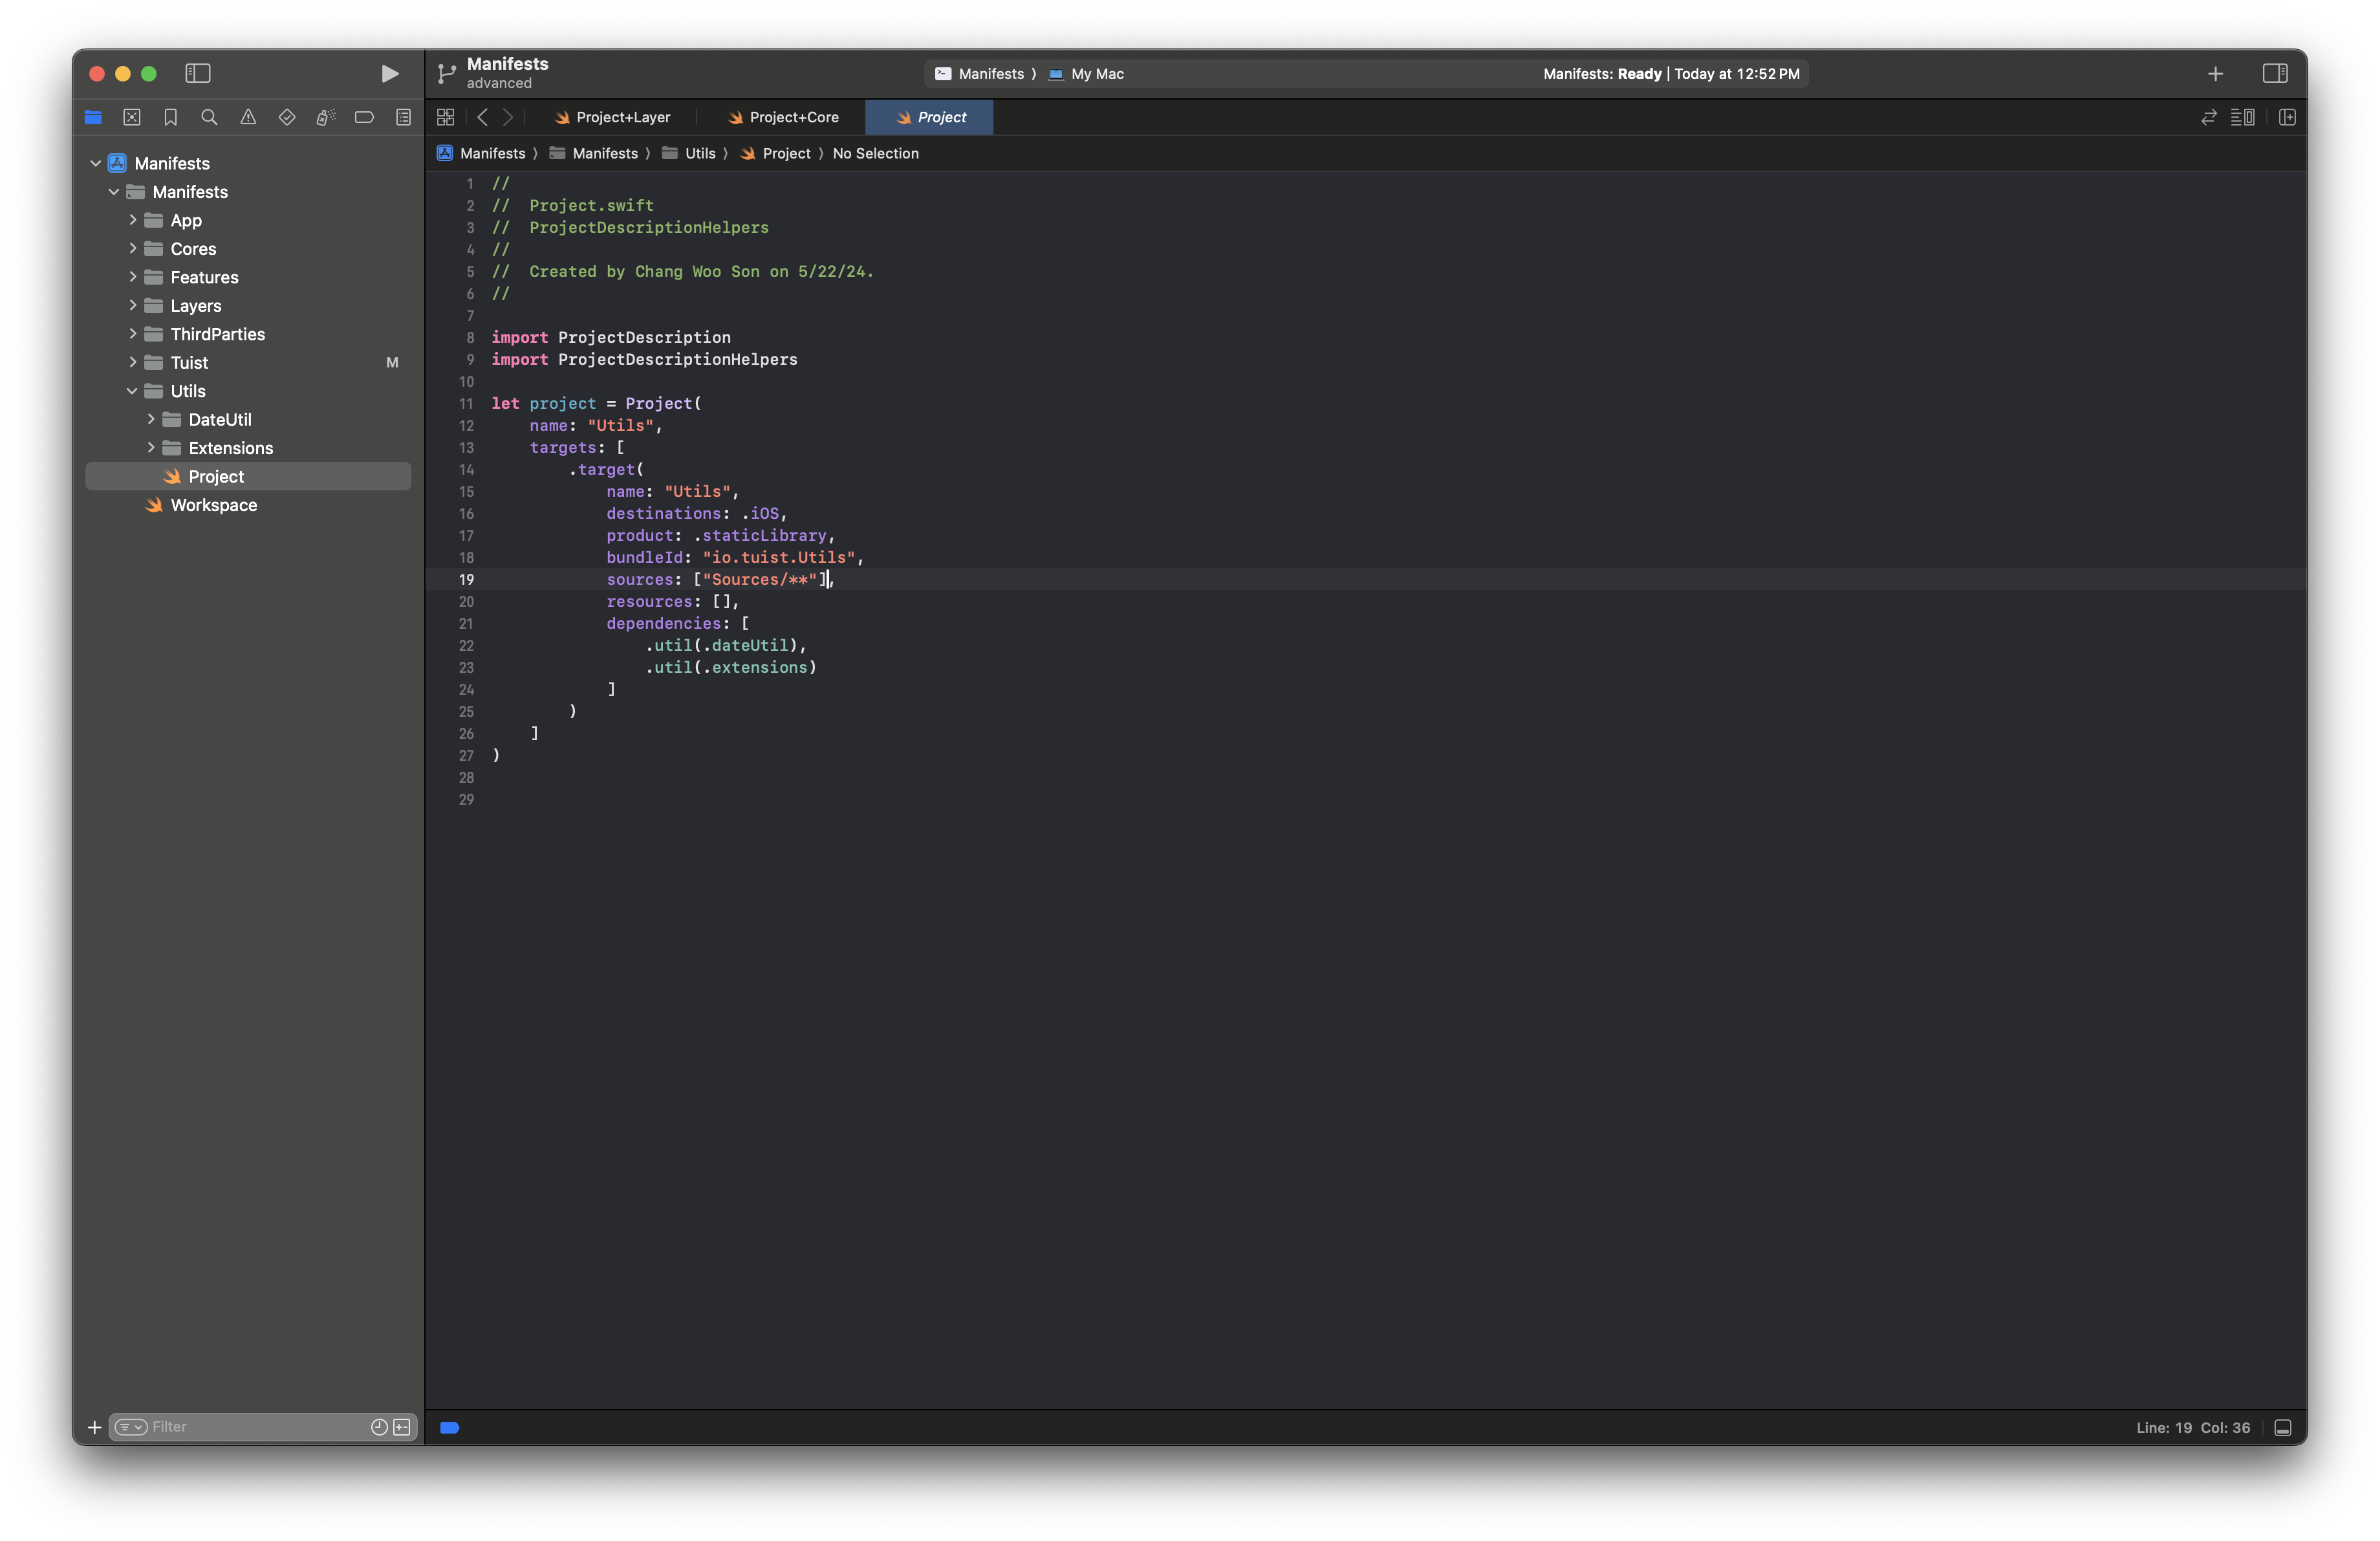
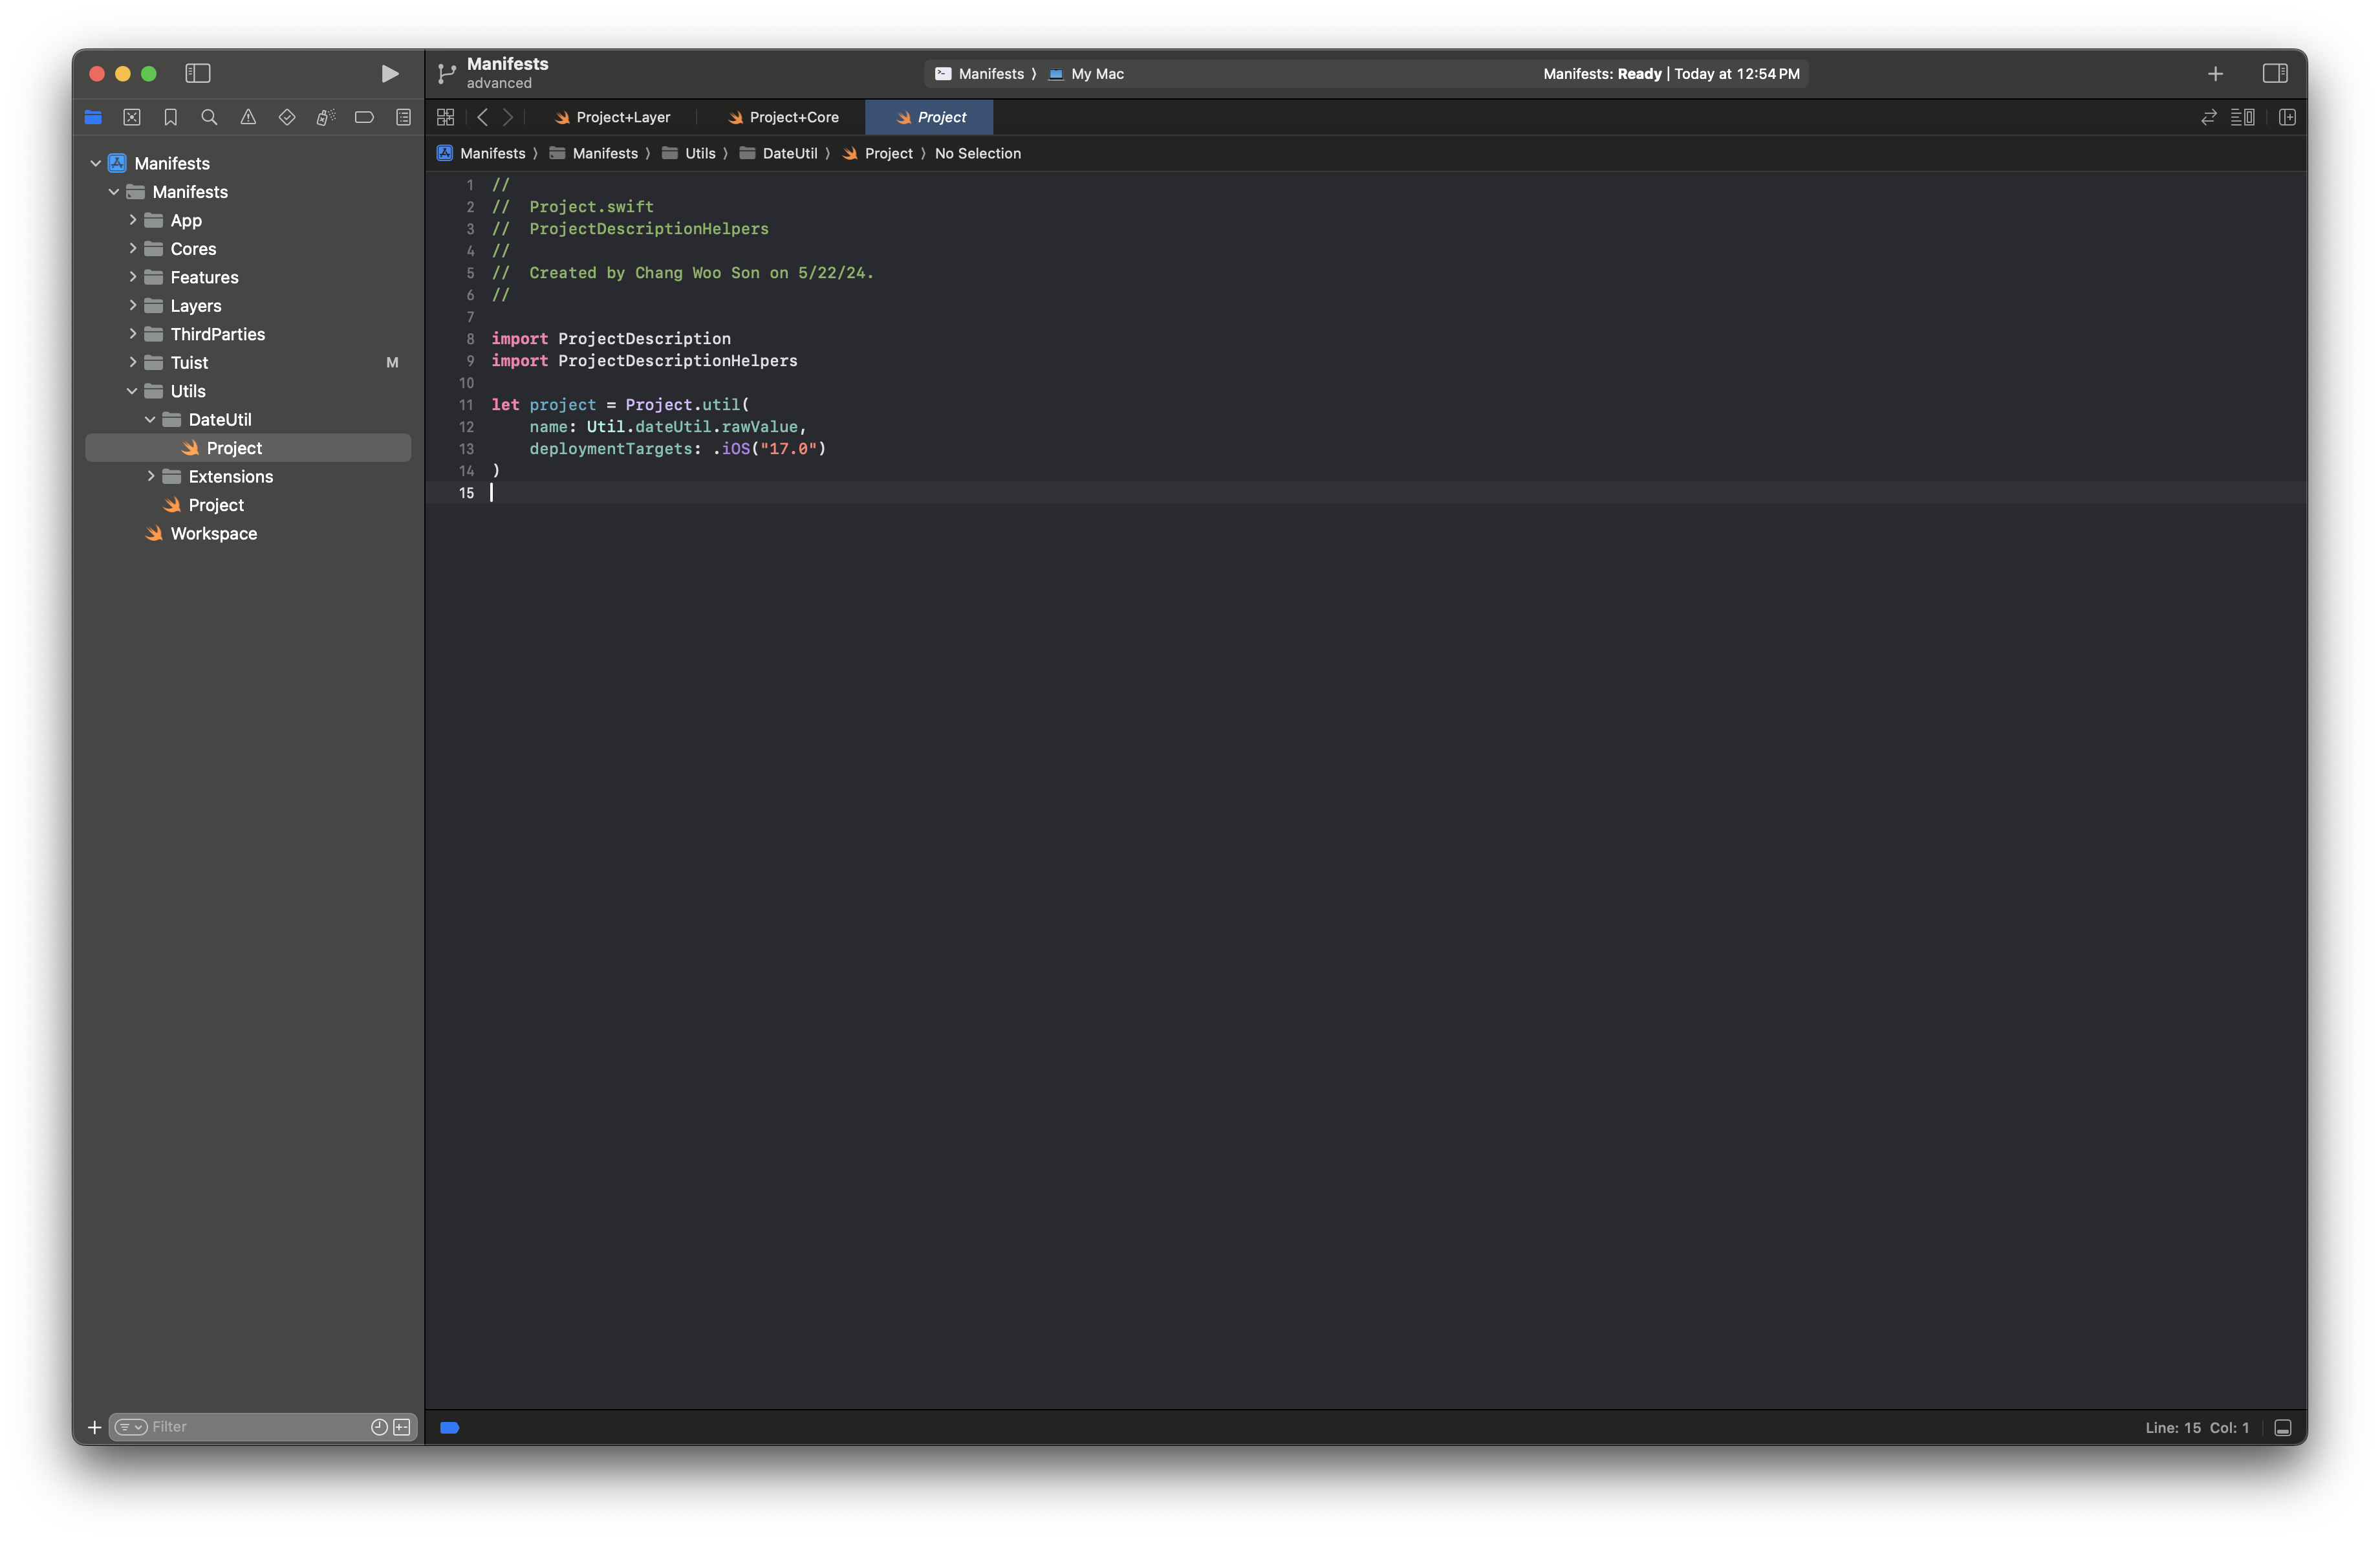
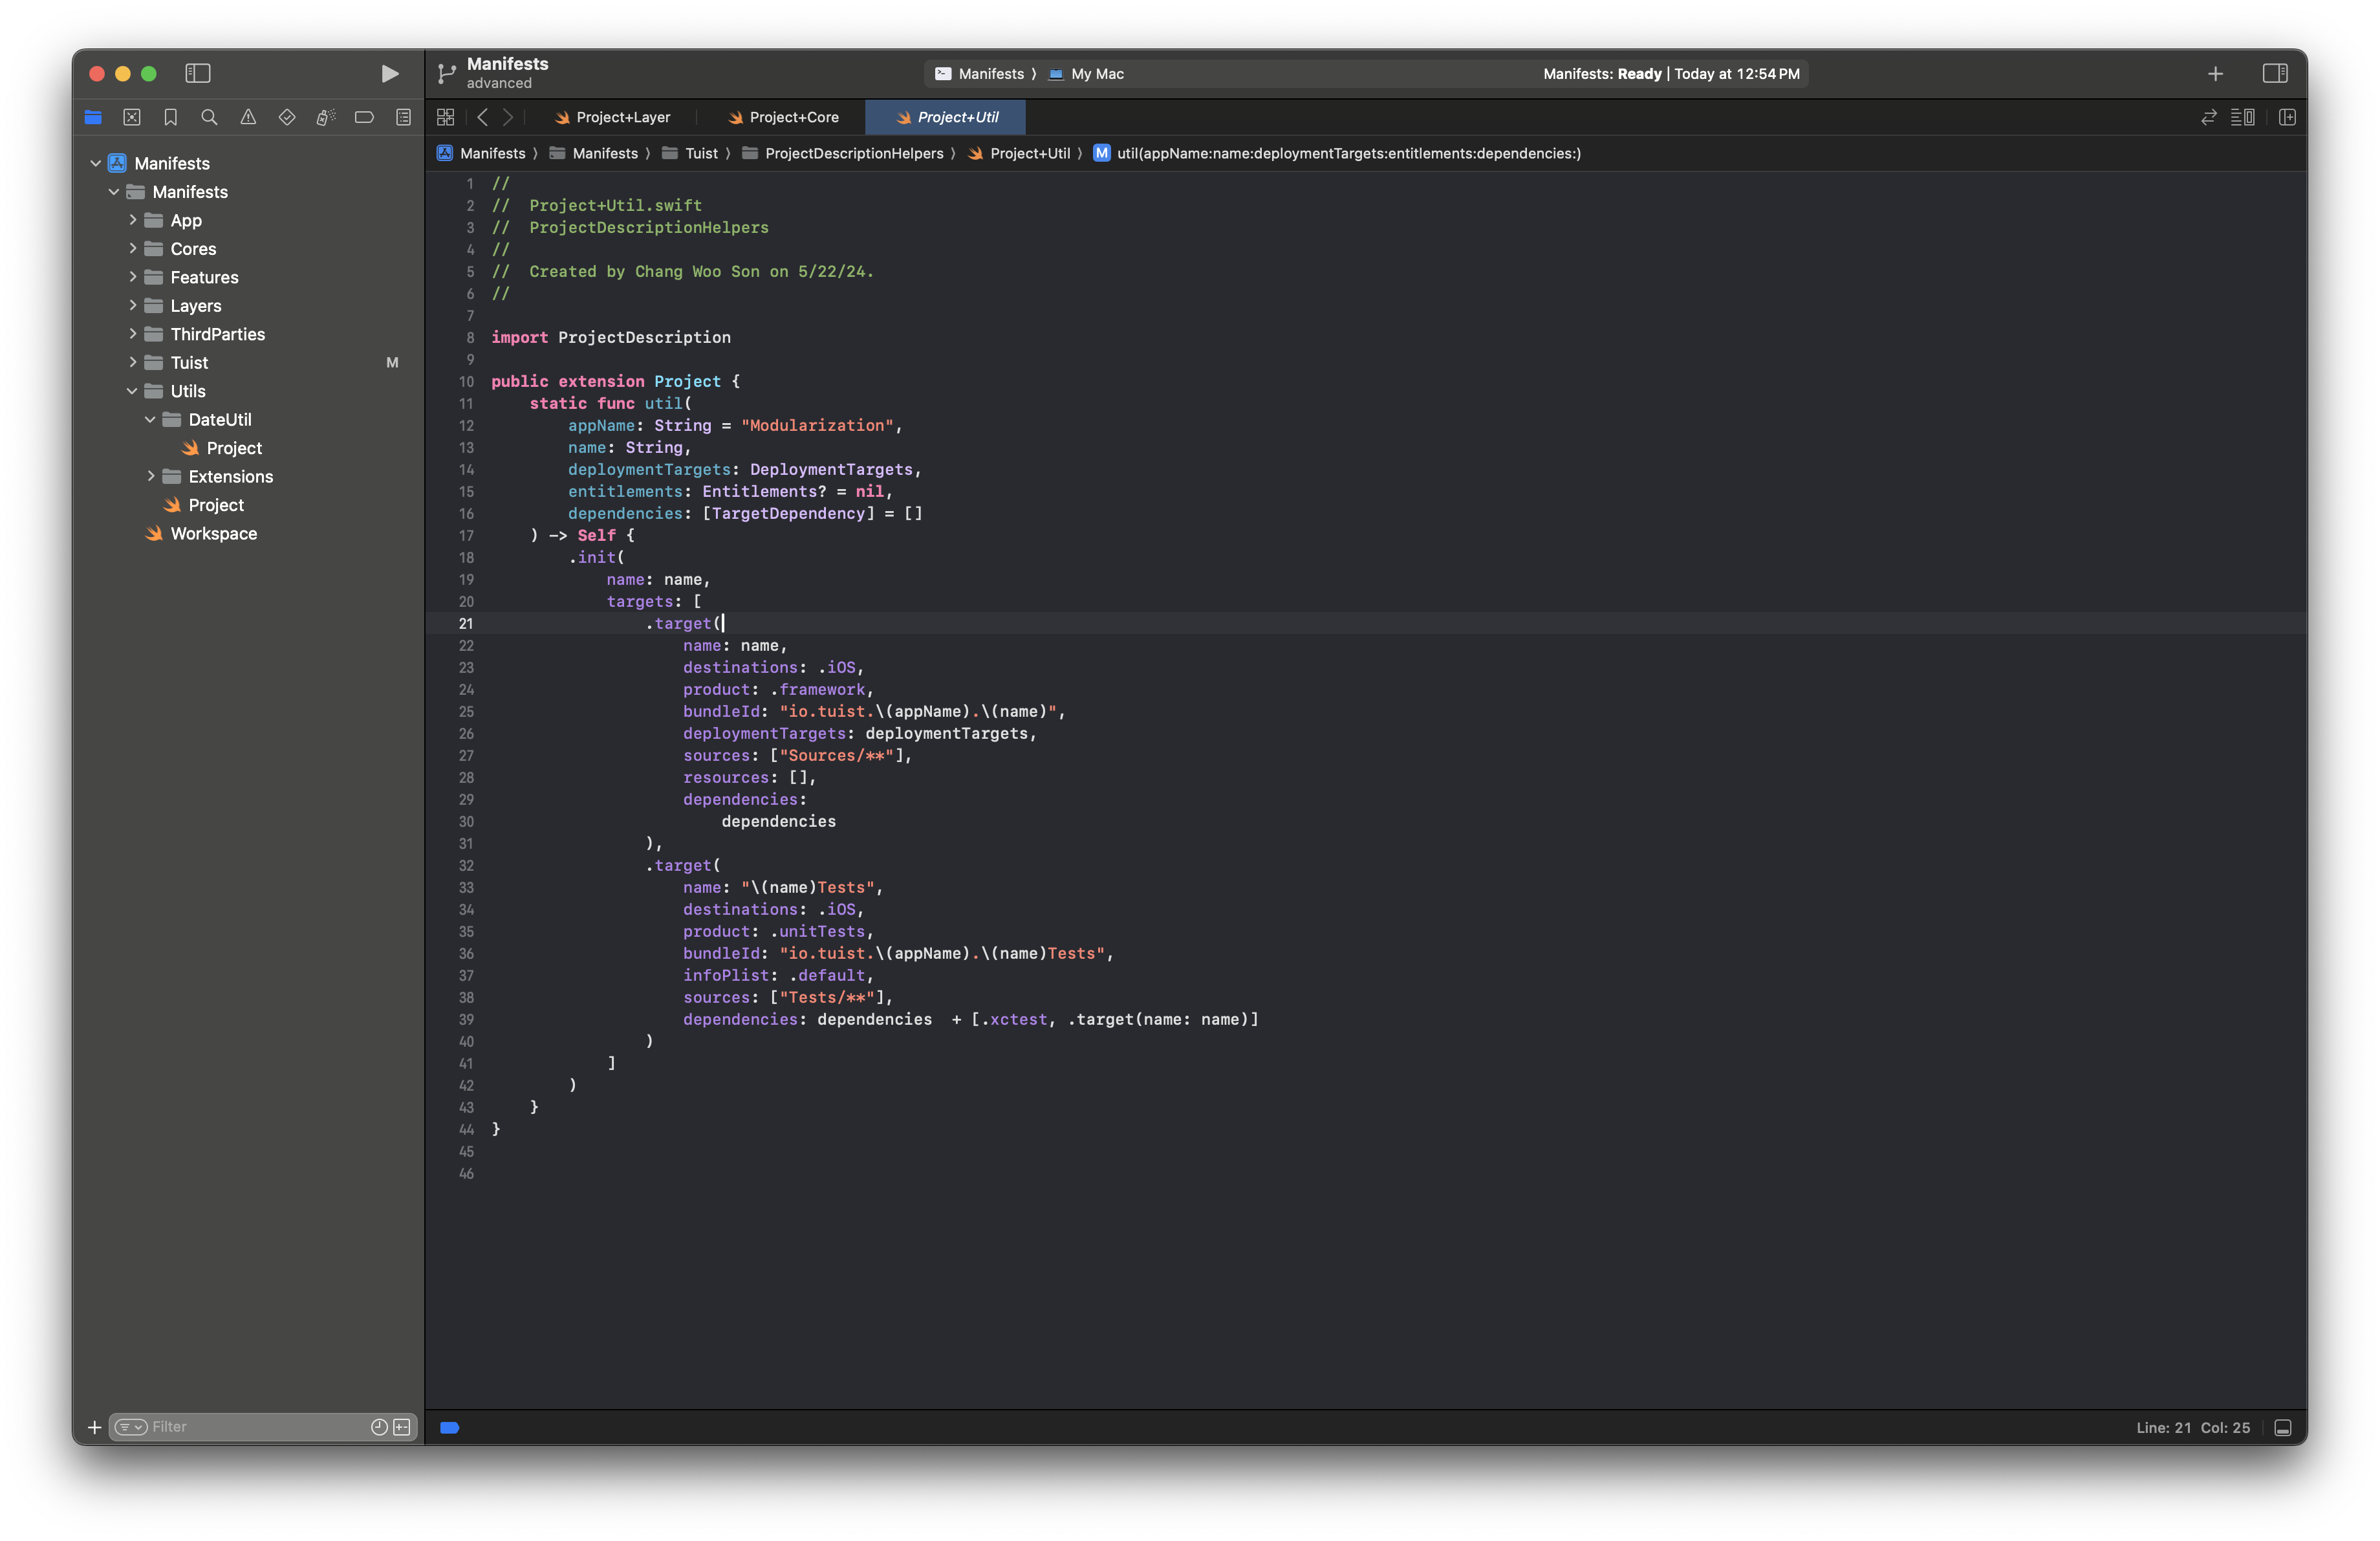
Like Core, Util modules do not depend on each other.
- Each module is consumed directly where needed.
Helper extensions
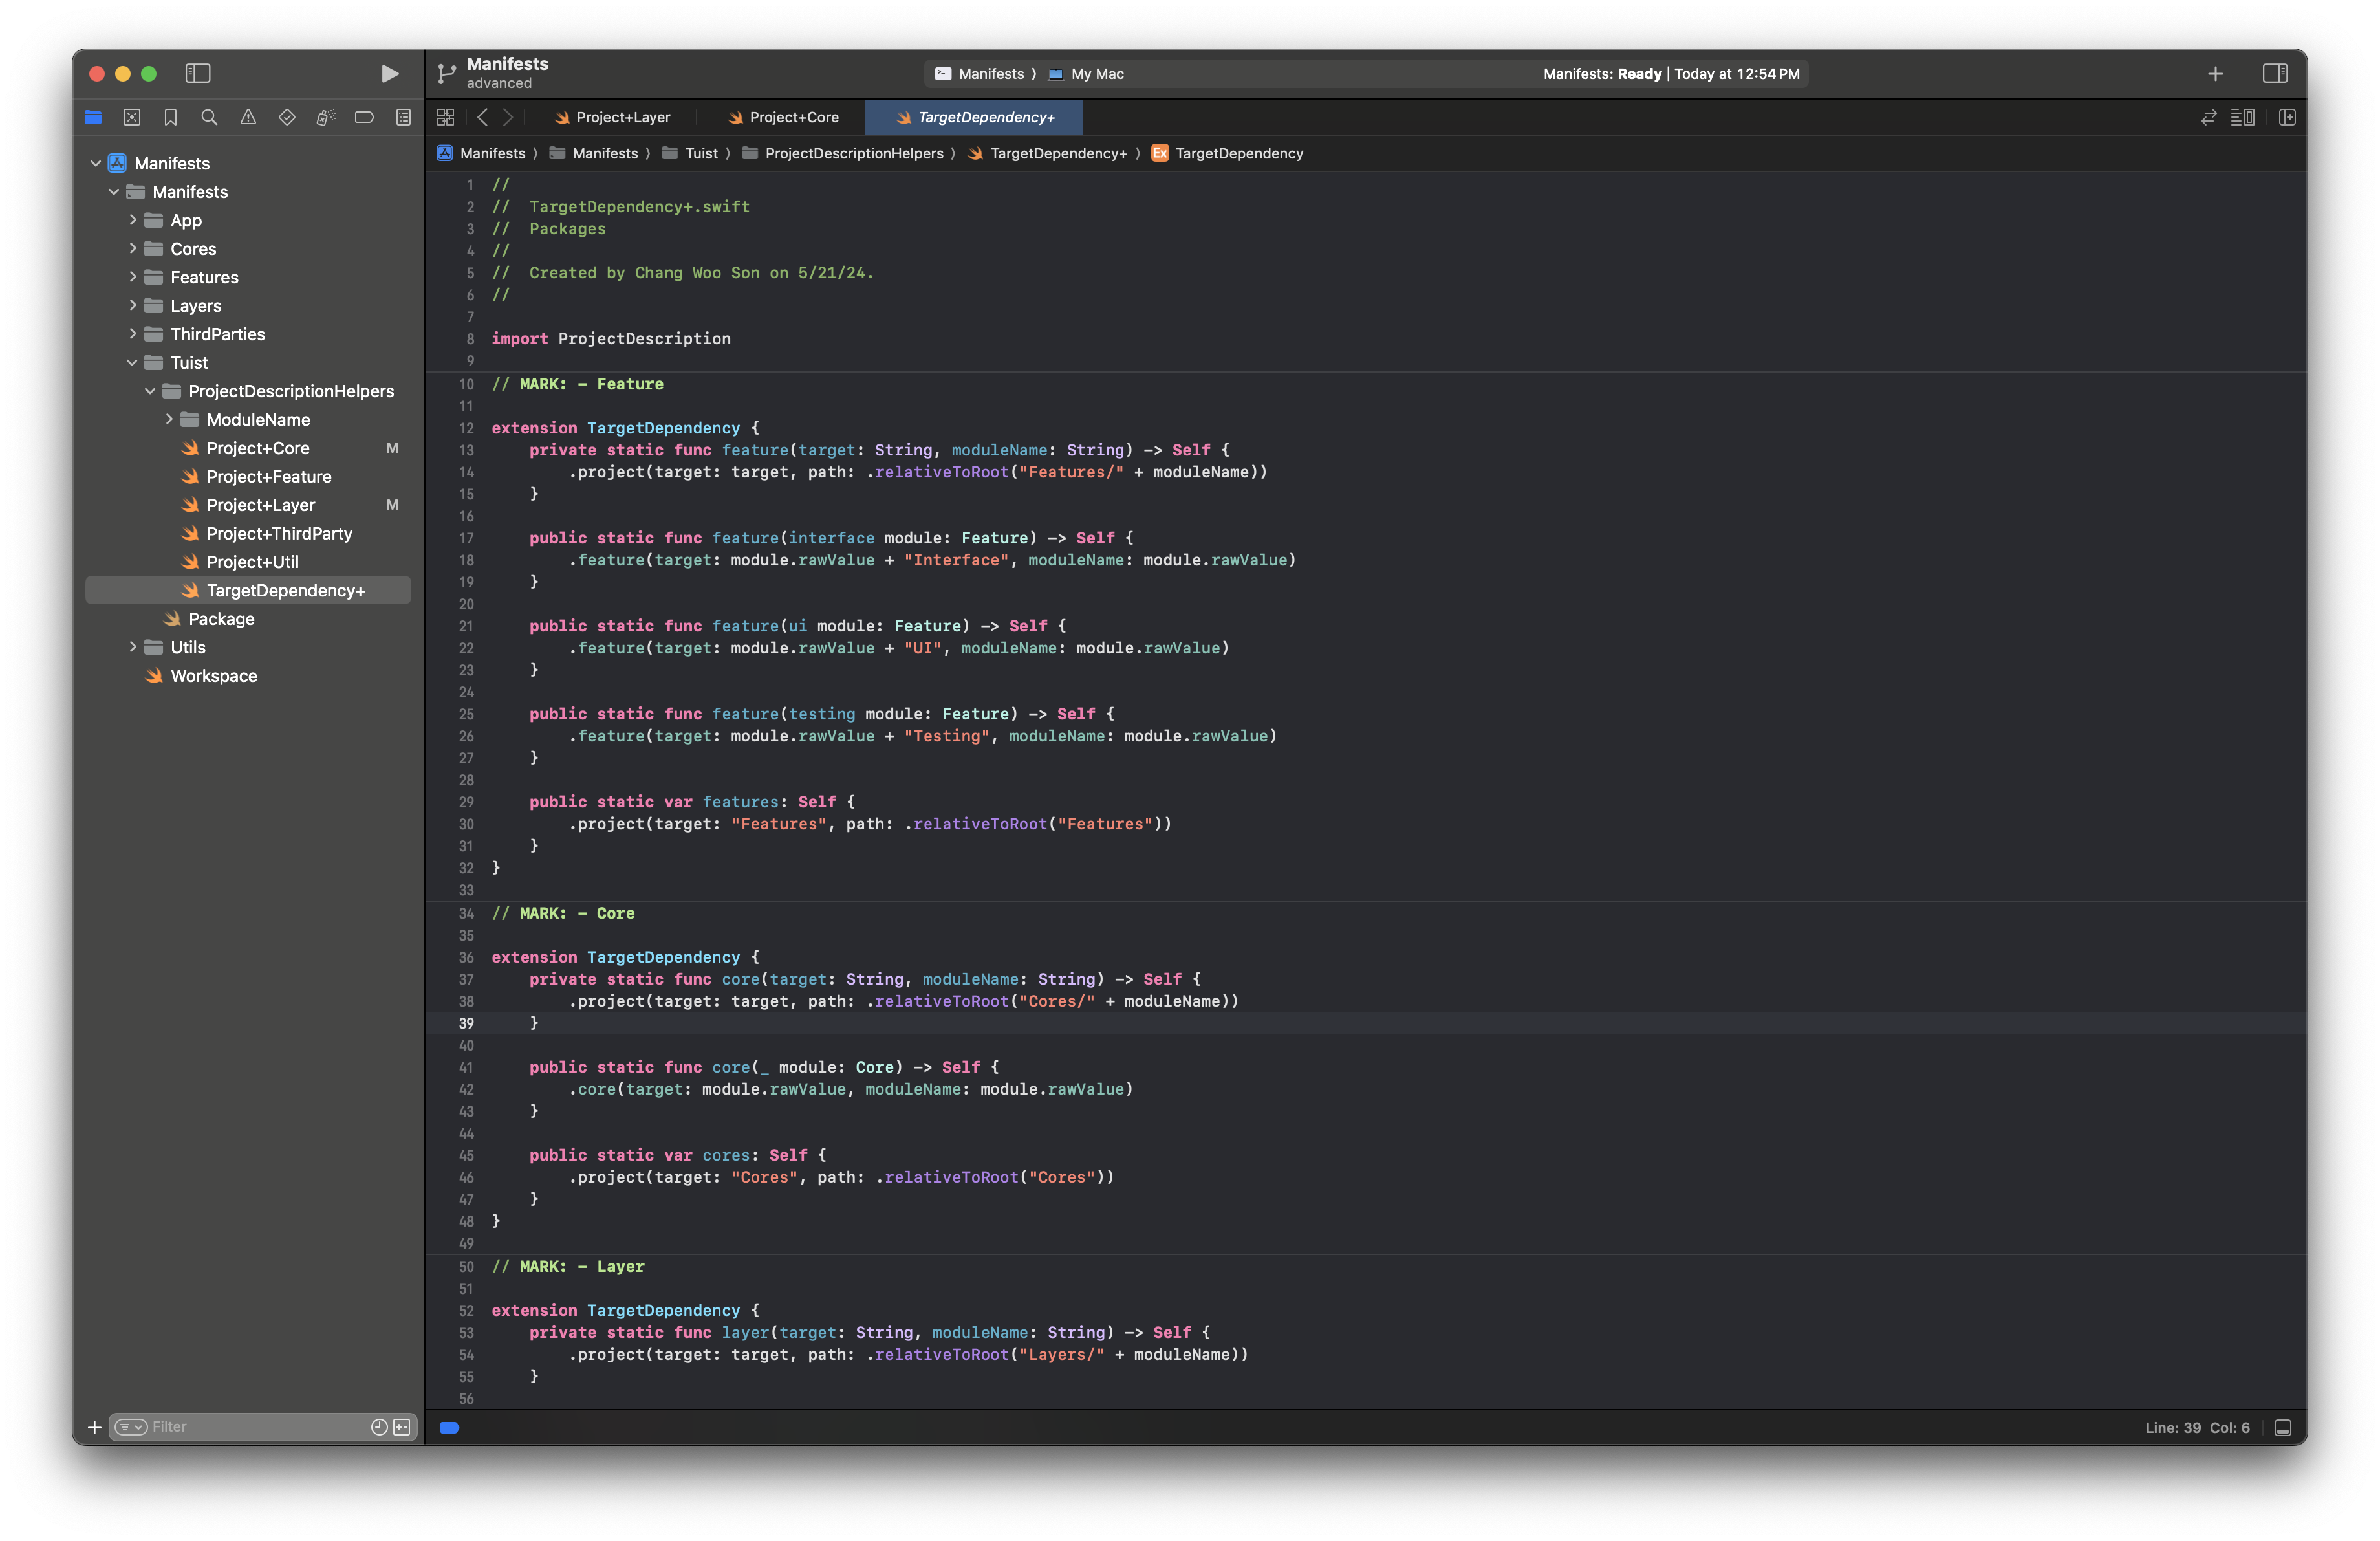
As the number of modules grows, hard-coded module names/strings become more error-prone.
Helper extensions reduce those manual errors.
Write DI and basic code inside the app
We previously checked how to create a project through tuist edit.
Now let’s implement DI and verify that DIP works in practice.
DI Authoring with NeedleFoundation
- We use Needle as the DI framework.
Feature-level DI is configured in
Features.Layer-level DI is configured across the app.
Third-party DI is configured through
ApporThirdParties, depending on context.
A closer look at the Feature module

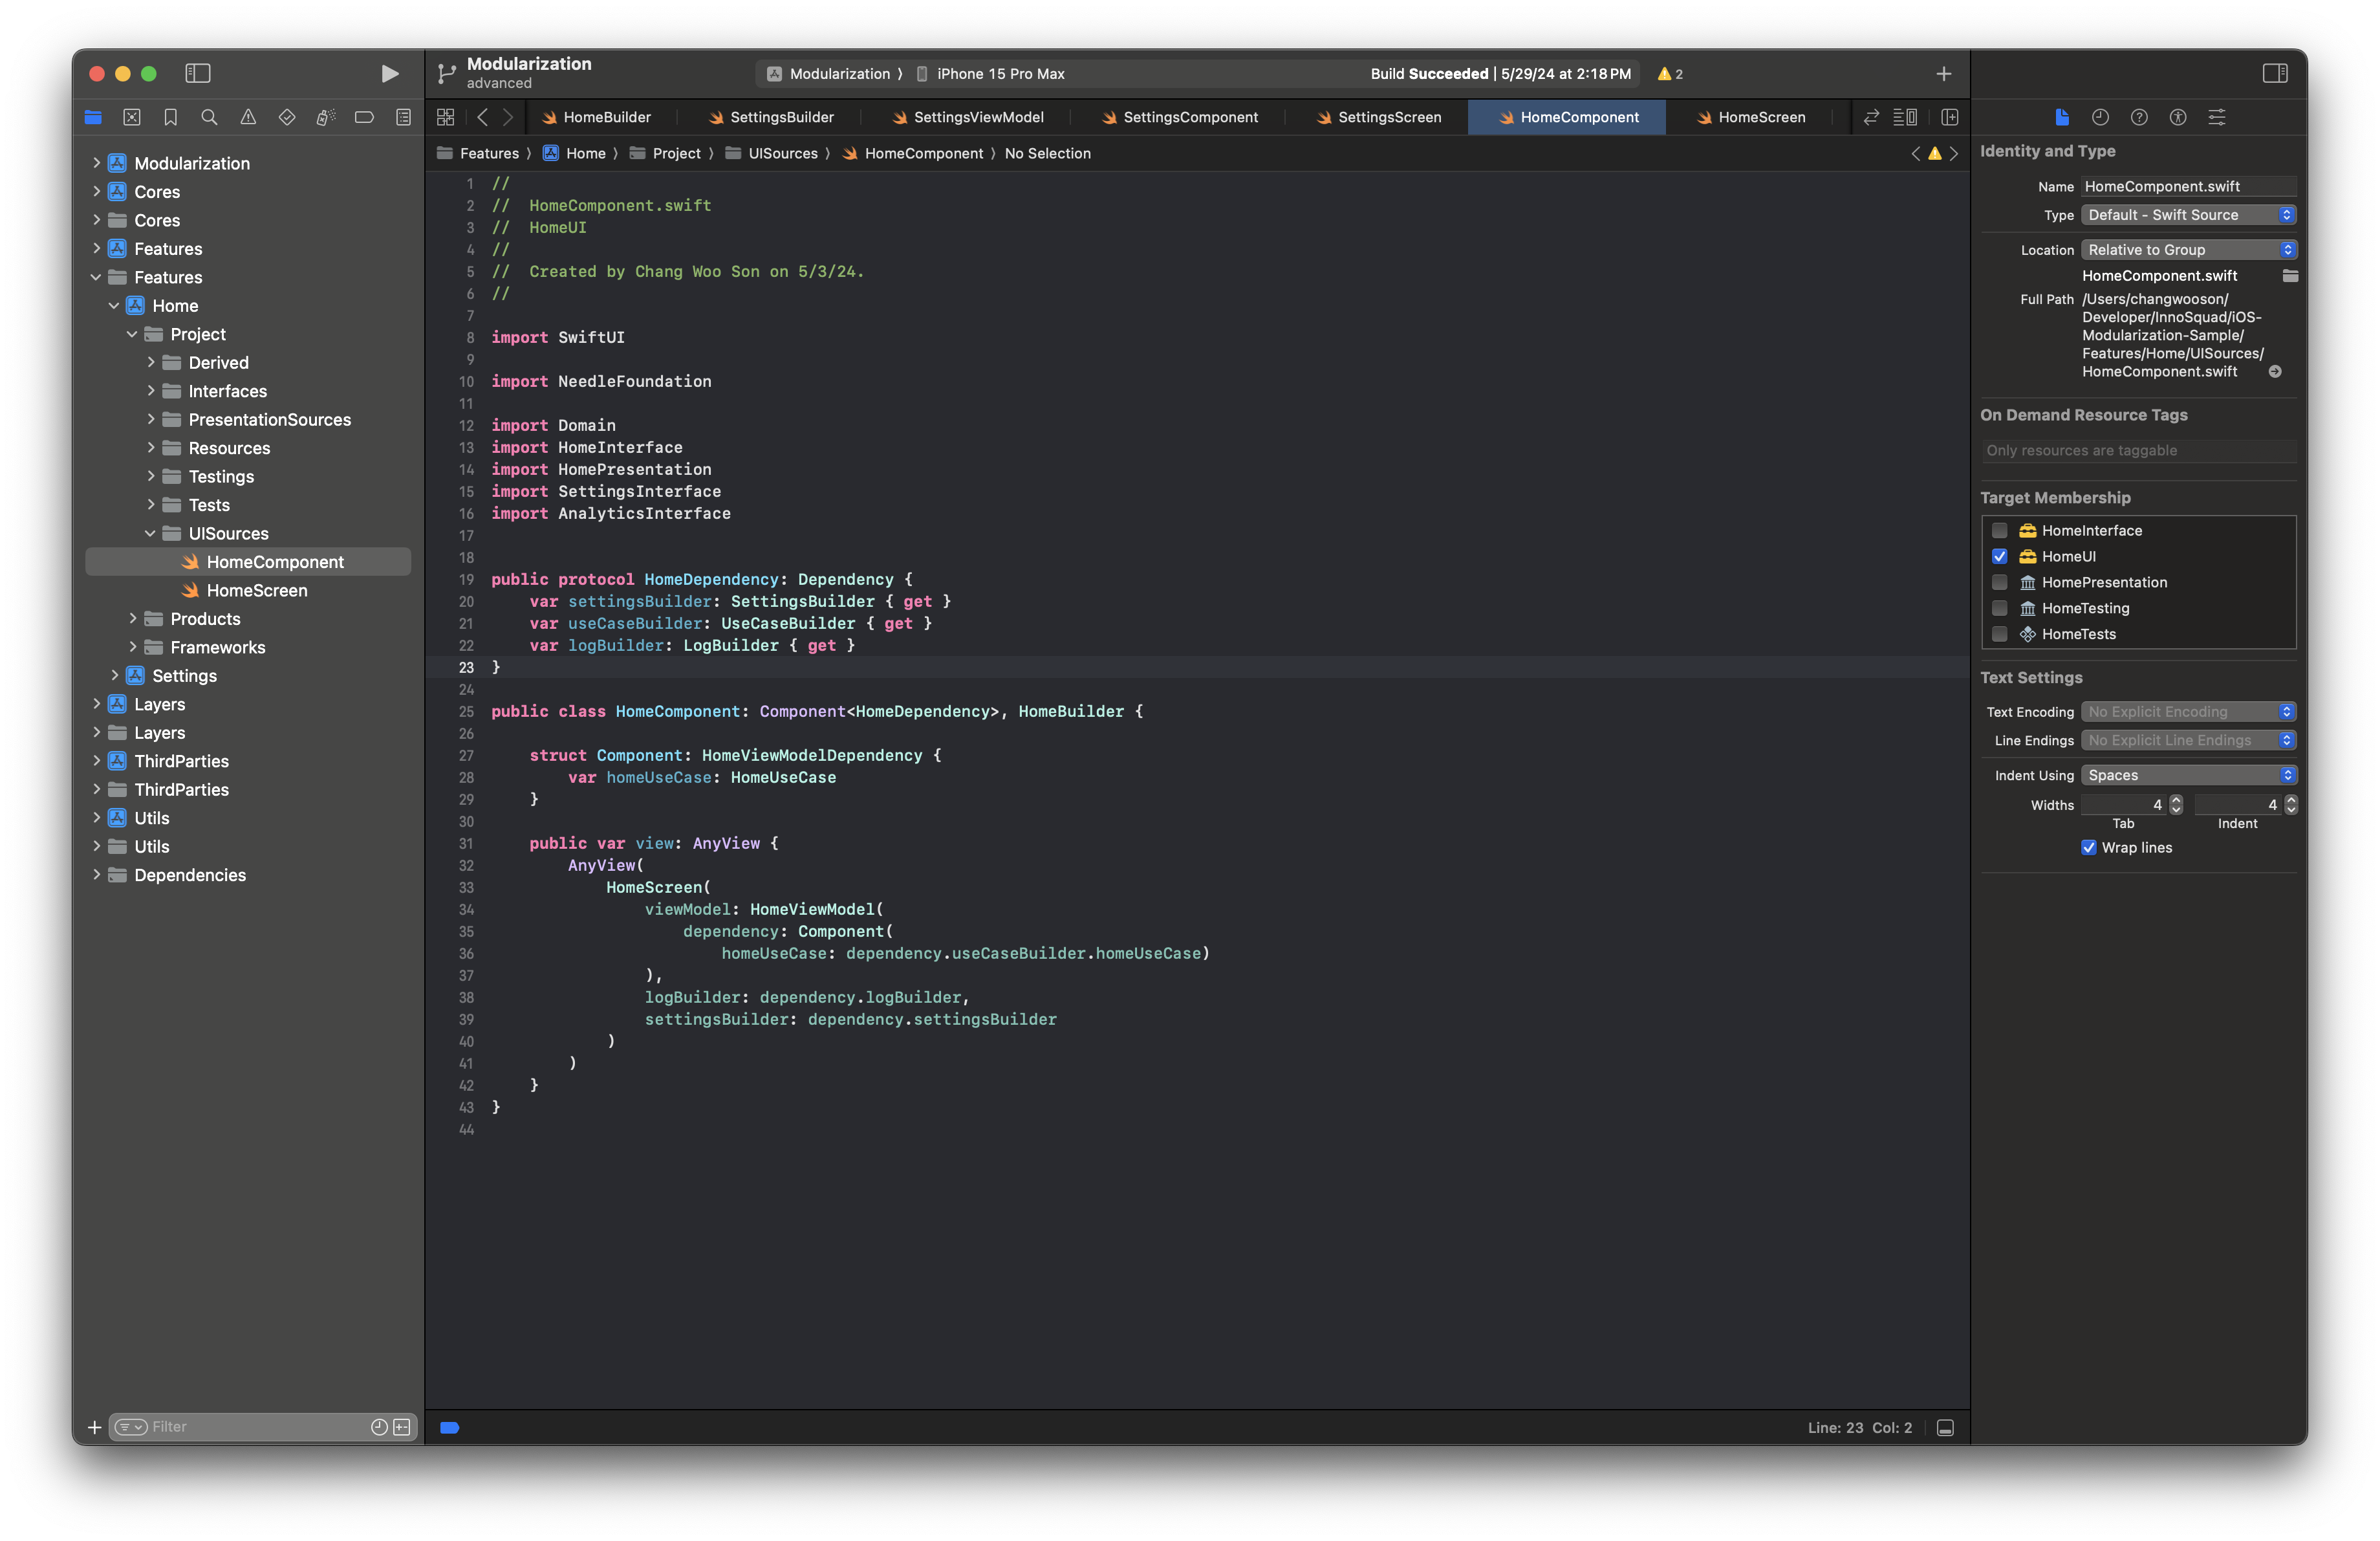
Define the protocol for creating the home screen in Interface.
Implement that interface in the UI module.
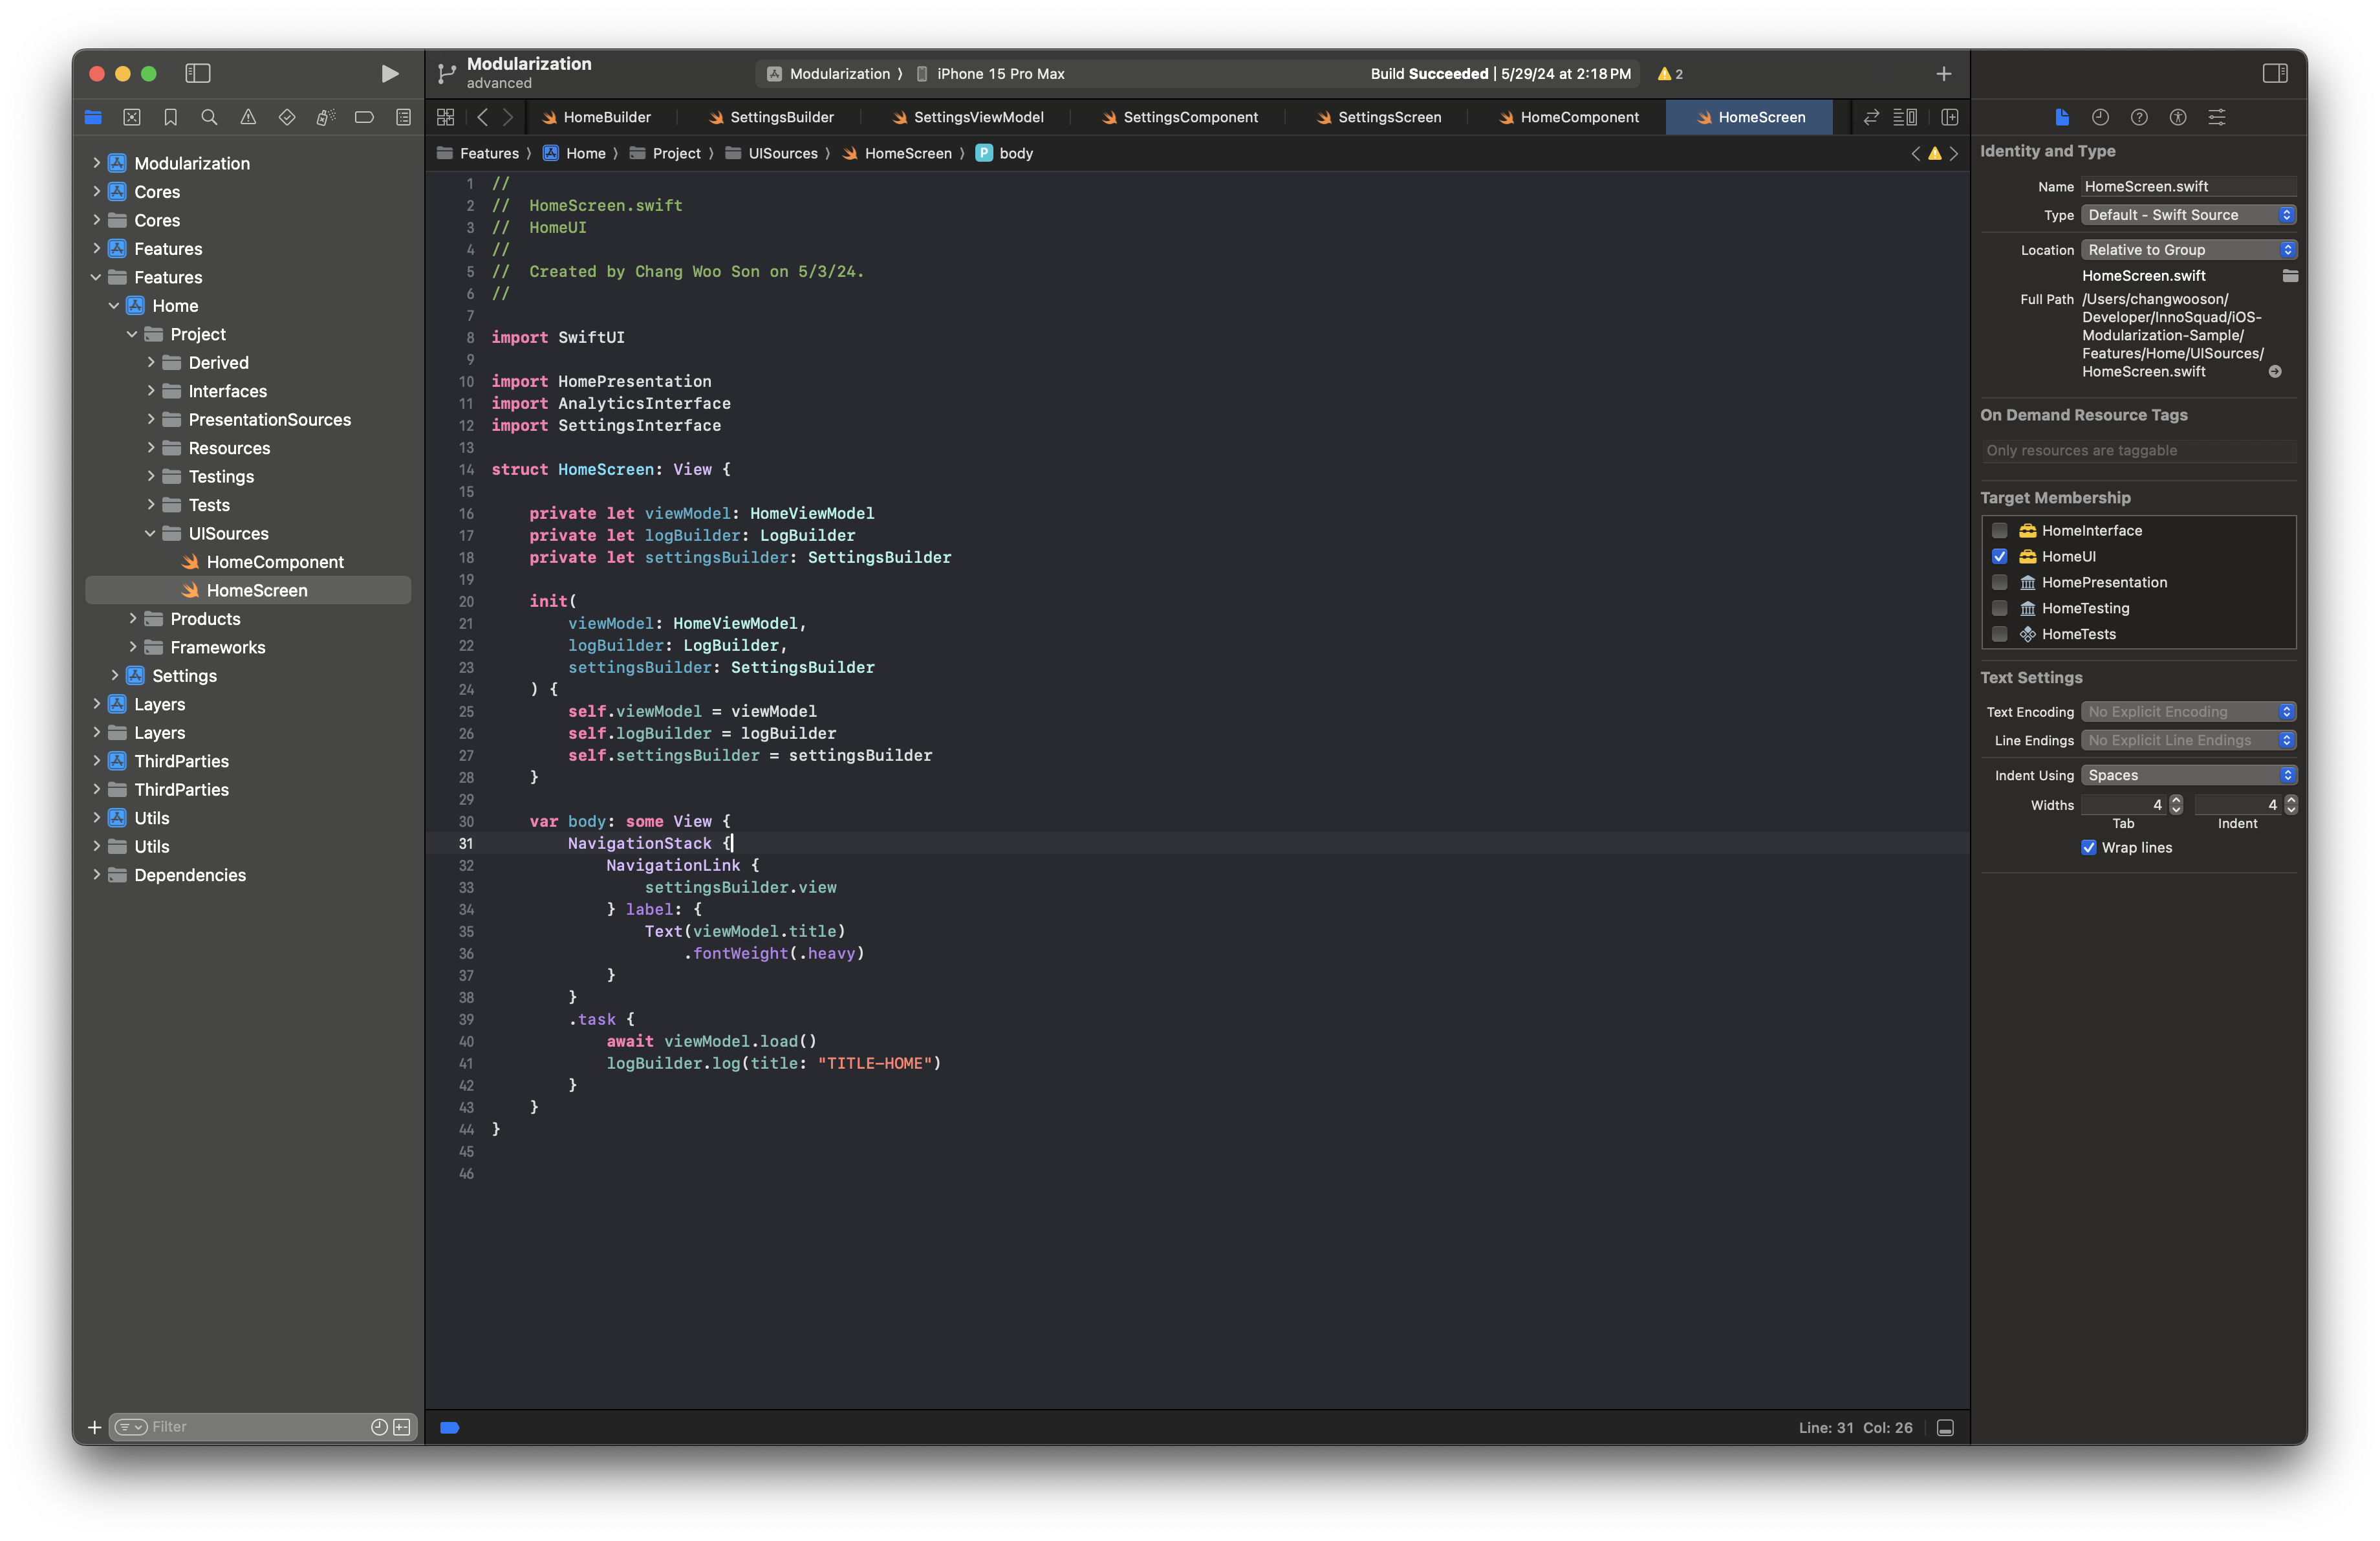
In each screen, Builder and ViewModel are injected to handle navigation.
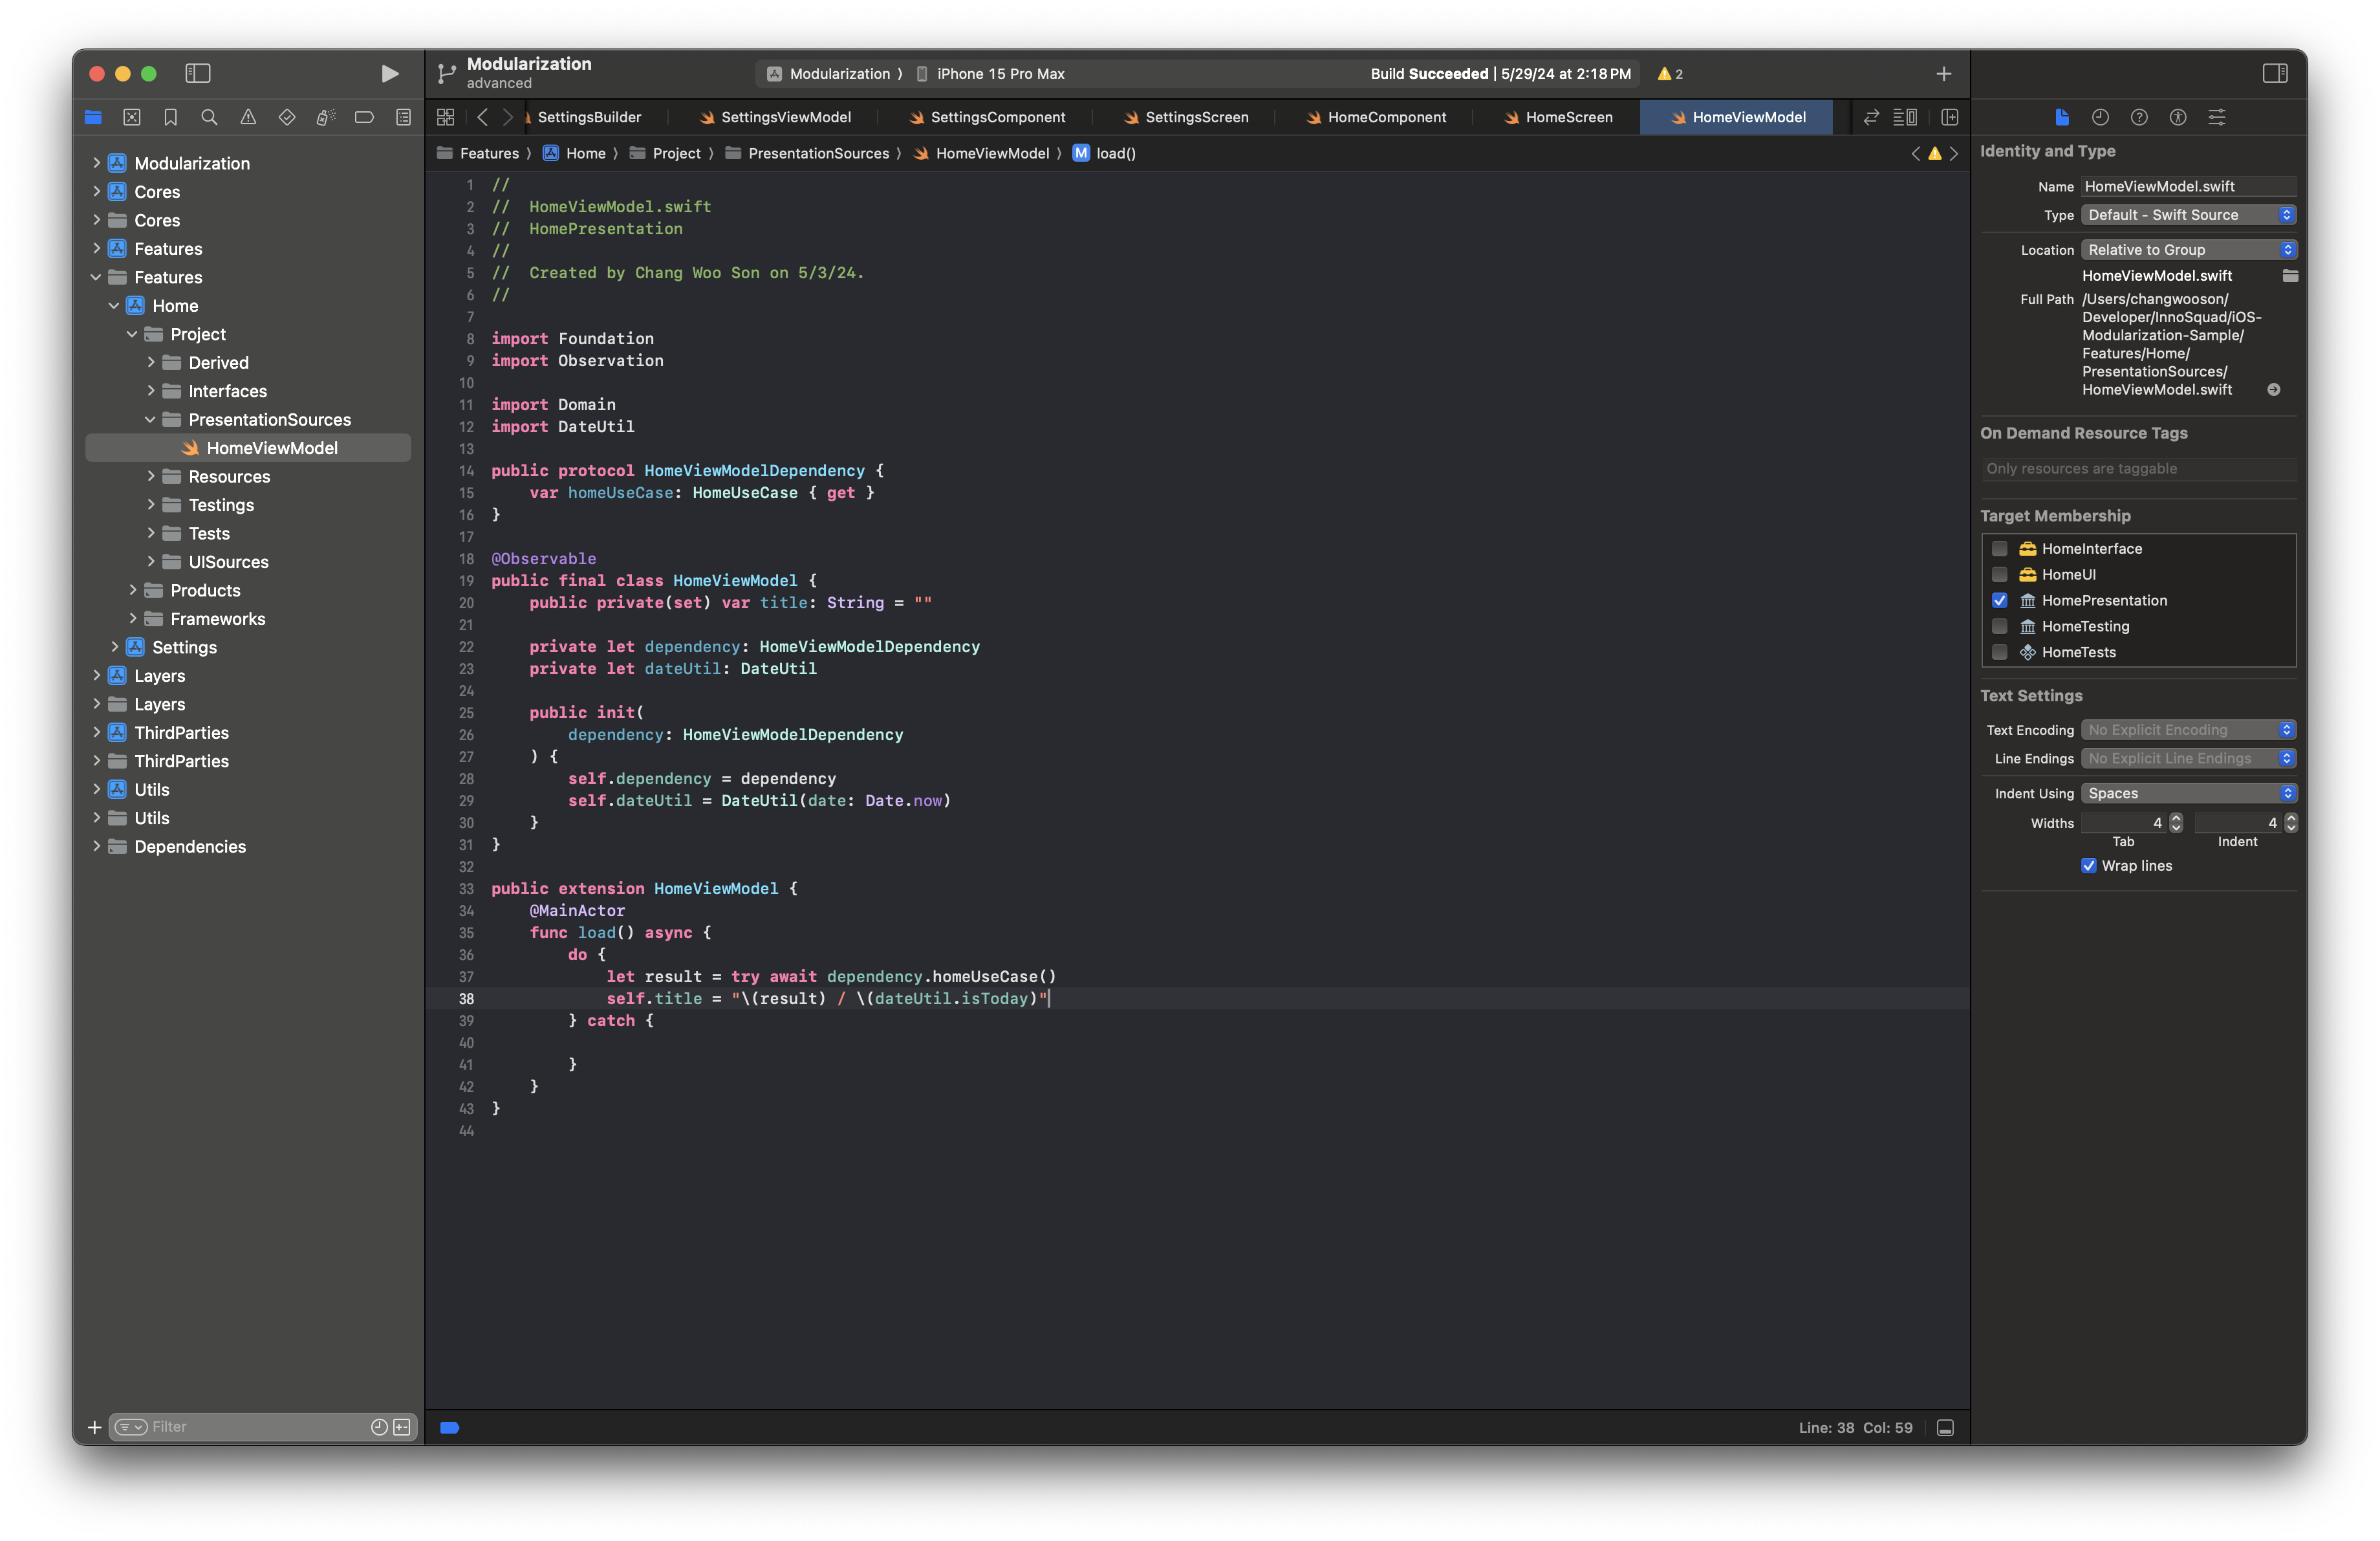
The ViewModel declares required UseCase dependencies and receives them via injection.
Conclusion
From Part 1 to Part 4, we covered a practical end-to-end approach to iOS modularization.
We walked through why modularization matters, how to structure modules, and how concepts like DIP, DI, and Clean Architecture fit together.
Next, our iOS team will dig deeper into Swift Concurrency.
We’ll continue with topics such as Actor and Sendable, focusing on practical usage in production code.
This concludes the modularization series, and we’ll return with the next topic soon.